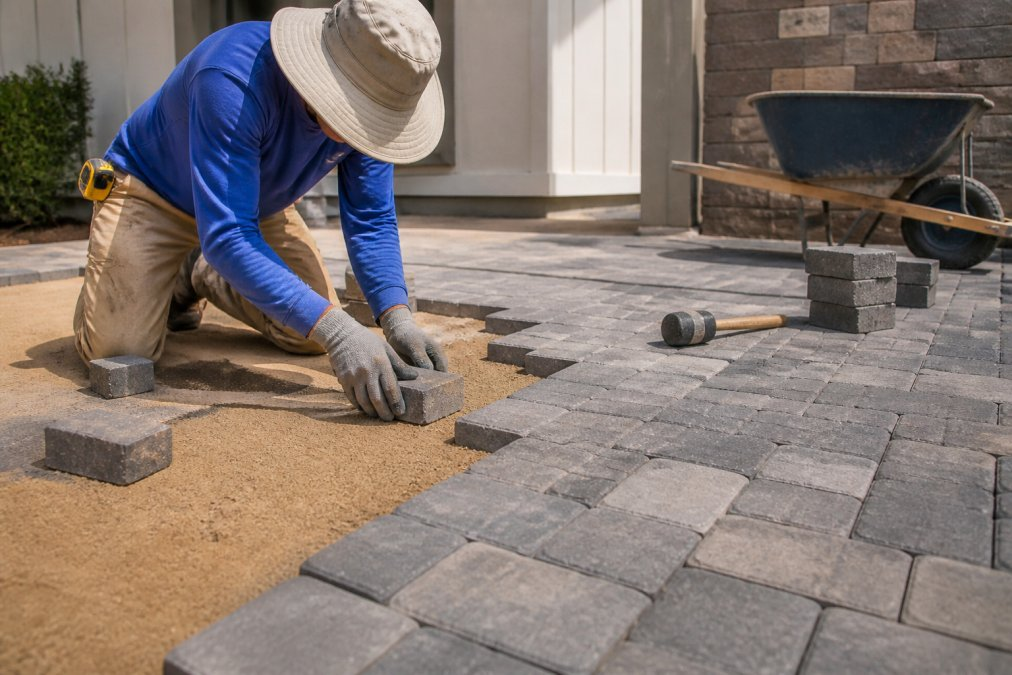
Professional paver installation transforms an outdoor space into a durable, beautiful asset that adds real value to your home. A properly installed paver patio, driveway, or walkway lasts 25 years or more, while a poorly prepared base, uneven compaction, or improper joint stabilization leads to settling, cracking, and costly repairs within just a few years.
At Kingdom Paver, we’ve seen what separates installations that hold up from those that fail: understanding the soil beneath the pavers, using the right equipment and techniques, and anticipating problems before they happen. The foundation work, what happens below the surface, determines everything that comes after.
A cracked or sunken patio becomes a tripping hazard, collects water, and signals poor maintenance to potential buyers. Conversely, a professionally installed paver surface becomes a selling point that demonstrates quality craftsmanship and adds tangible curb appeal.
Pro Tip The most common mistake homeowners make is rushing base preparation. Skipping proper compaction or geotextile fabric installation saves a few hours upfront but costs thousands in repairs later. Professional installers know that the work you can’t see determines whether pavers stay level for decades or start moving within months.
Paver Patio Base Preparation Standards That Ensure Longevity
The foundation of any paver installation is the base. A stable, well-draining base prevents settling, manages water movement, and distributes weight evenly across the entire surface.
Soil Analysis and Drainage Engineering
Before installation begins, professionals analyze soil composition and drainage characteristics. Different soil types, clay, sand, loam, or mixed, compact differently and drain at different rates. Clay soils hold water and shift seasonally; sandy soils drain quickly but may not compact firmly enough. Understanding what you’re working with allows proper preparation.
Professional contractor examining soil composition and site drainage on residential property before paver installation begins, with grading tools visible
Proper drainage engineering prevents water from pooling beneath pavers, which causes freeze-thaw damage and undermines structural stability. A professional assessment identifies low spots, evaluates existing drainage patterns, and determines whether additional measures like French drains or permeable paver systems are needed.
Sub-Base Compaction and Geotextile Fabric Installation
Preparing the sub-base involves excavating to proper depth, removing unsuitable material, and compacting in layers to a specific density, usually 95% Proctor density for residential applications. This requires compaction equipment and testing to verify standards are met.
Geotextile fabric is then installed over the compacted base, preventing fine soil particles from mixing with the gravel layer, which would compromise drainage and structural integrity. After the geotextile, a layer of compacted gravel (usually 4-6 inches) is added and compacted again, followed by a thin layer of bedding sand screeded level using precision tools. The entire process requires specific sequencing, proper equipment, and understanding of how each layer functions.
Watch Out Improper compaction is the #1 cause of paver failure. Pavers installed on an inadequately compacted base will start settling within 1-2 years. The cost to remove, re-compact, and reinstall is far higher than doing it correctly the first time.
Paver Patio Installation Timeline Expectations
Professional paver patio installation timeline depends on project size, site conditions, and weather. A typical residential patio (200-400 square feet) takes 3-5 days for a professional crew, including site preparation, excavation, sub-base installation and compaction, bedding sand leveling, paver placement, joint sand installation, and sealing. Larger projects or complex designs take longer; a driveway might span 1-2 weeks.
Base preparation alone typically takes 1-2 days even for a modest patio. Rushing this phase creates the settling and cracking problems that plague DIY installations. Weather affects the schedule, rain delays work because wet soil doesn’t compact properly, and sealing can’t be applied to wet pavers. Professional installers build in buffer time and adjust schedules based on forecasts. A quote promising completion in 2 days for a 400-square-foot patio should raise red flags.
Key Takeaway The difference between a quick install and a proper one is measured in days, not hours. Professional paver patio installation timeline expectations account for weather, material curing times, and the non-negotiable phases of base preparation. Faster isn’t better; it’s a warning sign.
Structural Integrity and Long-Term Durability
A professionally installed paver surface maintains structural integrity for decades because every component, from soil preparation to joint stabilization, is engineered to work together.
Load-Bearing Capacity and Foundation Settling Prevention
Pavers must handle weight: foot traffic, furniture, vehicles on driveways, and seasonal freeze-thaw cycles. A properly compacted sub-base with adequate thickness (typically 4-6 inches of compacted gravel for residential applications) spreads load across a wider area, preventing localized settling.
Foundation settling happens when the base isn’t properly compacted or when water undermines the base layer. Even small settlements create visible dips and tripping hazards. Professional installation prevents this by ensuring the base is compacted to specification, properly drained, and protected from water infiltration.
Joint Sand Stabilization and Edge Restraints
Joints between pavers must be stable. Traditional loose sand shifts over time, allowing pavers to move and creating gaps where weeds grow. Professional installers use polymeric sand or resin jointing systems that lock pavers in place while allowing minor expansion and contraction with temperature changes. Products like Alliance Gator Maxx G2 Intelligent Polymeric Sand harden when exposed to water, creating a stable bond.
Edge restraints, typically plastic or metal borders, prevent pavers at the perimeter from moving outward. Without them, the outer ring gradually migrates outward, destabilizing the entire surface. Professional installations always include proper edge restraints, properly secured and compacted into the base.
Cost of Professional Paver Installation and ROI
Professional paver installation costs more than DIY, but the return on investment justifies the expense. A professional installation lasts 25+ years with minimal maintenance; a poorly done DIY installation may need complete replacement within 5-10 years.
Property value gains are measurable. A well-designed, professionally installed patio or driveway adds curb appeal and outdoor living space, influencing buyer perception and property appraisal. Quality hardscaping improvements consistently deliver strong ROI, often recouping 50-75% of installation cost in property value increase, with remaining value coming from years of functional use.
The cost difference between professional and DIY work is smaller than many assume. DIY projects require equipment rental, material purchases, and often corrections for mistakes. A professional crew has equipment, expertise, and efficiency to complete work faster and to specification. For most homeowners, the cost difference is 15-25%, not the 50%+ gap many expect.
Best For Professional paver installation is the right choice for homeowners who plan to stay in their home for 10+ years, want minimal maintenance, or are installing high-visibility features like driveways or outdoor kitchens that directly impact property value.
Professional-Grade Equipment and Precision Cutting
Professional paver installation requires equipment most homeowners don’t own: plate compactors, vibratory screeds, wet saws, and specialized cutting tools. This equipment is expensive and renting it for DIY projects adds significant cost.
More importantly, the equipment enables precision work impossible by hand. A vibratory screed levels the bedding sand layer to within a fraction of an inch, critical for preventing uneven settling. A professional-grade wet saw makes clean, precise cuts without chipping paver edges.
Professional contractor operating precision stone cutting equipment with wet saw, demonstrating dust-controlled cutting technique on paver material with proper safety setup
Equipment like the Alpha Professional Tools ECC-125 Ecocutter delivers virtually dust-free cuts, protecting installer health and job site cleanliness. This precision and safety is standard in professional work but difficult to achieve with rental equipment. A professional crew with proper equipment completes work 2-3 times faster than a DIYer, reducing labor cost per square foot and minimizing disruption.
Design Versatility, Curb Appeal, and Property Value
Professional paver installation opens design possibilities that DIY work rarely achieves. A professional designer creates complex patterns, incorporates multiple paver types and colors, integrates drainage features invisibly, and designs spaces that flow naturally with the home’s architecture.
Aesthetic Consistency and Landscape Design
The aesthetic consistency of a professional installation reflects careful planning and execution. Every paver is level, joints are uniform, colors are balanced, and the overall composition enhances curb appeal. Landscape design integration is another professional advantage. A well-designed patio or driveway complements existing landscaping, defines outdoor spaces, and creates functional zones. Professional designers understand sight lines, traffic flow, and how hardscaping interacts with plantings and structures.
Permitting and Local Zoning Regulations
Many homeowners don’t realize paver installations may require permits, especially for driveways or structures like outdoor kitchens. Local zoning regulations specify setbacks, impervious surface limits, and drainage requirements. Professional installers understand local codes and ensure compliance, protecting homeowners from fines or required removal.
Permitting ensures work meets safety standards and is properly inspected. A permitted installation provides documentation valuable for insurance and future property sales. DIY installations that skip permitting often create expensive problems later.
Maintenance, Sealing, and Workmanship Warranty
Professional paver installations include maintenance guidance and often a workmanship warranty. A typical warranty covers settling, cracking, and joint failure for 1-2 years, giving homeowners peace of mind.
Regular maintenance extends paver life significantly. Professional sealers like StrongSeal Wetlook concentrated wet-look paver sealer protect against stains, freeze-thaw damage, and UV fading. Applied every 2-3 years, sealing keeps pavers vibrant and prevents water infiltration. Professionals recommend sealing frequency based on climate and paver type.
Professional-grade cleaners like SRW Products PW Paver Wash for surface preparation and maintenance remove efflorescence and prepare surfaces for resealing. Polymeric sand occasionally needs topping up in high-traffic areas, but properly installed systems require far less maintenance than loose sand joints.
A workmanship warranty is a commitment to quality, meaning the installer stands behind their work and will address problems from installation defects. This accountability is absent in DIY work.
The benefits of professional paver installation extend far beyond aesthetics. A properly designed and installed paver surface becomes a durable, low-maintenance asset that enhances property value, creates functional outdoor living space, and lasts for decades. Kingdom Paver brings 10 years of experience in hardscaping design and installation, delivering custom solutions tailored to your specific needs and local conditions. Whether you’re upgrading a driveway, building a patio for entertaining, or creating a custom outdoor kitchen, professional installation ensures your investment is protected and your vision is realized correctly the first time. Contact Kingdom Paver for a consultation and learn how professional paver installation can transform your outdoor space.
Frequently Asked Questions
How long does professional paver installation typically take?
Professional paver patio installation timeline expectations depend on project size and complexity. A standard 20×20 foot patio typically takes 3-5 days, including site preparation, base compaction, paver laying, and joint sand application. Larger projects, custom designs, or sites requiring significant drainage work may extend the timeline. Professionals plan the schedule upfront so you know when your outdoor living space will be ready for entertaining.
Why is paver patio base preparation standards so critical?
Proper base preparation prevents pavers from sinking, cracking, and shifting over time. Professional installers conduct soil analysis, ensure correct sub-base compaction, install geotextile fabric for drainage, and apply joint sand stabilization. These standards create a load-bearing foundation that resists freeze-thaw damage and settling. Skipping or rushing base preparation is the leading cause of early paver failure, professionals get it right the first time.
What is the cost of professional paver installation compared to DIY?
The cost of professional paver installation varies based on material choice, site size, and complexity. While DIY projects save labor costs upfront, professionals deliver precision base preparation, proper compaction, and workmanship warranty that prevent expensive repairs later. Professional installation typically costs more initially but protects your investment through durability and structural integrity. For specific pricing tailored to your project, contact Kingdom Paver for a free estimate.
Do professional paver installations add value to my home?
Yes. Professional paver installations enhance curb appeal and outdoor living space, increasing property value and ROI. A well-installed patio, driveway, or pool deck becomes a functional asset that buyers expect in master-planned communities. The combination of aesthetic consistency, durability, and professional craftsmanship justifies the investment and often recovers 50-80% of costs at resale.