
Table of Contents
- Why Regular Trench Drain Maintenance Matters
- What You’ll Need: Trench Drain Cleaning Tools
- Step-by-Step: How to Clean Your Trench Drain
- How Often to Clean Trench Drains
- How to Unclog a Trench Drain
- Trench Drain Maintenance Checklist
- Common Mistakes to Avoid
- When to Call a Professional
- Frequently Asked Questions
Last Updated: October 12, 2026
Why Regular Trench Drain Maintenance Matters
Trench drains redirect surface water away from patios, driveways, and foundations. Without regular maintenance, they clog with leaves, sediment, and debris, so water pools instead of flowing, creating slip hazards, accelerating paver deterioration, and risking foundation damage.
Standing water weakens the base layer beneath pavers, promotes algae growth, and makes surfaces slippery; over time, infiltration causes uneven settling and cracking.
The good news: learning how to clean and maintain trench drains prevents these problems entirely, keeping your drainage system working as designed and extending the life of your outdoor space by years.
What You’ll Need: Trench Drain Cleaning Tools
Before cleaning your trench drain, gather the right supplies and protective gear. Most tools are common household items, but safety equipment is not optional. Trench drains collect stormwater, sediment, lawn chemicals, pet waste, and sometimes sanitary or gray water, so treat the channel as a contaminated-work zone until cleaned.
Personal protective equipment (PPE):
- Nitrile or rubber gloves with a gauntlet cuff
- Safety glasses or sealed goggles, especially when scrubbing overhead or pressure washing
- Waterproof boots with slip-resistant soles
- N95 or P100 respirator when vacuuming dry sediment or working around mold and dried algae
- Long pants and long-sleeve shirt against scrapes and splash
- High-visibility vest if the drain sits in or near a driveway or parking area
Essential tools:
- Flashlight or hands-free headlamp
- Stiff-bristle brush or deck brush with a handle long enough to reach the channel floor without kneeling in water
- Plastic scoop, small shovel, or mud scoop for sediment
- Garden hose with adjustable spray nozzle
- Two buckets: one for debris, one for rinse water
- Grate-lifting tool or flat pry bar with a taped edge to protect the frame
- Traffic cones or a spotter if the drain is in a driveway or shared surface
Optional but helpful:
- Leaf blower for dry debris before it becomes wet and compacted
- Wet/dry shop vacuum rated for liquids if standing water is present
- Pressure washer with adjustable pressure, not a fixed high-pressure unit
- Drain auger or plumber’s snake for outlet-pipe clogs
Material-specific tool cautions:
- Concrete and polymer concrete channels: A stiff nylon brush is safe. Avoid metal wire brushes and scrapers, which scratch the surface and give algae and sediment places to grab.
- Plastic (HDPE, PVC, polypropylene) channels and grates: Avoid metal tools and high-pressure tips; plastic can flex, crack, or deform under heat and pressure.
- Cast iron and steel grates: A wire brush is acceptable for rust, but rinse and apply a light coat of compatible protective finish if the manufacturer recommends it.
- Stainless steel: Use a nylon brush and non-chloride cleaner; chloride cleaners and bleach can pit stainless steel over time.
Cleaning products depend on the drain material and debris type. Warm water and a stiff brush handle most routine cleaning; for algae, mold, or mineral film, use a mild biodegradable detergent or diluted oxygen-based cleaner.
Never mix cleaning chemicals. Combining bleach with an acid or with ammonia can release toxic gas in a confined channel. Rinse the channel with plain water between products.
Keeping these tools and your PPE in one labeled bin helps you clean on schedule.
Step-by-Step: How to Clean Your Trench Drain
Learning how to clean and maintain trench drains takes about 30 to 45 minutes for a typical residential installation. Follow these steps to keep the channel clear and functional.

Step 1: Remove and Inspect the Grate
Start by safely removing the drain grate or cover. Most residential grates sit in place without fasteners and lift straight up; if stuck, gently work a flat tool under the edges to loosen it. Set the grate aside and inspect the channel for standing water, visible debris, or unusual buildup, this tells you what cleaning approach you’ll need.
Safety tip: Wear work gloves and safety glasses; drain channels can harbor sharp edges or hidden debris.
Step 2: Clear Leaves, Sediment, and Debris
Remove large debris by hand or with a rake, pulling out anything you can reach easily. For debris deeper in the channel, use a small shovel or scoop, rake gently along the floor, and collect it in a bucket. If standing water is present, remove it with a shop vacuum first to access the channel bottom.
Pro tip: If debris is packed tight, spray it lightly with water first to loosen compacted sediment without creating a mess.
Step 3: Scrub the Grate and Channel Surfaces
Scrub both the grate and channel walls with a stiff-bristle brush and firm pressure.
For the grate:
- Scrub both sides thoroughly
- Pay attention to corners where algae builds up
- Rinse as you work
For the channel:
- Scrub the floor and side walls
- Use a handled brush to reach full depth
- Work in sections along the entire drain
This removes algae, mineral deposits, and fine sediment. A clean channel drains faster and looks better.
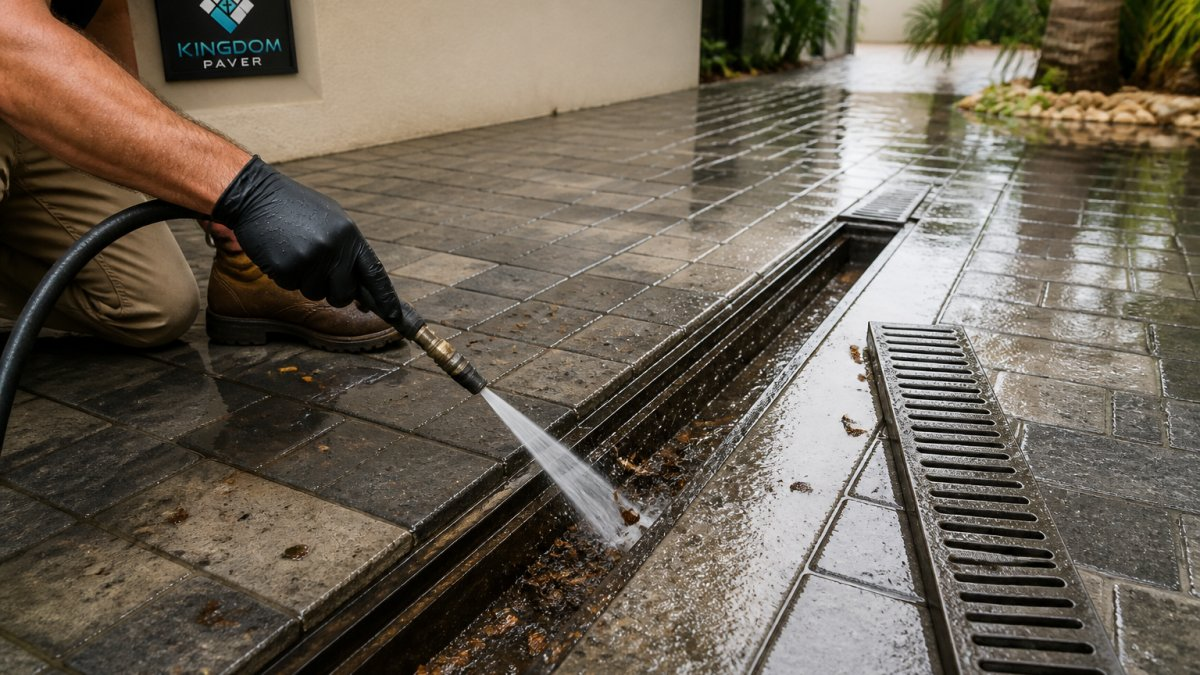
Step 4: Flush with Water and Rinse Thoroughly
Use your garden hose to flush the entire drain system, starting at one end and working toward the outlet.
Flushing steps:
- Set your hose to a medium spray
- Work along the full length of the channel
- Watch for water flow, which should move steadily toward the outlet
- If water backs up, you may have a deeper clog (see troubleshooting section)
Rinse the grate again before reinstalling it, then replace it so it sits flush with the surrounding surface; if uneven, check for debris trapped underneath.
How Often to Clean Trench Drains
The right cleaning frequency depends on how much debris your drain receives and how much flow it must carry. Use the schedule below as a starting point, then adjust based on your inspections.
Baseline schedule by setting and debris load:
| Setting | Debris load | Inspect | Clean |
|---|---|---|---|
| Covered patio, no overhanging trees | Low | Monthly | Quarterly |
| Residential driveway near deciduous trees | Moderate | Every 2 weeks in leaf season | Monthly in spring and fall; quarterly otherwise |
| Commercial entry, sidewalk, or plaza | Moderate to high | Weekly | Monthly |
| Parking lot, loading area, or food-service exterior | High | Weekly | Monthly, plus after every heavy storm |
| Landscaped courtyard with mulch, pine needles, or seed pods | High | Weekly | Every 2 to 4 weeks |
| Any drain downstream of a roof downspout or gutter | Variable | Monthly | Before and after each rainy season |
Seasonal adjustments:
- Spring: Remove winter grit, sand, and salt residue; de-icing material can corrode metal grates and stain concrete.
- Summer: Watch for algae and biofilm in warm, damp channels; a quick scrub during the monthly inspection prevents slick surfaces.
- Fall: Increase frequency to every 2 to 4 weeks where leaves fall; a single heavy leaf drop can block a residential channel in one storm.
- Winter: Clear the channel and grate before a freeze-thaw cycle; trapped water can freeze, expand, and crack concrete or polymer concrete.
Storm-triggered cleaning:
After any storm with visible runoff, walk the drain line and check the grate and outlet; storms move mulch, roof grit, and street debris into channels faster than routine accumulation.
Capacity-based rule of thumb:
If the channel is more than one-third full of sediment at any inspection, clean it.
Recordkeeping:
Note the date, debris type, and depth in a simple log or phone note.
Set two recurring reminders instead of one: a monthly two-minute visual check and a quarterly full cleaning. The visual check catches blockages early; the full cleaning keeps the system at design capacity.
Setting a phone reminder for your first cleaning and adjusting the interval after the first full year can help. Once you know your drain’s debris pattern, maintenance becomes predictable rather than reactive.
How to Unclog a Trench Drain
Sometimes standard cleaning isn’t enough. If water still pools after clearing visible debris, your drain may have a deeper clog.
Signs of a clog:
- Water pools in the channel or drains slowly
- Foul odors from the drain
- Visible sediment or buildup even after cleaning
Unclogging methods:
Method 1: Pressure washing. A pressure washer removes packed sediment and mineral deposits.
Method 2: Drain snake. A plumbing snake (drain auger) breaks up clogs in the outlet pipe.
Method 4: Professional jetting. If DIY methods fail, hire a professional with a drain jetting system to clear stubborn clogs safely.
When to call a professional: If the drain remains clogged, the outlet pipe may be damaged or the clog may be beyond the drain channel itself.
Trench Drain Maintenance Checklist
Use this checklist to stay organized and miss nothing during your cleaning routine.
| Task | Frequency | Notes |
|---|---|---|
| Visual inspection | Monthly | Check for debris and standing water |
| Remove large debris | Quarterly | Clear leaves, twigs, sediment |
| Scrub grate and channel | Quarterly | Use stiff brush; remove algae and deposits |
| Flush with water | Quarterly | Ensure water flows freely to outlet |
| Deep clean with pressure washer | Annually | Spring or fall recommended |
| Inspect outlet and pipes | Annually | Check for damage or blockages |
| Test drainage after rain | As needed | Verify system works after storms |
Print this checklist and post it near your drain, checking off tasks as you go; it creates a maintenance record and helps you spot clogging patterns.
Common Mistakes to Avoid
Even experienced homeowners make mistakes maintaining trench drains. Learning from these errors saves time and prevents damage.
Mistake 1: Using harsh chemicals. Strong acidic or alkaline cleaners damage paver sealants and disrupt soil chemistry around your landscaping.
Mistake 2: Ignoring standing water. Don’t assume it will drain on its own; it won’t. Address pooling immediately to prevent foundation damage and paver deterioration.
Mistake 4: Cleaning only the visible channel. Debris accumulates in the outlet pipe too.
Mistake 5: Waiting too long between cleanings. Debris compacts over time and becomes harder to remove, so keep up quarterly maintenance.
Mistake 6: Skipping the inspection step. Many homeowners clean without checking what’s actually clogging the drain.
When to Call a Professional
You can handle most routine trench drain maintenance yourself, but some situations require professional expertise.
Call a professional if:
- Water remains pooled after cleaning
- You notice cracks in the channel or surrounding pavers
- The drain outlet is damaged or blocked
- The drain has never been professionally cleaned (deep sediment may be compacted)
- You’re uncomfortable working at height or in tight spaces
- Pressure washing or drain snaking hasn’t resolved the clog
Kingdom Paver can assess your drainage system and recommend the right solution, from routine maintenance to complex repairs. Our 10 years of experience means we spot problems early and fix them right.
Trench drain maintenance keeps your outdoor space functional and beautiful. A few hours of work each year prevents thousands in repairs. Start with a simple quarterly cleaning routine, and your drainage system will perform reliably for decades. If you need professional help or want to discuss your specific drainage setup, Kingdom Paver’s team is ready to assist.
Frequently Asked Questions
How often should you clean a trench drain?
Cleaning frequency depends on your environment and debris load. High-debris areas like those surrounded by trees need cleaning every 1-2 months, especially in fall and spring. Standard residential areas benefit from quarterly cleaning. Winter preparation requires an extra cleaning before cold weather to prevent ice formation and blockages. Inspect monthly to catch buildup early.
What tools do you need to clean a trench drain?
Essential tools include a stiff-bristle brush for scrubbing the channel and grate, a rake or shovel to remove leaves and sediment, a shop vacuum to collect debris, and a garden hose for rinsing and flushing. For stubborn buildup, consider pressure washing equipment. Wear work gloves and safety glasses as personal protective equipment.
What should I do if my trench drain keeps getting clogged?
Recurring clogs indicate a deeper issue. First, increase your cleaning frequency and inspect the outlet to ensure water flows freely. Check for sediment accumulation in the channel that regular sweeping misses. Keep the surrounding area clear of leaves and debris. If problems persist despite regular maintenance, standing water may indicate improper slope or a blockage deeper in the drainage system. Professional inspection can identify deeper issues.
Is it safe to use dish soap or chemical cleaners in a trench drain?
Dish soap and mild detergents are generally safe for routine cleaning but should be used sparingly and rinsed thoroughly to avoid buildup. Avoid harsh chemical cleaners unless the drain is designed for them, as some materials can be damaged. Always check your drain’s material specifications before applying any cleaner. For most residential trench drains, water, a stiff brush, and mechanical removal of debris are sufficient. If you’re unsure about cleaner compatibility, consult a professional before application.


