
Table of Contents
- Why Documentation Matters for Paver Installation Defects
- What Counts as a Paver Installation Defect
- How to Photograph Construction Defects Step by Step
- Using a Paver Inspection Checklist to Preserve Evidence
- Organizing Records for a Paver Installation Warranty Claim
- Writing a Paver Contractor Complaint Letter
- Next Steps After Documentation
- Frequently Asked Questions
Last Updated: October 12, 2026
Why Documentation Matters for Paver Installation Defects
When pavers fail, the evidence disappears fast. A contractor might rush repairs before you’ve had time to document what went wrong. Water damage spreads. Cracks worsen.
That’s why you must document paver installation defects from day one, it changes everything. Clear evidence makes the difference between a successful claim and a dead end.
This guide walks you through exactly how to document paver installation defects so your claim holds up.
What Counts as a Paver Installation Defect
A paver installation defect is workmanship or material failure that violates the contract, industry standards, or manufacturer specifications. Not every paver problem is a defect, some issues are normal wear, maintenance problems, or design limitations. The difference matters when you’re building a claim.
Common Installation Problems
Real defects include:
- Uneven surfaces, pavers that are significantly higher or lower than adjacent pavers, creating trip hazards or standing water
- Poor joint work, joints that are too wide, missing sand, cracked, or unevenly filled, allowing water infiltration
- Sunken or settling pavers, sections that sink below the original grade due to inadequate base preparation or compaction
- Cracked pavers, breaks in individual pavers caused by improper installation, poor base, or material defects
- Water pooling, areas where water collects instead of draining, caused by incorrect slope or grading
- Loose pavers, pavers that shift or rock when walked on, indicating poor base or sand installation
- Lippage, excessive height differences between pavers that should be flush
- Efflorescence or staining, persistent discoloration from improper sealing, poor drainage, or material issues
- Mortar failure, crumbling joints or missing mortar in mortared installations
Defects vs. Normal Wear
Not every problem is the contractor’s fault. Understanding the difference protects you from frivolous claims and strengthens legitimate ones.
Normal wear and maintenance:
- Minor surface wear from foot traffic after years of use
- Weeds or moss growth in joints (maintenance issue)
- Fading or color change from sun exposure
- Routine joint sand loss in high-traffic areas
- Minor settling after the first season (within industry tolerance)
Contractor defects:
- Defects visible within the first year of installation
- Problems that violate the written contract terms
- Workmanship that fails to meet industry standards (like ICPI guidelines for paver installation)
- Material failures covered by warranty
- Installation errors that cause water damage, safety hazards, or structural failure
The key: defects typically appear early and violate what was promised or what industry standards require. Normal wear develops slowly and is the homeowner’s responsibility to maintain.
How to Photograph Construction Defects Step by Step
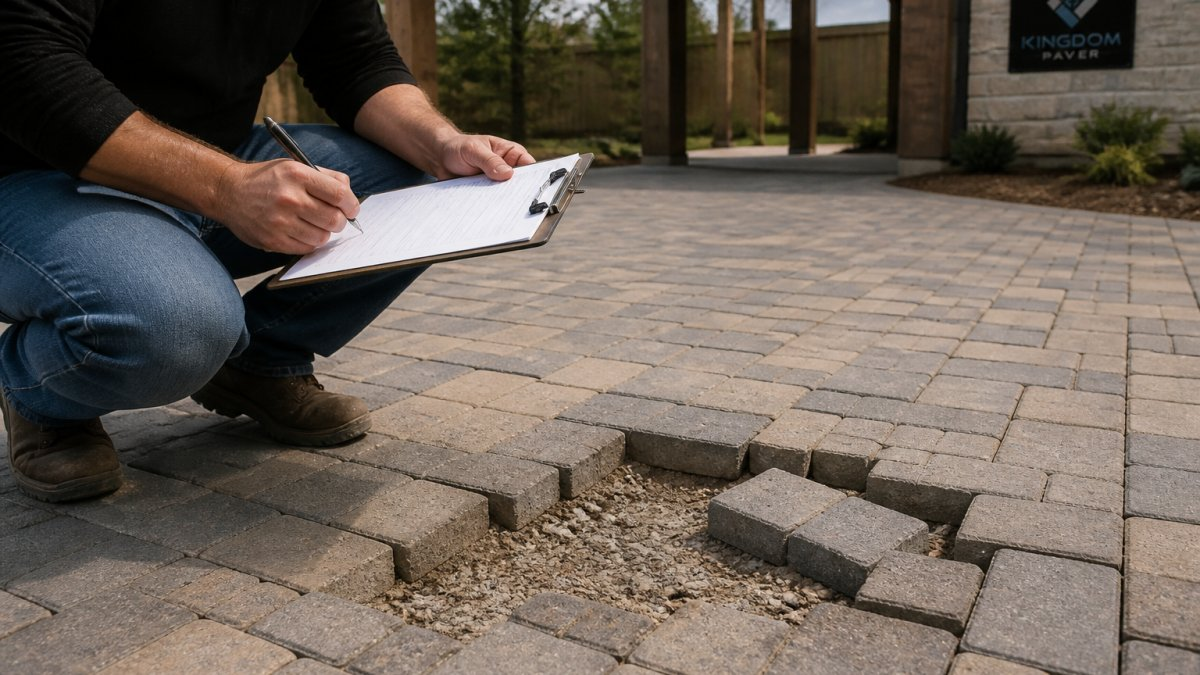
Photos are your strongest evidence. A clear, well-documented photo can prove a defect better than any written description. The goal is to capture what’s wrong in a way that’s impossible to deny or downplay.
Photo Capture Checklist
Follow this checklist every time you photograph a defect:
- Take photos in natural daylight (morning or afternoon, avoid harsh midday sun)
- Photograph the defect from multiple angles (straight-on, 45-degree angle, wide shot showing context)
- Include a ruler, coin, or measuring tape in the frame to show scale
- Capture the defect close-up and zoomed out to show its location in the larger area
- Take photos of adjacent pavers to show the contrast (good vs. defective)
- Photograph the entire affected section, not just the worst spot
- Include timestamps in photo metadata (most smartphones do this automatically)
- Take at least 10-15 photos per defect from different angles and distances
- Photograph water pooling or drainage issues after rain or with water applied

Documenting Measurements and Angles
Numbers matter in claims. A defect that measures half an inch plays differently than one that measures two inches. Precise measurements prove you’re serious and give your claim credibility.
Use a ruler or measuring tape visible in your photos. Measure:
- Lippage, the height difference between adjacent pavers (measure from the highest point of one paver to the highest point of the next)
- Settlement depth, how far a sunken paver sits below its neighbors
- Joint width, the gap between pavers (standard is typically 1/8 to 3/8 inch)
- Crack length and width, measure cracks in pavers from end to end and across the widest point
- Water pooling depth, how deep water sits in problem areas
Write these numbers down immediately. Don’t rely on memory. Create a simple log with the date, location, defect type, and measurements. This becomes part of your claim file.
Using a Paver Inspection Checklist to Preserve Evidence
A paver inspection checklist keeps you organized and ensures you don’t miss anything. It also proves you were thorough, which strengthens your credibility when filing a claim.
What to Inspect and Record
Walk the entire paver area systematically. Don’t skip sections. Use this checklist:
- Surface level, Are all pavers level? Mark any that are high or low.
- Joints, Are joints filled, consistent width, and intact? Note gaps, missing sand, or cracks.
- Cracks, Are there cracks in any pavers? Document location, length, and width.
- Drainage, Does water drain properly or pool in certain areas? Test by pouring water or observing after rain.
- Settling, Have any sections sunk? Compare to the original grade if possible.
- Movement, Do any pavers rock or shift when you step on them?
- Sealing, Is the sealer intact or peeling? Are there stains or discoloration?
- Edges, Are edge pavers stable or loose? Are borders intact?
Record everything on a map or diagram. Draw the paved area and mark problem spots with numbers or letters that correspond to your detailed notes.
Creating Your Defect Log
A defect log is a simple document that organizes all your findings. Create one using a spreadsheet or document template.
Your defect log should include:
| Defect # | Location | Type | Date Discovered | Measurements | Photos | Notes |
|---|---|---|---|---|---|---|
| 1 | East driveway, 8 ft from garage | Uneven surface | Sept 15, 2026 | 1.25″ lippage | P001-P015 | Tripping hazard |
| 2 | Patio center, 12 ft from house | Water pooling | Sept 15, 2026 | 2″ depth | P016-P025 | Pools after rain |
| 3 | West edge, full length | Poor joints | Sept 15, 2026 | 1/2″ gaps | P026-P035 | Sand missing |
This log becomes your master record. It shows you were organized, systematic, and thorough. Claims officers take organized documentation seriously.
Organizing Records for a Paver Installation Warranty Claim
Before you file any claim, gather and organize every document related to the installation. A complete file is harder to dismiss than scattered papers.
Essential Documents to Keep
Collect and organize these records:
- Original contract, the signed agreement between you and the contractor
- Estimates and quotes, all bids you received, including the one you accepted
- Invoices and payment records, proof of what you paid and when
- Permits and inspections, any building permits, inspection reports, or certificates of completion
- Warranty documents, written warranty terms from the contractor or manufacturer
- Communications, emails, texts, letters, or notes from conversations with the contractor
- Photographs, organized by date and defect type
- Inspection reports, your defect log and any independent inspector’s report
- Receipts for repairs, if you had to pay for temporary fixes or repairs
- Proof of damage, photos or receipts showing water damage, property damage, or other consequences
Keep originals in a safe place. Make copies for your claim file.
Creating a Claim-Ready File
Organize your documents in a single folder (physical or digital) in this order:
- Cover page with your name, address, phone, and claim date
- Summary page listing all documents included
- Original contract and warranty
- Timeline of events (dates of installation, when defects appeared, when you reported them)
- All communications with the contractor (organized by date)
- Photographs (organized by defect type or date)
- Inspection reports and defect log
- Estimates for repairs
- Payment records
- Any other supporting documents
This organized file makes your claim easier to process and harder to deny. Insurance companies and legal representatives expect this level of documentation.
Writing a Paver Contractor Complaint Letter
A formal complaint letter is your official record that you reported the defects. It creates a paper trail and often triggers the contractor’s obligation to respond within a specific timeframe.
What to Include in Your Letter
Your complaint letter should be professional, specific, and factual. Include:
- Date, when you’re writing the letter
- Contractor name and address, be precise
- Your name and address, your contact information
- Installation date, when the work was completed
- Specific defects, list each defect with location and description
- Measurements, include specific measurements or photos referenced
- Timeline, when you first noticed each defect
- Contract reference, cite the specific contract terms the contractor violated
- Request for action, what you want (repair, replacement, refund)
- Deadline, give a reasonable timeframe (typically 14-30 days)
Keep the tone professional and unemotional. Stick to facts. Don’t make accusations or threats, just state what happened and what you expect.
Delivery and Follow-Up
Send your complaint letter via certified mail with return receipt requested. This proves delivery and creates a legal record. Keep a copy for your file.
If the contractor doesn’t respond within your deadline, send a follow-up letter (also certified) stating that you’re proceeding with other remedies. Document everything.
Next Steps After Documentation
Once you’ve documented the defects, you have options. The path you take depends on the severity, the contractor’s response, and what you want to achieve.
Getting an Independent Inspection
An independent paver inspector or engineer can validate your findings and strengthen your claim. This is especially important if the contractor disputes your assessment.
An independent inspector will:
- Examine the installation against industry standards
- Measure defects with professional equipment
- Provide a written report with findings and recommendations
- Estimate repair costs
- Testify if your claim goes to court
This costs money (typically $300-$1,000 depending on the area), but it’s worth it for significant defects. The inspector’s report carries weight in disputes and claims.
Filing a Claim or Dispute
Once you have solid documentation, you can pursue a claim through:
- Contractor’s warranty, submit your documented defects to the contractor’s warranty program
- Payment dispute, if you paid by credit card, you can file a chargeback for defective work
- Insurance claim, if the defects caused property damage, file with your homeowner’s insurance
- Small claims court, for smaller amounts, you can sue without an attorney
- Legal action, hire an attorney for significant defects or damage
Your documentation file makes every path stronger. Claims officers, judges, and attorneys take organized evidence seriously.
When paver defects appear, the homeowner who wins is the one who documented early and thoroughly. You’ve now got the roadmap to do exactly that.
If you’re considering paver installation or need guidance on protecting your investment, we’re here to help. Reach out to discuss your outdoor space and how we can build it right the first time.
Frequently Asked Questions
What evidence should I collect for a paver installation defect claim?
Collect dated photographs from multiple angles, written measurements of gaps or uneven surfaces, your original contract and invoice, payment records, written communication with the contractor, and inspection notes. Keep all documents in one organized file with dates clearly marked. This evidence proves when the defect occurred and what was promised versus delivered. Store digital copies separately from physical originals to prevent loss.
How do I photograph construction defects properly?
Use natural daylight and photograph from multiple angles: straight-on, at 45 degrees, and from above. Include a ruler or measuring device in the frame to show scale. Capture wide shots showing the overall area and close-ups of the specific problem. Photograph the same area on different dates if possible to show whether the defect worsens. Label each photo with the date, time, and location before storing.
What should I include in a complaint letter to my paver contractor?
State the specific defect with dates and locations, reference the original contract and warranty terms, describe what you expected versus what was delivered, request a specific remedy (repair or refund), and include a deadline for response. Attach photographs and measurements as evidence. Send via email or certified mail so you have proof of delivery. Keep a copy for your records and follow up in writing if the contractor doesn’t respond.
Should I get an independent inspection before filing a paver warranty claim?
Yes, an independent inspection strengthens your claim significantly. A licensed inspector or engineer documents the defect objectively, measures deviations from installation standards, and provides a written report that contractors and insurers take seriously. This third-party evidence is harder to dispute than your own photographs alone. Obtain the inspection report before submitting your claim to maximize your chances of approval.


