
Table of Contents
- What to Expect When Getting a Patio Installation Quote
- Average Cost of Paver Patio Installation
- Key Questions to Ask Patio Contractors
- How Long Does Patio Installation Take
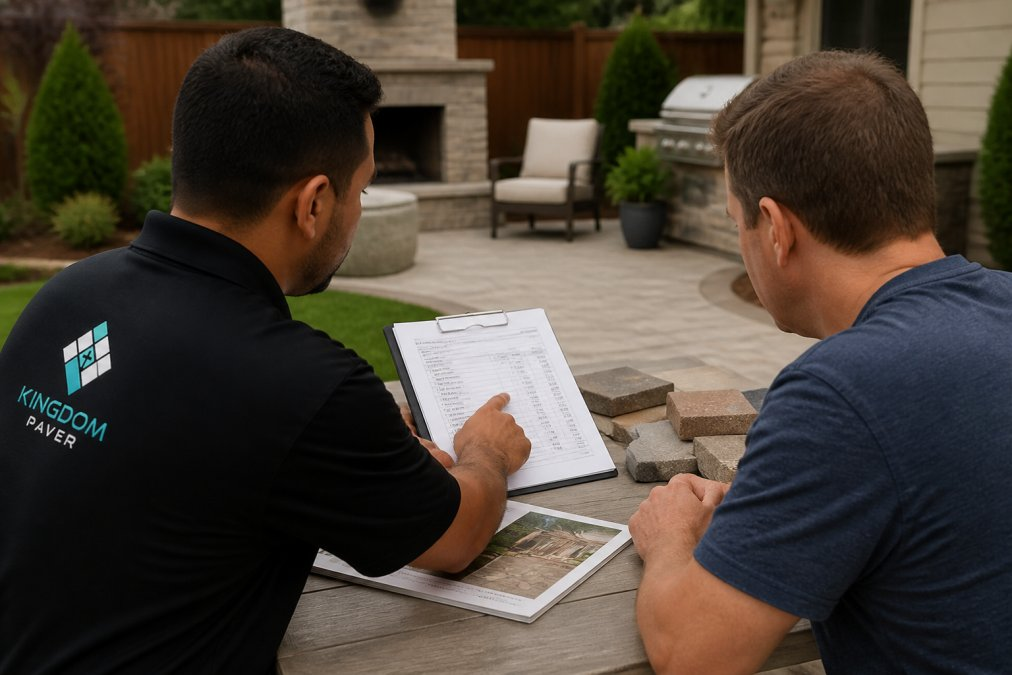
- Using a Patio Installation Estimate Template
- Comparing Multiple Patio Quotes
- Common Hidden Costs in Patio Projects
- Conclusion
Last Updated: August 27, 2026
What to Expect When Getting a Patio Installation Quote
When you reach out to a patio contractor, the quote process sets the tone for your entire project. A professional patio installation quote should include far more than just a price. The contractor needs to assess your site conditions, understand your vision, and account for variables that dramatically affect cost.
The initial consultation typically involves a site visit where the contractor measures the area, evaluates drainage patterns, checks soil composition, and identifies obstacles like utilities or tree roots. They should ask detailed questions about your intended use, preferred materials, timeline, and budget. A thorough contractor documents existing conditions with photos, which protects both parties and ensures the quote reflects reality.
Site conditions matter significantly. A sloped yard requires different preparation than a level one. Poor drainage means additional base layer work. These aren’t optional upgrades, they’re foundational to a patio that won’t crack or sink within a few years. Kingdom Paver factors these realities into the estimate rather than discovering problems mid-project.
Request that your contractor provide a written site assessment along with the quote. This document should note soil conditions, drainage concerns, existing structures, and any obstacles. It’s your insurance policy against misunderstandings later.
Average Cost of Paver Patio Installation
Patio installation costs vary significantly based on materials, square footage, and site complexity. Labor costs typically represent 40-60% of the total project cost, depending on site conditions and paver pattern complexity (peer-reviewed research). Material costs account for the remainder, driven by paver type and base materials required.
Square footage is the primary cost driver. Smaller patios under 200 square feet have higher per-square-foot costs because contractors must mobilize equipment and crews regardless of project size. Larger patios benefit from economies of scale.
Material selection dramatically affects your final price. Concrete pavers cost less than natural stone or permeable pavers. Decorative patterns and custom designs add labor time. Complex herringbone or circular patterns cost more than simple grid layouts.
Site preparation and excavation costs depend on existing conditions. Good drainage and minimal grading needs mean straightforward, lower-cost preparation. Significant slopes, old concrete removal, or poor drainage increase excavation and sub-base preparation costs substantially. This is one of the most common hidden costs homeowners encounter.
When comparing patio installation quotes, calculate the per-square-foot cost to make fair comparisons. A quote that seems cheap per square foot often reflects inadequate site preparation or lower-quality materials.
Key Questions to Ask Patio Contractors
The questions you ask during the quote process reveal whether a contractor understands proper installation or is simply trying to land the job quickly.
Ask about their approach to site preparation and drainage. A contractor who mentions sub-base preparation, compaction, and drainage solutions is thinking long-term. Specifically ask: "What’s your process for ensuring proper drainage?" and "How do you prepare the base for long-term stability?"

Request details about recommended materials. Ask for the specific paver type, thickness, and manufacturer. Ask about base materials, gravel depth, sand type, and compaction standards. A contractor who answers these questions specifically is demonstrating expertise. Vague answers are red flags.
Ask about warranty and guarantee. What happens if pavers crack or settle within the first year? A contractor unwilling to offer any guarantee should concern you.
Inquire about timeline and project management. How long will the project take? Will they work around your schedule? What’s their plan if weather delays the work?
Ask whether they handle the entire project in-house or subcontract portions. If they subcontract, ask which portions and whether they supervise subcontractors directly.
Request references from recent projects similar in scope to yours. Call those references and ask about professionalism, timeline adherence, and how well the patio has held up.
How Long Does Patio Installation Take
Project timeline depends on size, complexity, and site conditions. A typical residential patio installation takes 5-10 days for a 300-400 square foot project, assuming good weather and straightforward site conditions (the CDC). This includes excavation, base preparation, paver installation, joint sand application, and sealing if requested.
Larger patios naturally take longer. A 600-square-foot patio might require 2-3 weeks. Custom designs with complex patterns add time because each paver must be cut and placed precisely.
Site conditions significantly impact timeline. If the contractor discovers poor drainage or unstable soil during excavation, additional work becomes necessary. Tree roots, underground utilities, or existing structures can add days to the project. This is why thorough site assessment during the quote phase is critical.
Weather plays a major role. Heavy rain delays work because the base must remain dry during preparation. Most contractors schedule patio work during favorable weather seasons.
Ask your contractor for a detailed project schedule that breaks down each phase: site preparation, excavation, base installation, paver laying, joint sand application, and sealing. This timeline should include buffer days for weather delays.
Be skeptical of contractors who promise completion in unusually short timeframes. Rushing base preparation or paver installation compromises quality and leads to problems within 1-2 years. A [patio that](/2026/08/20/how-to-prevent-sinking-pavers/) lasts 20 years is worth waiting an extra week for.
Using a Patio Installation Estimate Template
Creating a standardized template for your patio installation estimate helps you compare quotes fairly and ensures you’re not missing critical information.
Your template should include: site description, material specifications, labor breakdown, timeline, warranty, and payment terms. Start by documenting project scope, square footage, location, existing conditions, and any special requirements.
Material specifications should list every component: paver type and quantity, base materials (gravel depth, sand type), edging materials, joint sand specifications, and any sealant or protective treatments. When contractors use the same template, you can compare material choices directly.
Labor breakdown shows the cost for each phase: excavation, base preparation, paver installation, finishing, and cleanup. This transparency reveals where money is going.
Include a detailed timeline showing start date, expected completion date, and weather contingencies. Payment terms should specify how much is due upfront, when interim payments occur, and when the final payment is due. Most contractors request 25-50% upfront, with the balance due upon completion (the FTC).
Add a section for warranty terms. What’s covered? For how long? What’s the process if issues arise?
By using a consistent template across multiple quotes, you spot patterns. If one contractor’s estimate is significantly lower, the template reveals why: cheaper materials, reduced labor hours, or skipped steps.
Comparing Multiple Patio Quotes
Getting multiple quotes is essential, but comparing them effectively requires more than looking at the bottom-line price. Many homeowners choose the lowest bid without understanding what they’re sacrificing.
Start by verifying that all quotes address the same scope of work. A significantly cheaper quote might be excluding site preparation, proper base installation, or finishing work.

Calculate the cost per square foot for each quote to normalize for project size. If two contractors quote $15 per square foot and one quotes $8, the low bid warrants investigation. Ask the low-bidding contractor to explain their pricing.
Beyond price, evaluate the contractor’s communication during the quote process. Did they ask thorough questions? Did they provide detailed written estimates? Did they explain their process clearly?
Review references and online reviews carefully. Look for patterns in feedback about attention to detail and responsiveness. If reviews mention incomplete work or poor communication, those are warning signs regardless of price.
Consider the warranty and guarantee each contractor offers. A contractor willing to stand behind their work for 2-3 years is demonstrating confidence.
Factor in the contractor’s experience and stability. A contractor with 10 years of experience like Kingdom Paver has weathered market changes and built proven systems. A newer contractor might offer lower prices but less proven reliability.
Create a simple scoring system: assign points for price, warranty, communication, experience, and references. This forces you to weigh factors beyond cost and often reveals that the cheapest quote isn’t the best value.
Common Hidden Costs in Patio Projects
Understanding where hidden costs emerge helps you ask better questions during the quote phase and avoid budget surprises mid-project.
Site preparation often costs more than homeowners expect. Poor drainage might require a drainage system beneath the patio. Unstable ground requires additional base material and compaction work. These are foundational to a patio that won’t fail. When contractors discover these issues during excavation, costs increase. Detailed site assessment during the quote phase is critical.
Utility conflicts create unexpected expenses. If the contractor discovers underground electrical lines, gas lines, or irrigation systems during excavation, work stops until utilities are marked and potentially relocated. A thorough contractor marks utilities before excavation begins.
Existing structure removal costs money. Removing and hauling away old concrete or treating tree roots adds expense.
Permit and inspection fees vary by location but are often overlooked during budgeting. Some jurisdictions require permits for patio work, particularly if the patio exceeds a certain size or if drainage work is involved.
Custom design elements like built-in seating, fire pits, or integrated outdoor kitchens add cost beyond basic patio installation. Discuss these upgrades during the quote phase so they’re included in the estimate rather than discovered as add-ons later.
Sealing and maintenance products are sometimes presented as add-ons after the patio is installed. Clarify during the quote whether sealing is included or an additional cost.
Weather delays can extend timelines and increase labor costs if the contractor needs to return for additional work days. A detailed project schedule with contingencies helps manage this risk.
Conclusion
Getting a quality patio installation quote requires asking the right questions and evaluating contractors based on more than price alone. The difference between a patio that lasts 5 years and one that lasts 20 years often comes down to site preparation, material quality, and contractor expertise, all things reflected in a thorough quote.
At Kingdom Paver, we invest time in understanding your specific site conditions, your vision for the space, and your budget before providing an estimate. Our 10 years of experience means we’ve encountered nearly every challenge, poor drainage, unstable soil, utility conflicts, and we factor these realities into our quotes upfront rather than discovering problems mid-project. We handle the entire installation in-house, stand behind our work with a solid warranty, and communicate clearly throughout the process.
Contact Kingdom Paver today to schedule a site consultation and receive a detailed patio installation quote tailored to your property and needs.
Frequently Asked Questions
Q: What factors affect the price of a patio installation quote?
A: Patio installation costs depend on several variables: square footage, material choice (pavers, concrete, natural stone), site conditions, excavation and sub-base preparation requirements, drainage needs, labor costs in your region, and project complexity. A sloped yard requiring grading or poor soil needing extra compaction will increase costs. Permit fees and site accessibility also factor in. Always request a detailed cost breakdown from contractors to understand which factors drive your specific quote.
Q: How many quotes should I get for a patio project?
A: Get at least three quotes from different contractors to establish a realistic price range and compare service offerings. Three quotes give you enough data to spot outliers and understand the market rate without becoming overwhelming. Request that each quote include the same scope: materials, labor, excavation, sub-base preparation, drainage solutions, and timeline. This consistency makes comparison straightforward and helps you identify which contractor offers the best value for your project.
Q: What should a patio installation estimate template include?
A: A comprehensive estimate should list: project scope and square footage, material type and quantity, labor costs broken down by phase, excavation and site preparation charges, sub-base and compaction costs, drainage requirements, sealing or finishing treatments, permit fees, project timeline, payment schedule, warranty details, and contractor contact information. Request that estimates itemize costs separately rather than providing one lump sum. This transparency helps you understand where your money goes and makes it easier to compare quotes from different contractors accurately.
Q: How long does patio installation take from quote to completion?
A: A typical patio installation takes 2-4 weeks from start to finish, depending on project size, weather, and site conditions. The timeline includes site survey and preparation, excavation, sub-base compaction, paver or material installation, joint sand application, sealing, and final grading. Larger projects or those requiring extensive excavation may take longer. Ask contractors for a detailed installation timeline in their quote, including weather contingencies. Busy contractors may have scheduling delays, so confirm availability if you need the project completed by a specific date.
This article was written using GrandRanker


