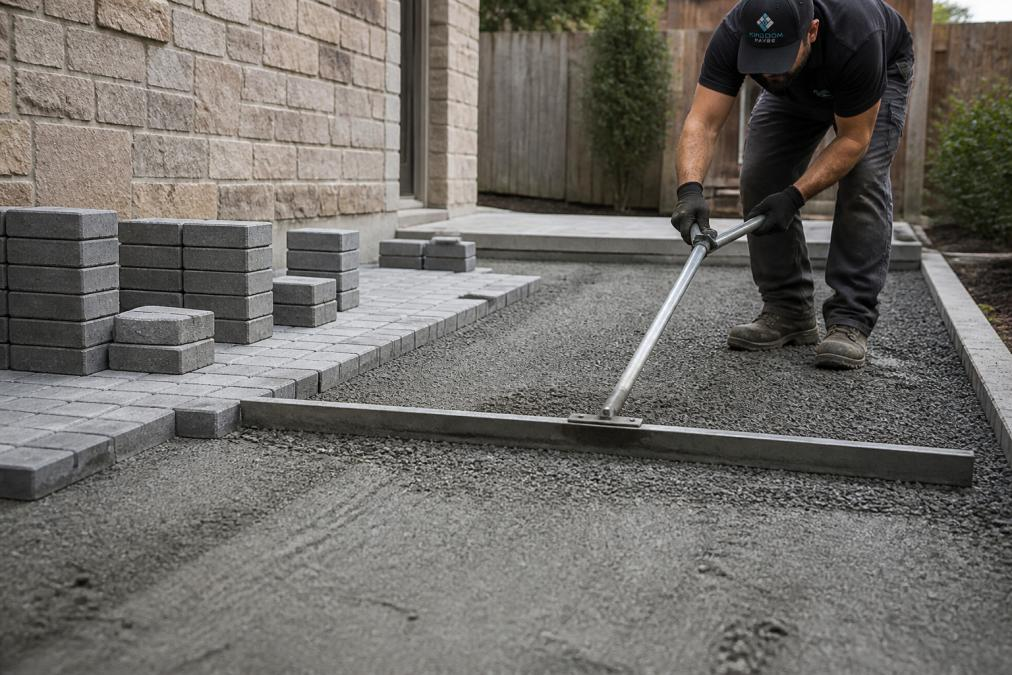
Paver failure doesn’t start at the surface. It starts below ground, in the foundation you can’t see. A poorly prepared base causes sinking, cracking, and uneven settling within months or years. The difference between a patio that lasts 20 years and one that needs replacement in five comes down to how seriously you take the paver installation base preparation guide process.
Most homeowners underestimate this step. They see the finished pavers and think that’s where the quality lives. It doesn’t. The base is where durability is built. When Kingdom Paver installs a patio, we spend more time on base preparation than on any other phase, because we know that’s where the real work happens.
The paver installation base preparation guide process involves six critical phases: site layout, excavation, soil analysis, compaction, material layering, and drainage setup. Skip or rush any of these, and you’re setting yourself up for expensive repairs down the line.
Site Layout and Marking for Paver Installation
Before you dig a single shovel, mark out your project area with precision. This is where the paver installation base preparation guide begins, on the surface, with string lines and spray paint.
Use a string line to establish the perimeter of your patio or driveway. Run it tight between stakes at each corner. This line becomes your reference point for everything that follows. Measure twice, mark once. A quarter-inch error in layout compounds as you work outward, and by the time you’re halfway through, your project can be off by inches.
Mark your site with spray paint along the string line. Use bright paint so it’s visible throughout excavation. Include any slope lines you’ll need to follow, these are critical for drainage. Most installers mark the high point and low point of the slope, then use those as guides during grading.
Check local codes before breaking ground. Some jurisdictions require permits for hardscape projects, especially if they involve drainage modifications or affect property lines. Call before you dig, it’s the safest approach. Your local utility locating service can also mark underground lines, preventing costly mistakes during excavation.
Paver Base Depth Requirements and Excavation
Determining Excavation Depth
The depth of your excavation determines whether your paver base can support the load and drain properly. This isn’t guesswork, it’s engineering.
For a typical residential patio, excavate 4 to 6 inches deep. For a driveway, go 6 to 8 inches. These depths accommodate the compacted base material, bedding sand, and pavers themselves. The exact depth depends on your soil type, climate, and intended use.
Calculate your excavation depth by working backward from the finished surface. If your finished patio should be at a certain height (usually flush with a door threshold or deck), subtract the height of your pavers (typically 2 to 3 inches), then subtract your bedding sand layer (1 inch), then subtract your total base material depth (3 to 5 inches). The remaining measurement is how deep you excavate.
Remove all organic material, grass, roots, topsoil. These materials compress over time and cause settling. Dig down to stable soil. If you hit clay or compacted earth, that’s your working surface. If you hit soft soil or sand, you may need to go deeper and add a geotextile fabric base.
Frost Line Considerations
In colder climates, frost heave is a real threat. Frost heave occurs when water in the soil freezes and expands, pushing the base upward. When it thaws, the base settles unevenly, and your pavers crack or shift.
The frost line, the depth at which soil freezes in winter, varies by region. In northern areas, it can reach 48 inches deep. In moderate climates, it might be 12 to 24 inches (usda.gov). You need to know your local frost line depth before finalizing your excavation plan.
If your frost line is deep, you have two options: excavate below it (expensive and often impractical), or use proper drainage and base material to manage water movement so freezing is minimized. Most residential projects use the second approach. A well-compacted, well-drained base resists frost heave far better than a poorly prepared one.
Consult your local extension office or county records for your area’s frost line depth. This single piece of information shapes your entire base strategy.
Sub-Grade Preparation and Soil Analysis
The sub-grade is the native soil beneath your excavation. Its condition determines how stable your base will be. Analyze it before you build on top of it.
Close-up of excavated soil showing distinct layers of clay, sand, and organic matter with a shovel and measuring tape on the ground surface
Perform a simple soil test: dig a hole, fill it with water, and observe how fast it drains. If water disappears in minutes, your soil drains well, good for paver bases. If it pools for hours, you have clay or poor drainage, you’ll need to address this with additional drainage measures or geotextile fabric. If water vanishes instantly, you have sand or gravel, also acceptable, though you may need a geotextile to prevent base material from migrating into the sub-grade.
Remove any soft spots or areas where the soil feels spongy. These areas won’t support the load and will cause settling. Compact the sub-grade with a plate compactor or hand tamper to create a firm, stable working surface. The sub-grade should feel hard and unyielding under your foot.
If you’re building over poor soil (clay, silt, or high water table), consider adding a geotextile fabric layer before your base material. This fabric separates the sub-grade from the base, prevents base material from mixing with soil, and allows water to drain while stabilizing the structure. It’s a small investment that prevents major problems later.
Best Tools for Paver Base Compaction
Plate Compactor vs. Hand Tamping
Compaction is where base preparation becomes physical work. You can hand tamp small areas, but for any project larger than 50 square feet, a plate compactor is essential.
Worker operating a plate compactor on prepared base material, showing proper stance and forward motion on a sunny afternoon with completed patio sections visible in background
A plate compactor uses a vibrating metal plate to compress material in multiple passes. Each pass reduces air gaps in the base, creating a denser, more stable foundation. Hand tamping with a 10-pound rammer works for small areas or edges, but it’s slow and produces inconsistent results. Most professionals use plate compactors for the main area and hand tampers for corners and edges.
Rent a plate compactor rather than buy one unless you’re doing multiple projects. A day’s rental typically costs less than the purchase price of a budget model, and you get a well-maintained tool. When you pick it up, ask the rental company for a quick demo on operation. These machines are powerful and can move fast if you’re not paying attention.
Equipment Rental vs. Purchase
For a single patio project, renting makes sense. A plate compactor rental runs for a day or a few days. You pay for what you need, return it, and move on. For professionals or homeowners planning multiple projects, purchasing might be justified.
If you’re renting, reserve your equipment in advance, especially during spring and summer when demand is high. Confirm delivery options, some rental companies deliver; others require pickup. Factor delivery time into your project schedule.
When operating a plate compactor, wear hearing protection and sturdy footwear. The machine vibrates significantly, and the noise is loud. Follow the rental company’s safety instructions. Compactors can be dangerous if misused.
Base Material Selection and Layering
Crushed Stone and ABC Base
Your base material is typically crushed stone or ABC base. ABC stands for "aggregate base course", a mix of stone, gravel, and dust that compacts tightly and provides excellent load-bearing support.
ABC base is the industry standard for paver installations. It compacts better than plain crushed stone because the dust particles fill voids between larger stones, creating a denser, more stable base. When you compact ABC base properly, it becomes almost concrete-like in hardness.
Use 3/4-inch minus crushed stone for your base layer (icpi.org). The "minus" designation means the material includes particles smaller than 3/4 inch, down to dust. This grading is critical, it’s what allows the material to compact densely.
Spread your base material in 2-inch lifts. Compact each lift fully before adding the next one. Three lifts of 2 inches each, fully compacted, gives you a solid 6-inch base. This layering approach is far more effective than dumping all 6 inches at once and compacting once.
Check your compaction by walking on the material. It should feel hard and stable, with no movement or flexing under your weight. If it flexes, compact it more.
Bedding Sand and Geotextile Fabric
Bedding sand is the final layer before pavers. It’s typically 1 inch of coarse sand (also called paver sand or concrete sand). This sand allows for minor adjustments as you set pavers, then locks them in place once they’re settled.
Never use play sand or fine sand. These materials don’t compact well and create an unstable surface. Coarse sand has larger particles and compacts tightly, providing a firm base for pavers.
Geotextile fabric serves multiple purposes. It separates base material from the sub-grade, preventing base material from sinking into soft soil. It also allows water to drain while maintaining structural separation. For most paver projects, especially over clay or poor soil, geotextile is worth the cost.
Lay geotextile fabric directly over the compacted sub-grade, before adding your base material. It should extend up the edges slightly. Once your base material is in place and compacted, the fabric stays in place, it won’t shift.
Drainage Slope and Edge Restraint Installation
Setting the Correct Pitch
Drainage is where many paver installations fail. Water that pools on your patio will find its way into the base, freeze in winter, and cause heave and cracking. A proper slope prevents this.
The standard slope for paver patios is 1/8 inch per linear foot (icpi.org). This means for every 8 feet of distance from high point to low point, the surface drops 1 inch. This slope is gentle enough to be invisible to the eye but effective at moving water away from the structure.
Mark your slope with string lines before you compact your base. Run a string from your high point to your low point, and use a level to establish the correct angle. This string becomes your guide as you shape the base material.
Slope should direct water away from structures. If your patio is next to a house, slope it away from the foundation. If it’s an island patio, slope it toward the edges.
Installing Edge Restraints
Edge restraints keep pavers from shifting outward under load. Without them, pavers gradually migrate outward, and your neat pattern becomes a mess.
Install edge restraints after your base is compacted but before you lay pavers. These are typically plastic or metal channels that anchor into the base material along the perimeter. Secure them with spikes driven into the base.
The edge restraint should sit at or just below the finished height of your pavers. If it’s too high, it’s visible and looks unfinished. If it’s too low, it won’t hold pavers effectively.
For curved edges, use flexible plastic restraints that bend to match your curve. For straight edges, rigid metal restraints provide maximum holding power.
Paver Patio Installation Timeline Expectations
A complete paver patio installation typically takes 2 to 5 days, depending on size, complexity, and weather. Here’s what a typical timeline looks like.
Day 1: Site preparation and excavation. Mark the site, remove sod and organic material, and excavate to depth. For a 400-square-foot patio, this takes 4 to 8 hours depending on soil conditions.
Day 2: Base preparation and compaction. Add base material in lifts, compact each lift, and establish your slope. This is the most labor-intensive day. Compacting a 400-square-foot area with a plate compactor takes 6 to 10 hours.
Day 3: Bedding sand and edge restraints. Spread bedding sand, install edge restraints, and prepare for paver laying. This takes 2 to 4 hours.
Days 4-5: Paver installation and finishing. Lay pavers, cut edge pavers to fit, and compact the surface. For a 400-square-foot patio, laying pavers takes 8 to 12 hours spread across two days.
Weather delays this timeline. Rain makes excavation and compaction impossible. Heat can slow work if you’re working in direct sun. Plan for contingency time.
Professional installers can compress this timeline because they work efficiently and have experience. A crew familiar with the process might complete a 400-square-foot patio in 3 days. A homeowner doing it for the first time should expect closer to 5 days or longer.
Start your project early in the week so weather delays don’t push you into a weekend. Finish compaction before rain is forecast, compacting wet base material is ineffective and frustrating.
A paver installation base preparation guide that cuts corners on base work is a false economy. You’re saving a few hundred dollars now and spending thousands on repairs in five years. The base is where durability lives. Prepare it properly, and your patio will outlast the house. Rush it, and you’ll be tearing it out and starting over.
Kingdom Paver has spent a decade building patios and driveways that last because we invest time in the foundation. The base work isn’t glamorous, nobody sees it once the pavers are down, but it’s where the real quality happens. If you’re planning a patio or driveway project, get the base right. It’s the decision that determines everything else.
=== FAQ ANSWERS (audit these too, same rules) ===
[1] Q: What goes under a paver base?
A: A proper paver base consists of multiple layers working together. Start with a compacted sub-grade (prepared soil), then add 4-6 inches of crushed stone or ABC base material, compact it thoroughly, and finish with 1 inch of bedding sand for leveling. Geotextile fabric between the sub-grade and base material prevents soil migration and extends the life of your paver installation base preparation significantly.
[2] Q: How deep should I dig for a paver base?
A: Excavation depth depends on your paver thickness, base material needs, and frost line depth. For standard 2.375-inch thick pavers with a 4-6 inch base, dig 6.5-8.5 inches total. In colder climates, extend below the frost line (typically 12-48 inches depending on location) to prevent heaving. Consult local building codes or a professional to determine your specific paver base depth requirements for your area.
[3] Q: Can I skip the gravel and just use sand under pavers?
A: No. Sand alone cannot provide proper drainage or load-bearing support for pavers. Crushed stone and ABC base create a stable, permeable foundation that drains water away and prevents settling. Sand is only the top bedding layer for leveling. Skipping the gravel layer leads to paver failure, sinking, and cracking within 1-2 years. Proper layering is essential for longevity.
[4] Q: Why is base compaction critical for paver longevity?
A: Compaction eliminates air pockets and creates a stable, load-bearing foundation. Without proper compaction, pavers settle unevenly, creating trips, water pooling, and cracking. Each layer must be compacted separately to 95% density. Using plate compactors or hand tamping ensures material bonds properly. Poor compaction is the leading cause of paver failure, making this step non-negotiable for durability.
[5] Q: What is the typical paver patio installation timeline expectations?
A: Most residential paver patios take 3-7 days, depending on size and complexity. Small patios (under 200 square feet) may finish in 2-3 days; larger projects take a week or more. Base preparation typically consumes 40-50% of the total time. Weather delays, soil conditions, and drainage requirements can extend timelines. Plan for additional time if your site requires significant grading or if heavy rain occurs during installation.
[6] Q: How do I determine the correct slope for drainage?
A: A 1/8-inch drop per linear foot (1% slope) is standard for patio drainage. For every 8 feet of patio width, drop the grade 1 inch to ensure water runs off rather than pooling. Use a string line and level to verify pitch during base preparation. Proper slope prevents water accumulation, which causes pavers to shift and fail. If your yard is already sloped significantly, adjust the base to work with natural drainage patterns.
[7] Q: What’s the difference between ABC base and crushed stone for pavers?
A: ABC base (aggregate base course) is a mix of crushed stone, dust, and gravel that compacts tightly and drains well, making it ideal for paver bases. Crushed stone alone is larger aggregate without the binding dust component. ABC base compacts better and creates a more stable foundation for paver installation base preparation. Both are permeable, but ABC base is typically preferred for residential patios because it locks together more effectively under compaction.
[8] Q: Should I use geotextile fabric under my paver base?
A: Yes, geotextile fabric placed between the sub-grade and base material prevents soil migration, maintains proper drainage, and extends base life. It stops fines from washing into the base layer while allowing water to drain freely. In areas with clay or poor soil, fabric is essential to prevent settling. It adds minimal cost but significantly improves long-term performance and reduces paver failure risk.
Frequently Asked Questions
Q: What goes under a paver base?
A: A proper paver base consists of multiple layers working together. Start with a compacted sub-grade (prepared soil), then add 4-6 inches of crushed stone or ABC base material, compact it thoroughly, and finish with 1 inch of bedding sand for leveling. Geotextile fabric between the sub-grade and base material prevents soil migration and extends the life of your paver installation base preparation significantly.
Q: How deep should I dig for a paver base?
A: Excavation depth depends on your paver thickness, base material needs, and frost line depth. For standard 2.375-inch thick pavers with a 4-6 inch base, dig 6.5-8.5 inches total. In colder climates, extend below the frost line (typically 12-48 inches depending on location) to prevent heaving. Consult local building codes or a professional to determine your specific paver base depth requirements for your area.
Q: Can I skip the gravel and just use sand under pavers?
A: No. Sand alone cannot provide proper drainage or load-bearing support for pavers. Crushed stone and ABC base create a stable, permeable foundation that drains water away and prevents settling. Sand is only the top bedding layer for leveling. Skipping the gravel layer leads to paver failure, sinking, and cracking within 1-2 years. Proper layering is essential for longevity.
Q: Why is base compaction critical for paver longevity?
A: Compaction eliminates air pockets and creates a stable, load-bearing foundation. Without proper compaction, pavers settle unevenly, creating trips, water pooling, and cracking. Each layer must be compacted separately to 95% density. Using plate compactors or hand tamping ensures material bonds properly. Poor compaction is the leading cause of paver failure, making this step non-negotiable for durability.
Q: What is the typical paver patio installation timeline expectations?
A: Most residential paver patios take 3-7 days, depending on size and complexity. Small patios (under 200 square feet) may finish in 2-3 days; larger projects take a week or more. Base preparation typically consumes 40-50% of the total time. Weather delays, soil conditions, and drainage requirements can extend timelines. Plan for additional time if your site requires significant grading or if heavy rain occurs during installation.
Q: How do I determine the correct slope for drainage?
A: A 1/8-inch drop per linear foot (1% slope) is standard for patio drainage. For every 8 feet of patio width, drop the grade 1 inch to ensure water runs off rather than pooling. Use a string line and level to verify pitch during base preparation. Proper slope prevents water accumulation, which causes pavers to shift and fail. If your yard is already sloped significantly, adjust the base to work with natural drainage patterns.
Q: What's the difference between ABC base and crushed stone for pavers?
A: ABC base (aggregate base course) is a mix of crushed stone, dust, and gravel that compacts tightly and drains well, making it ideal for paver bases. Crushed stone alone is larger aggregate without the binding dust component. ABC base compacts better and creates a more stable foundation for paver installation base preparation. Both are permeable, but ABC base is typically preferred for residential patios because it locks together more effectively under compaction.
Q: Should I use geotextile fabric under my paver base?
A: Yes, geotextile fabric placed between the sub-grade and base material prevents soil migration, maintains proper drainage, and extends base life. It stops fines from washing into the base layer while allowing water to drain freely. In areas with clay or poor soil, fabric is essential to prevent settling. It adds minimal cost but significantly improves long-term performance and reduces paver failure risk.