
Table of Contents
- Why Paver Maintenance Matters More Than You Think
- Best Paver Cleaning Tools and When to Use Them
- Paver Sealing Frequency: How Often Is Enough?
- How to Fix Uneven Driveway Sections
- Joint Sand Replenishment: The Step Most Homeowners Skip
- Stain Removal by Type: A Troubleshooting Guide
- Seasonal Paver Maintenance Checklist
- DIY vs. Professional Paver Restoration
- Frequently Asked Questions
Last Updated: September 8, 2026
Why Paver Maintenance Matters More Than You Think
Most homeowners don’t think about paver maintenance until a problem appears. The truth is that paver maintenance tips for homeowners aren’t about reacting to damage; they are about preventing it.
Paver maintenance protects the structural integrity and appearance of concrete, brick, or stone pavers through regular cleaning, joint care, and sealing. Small issues like sand loss or minor cracks compound quickly; left unchecked, water seeps beneath the surface, undermining the base layer and leading to costly repairs.
Kingdom Paver has a decade of experience installing and restoring patios, driveways, and walkways across Katy and Cypress.
Preventative maintenance is always cheaper than restoration. Tackling small issues in the spring and fall prevents the need for major paver replacement down the road.
Best Paver Cleaning Tools and When to Use Them
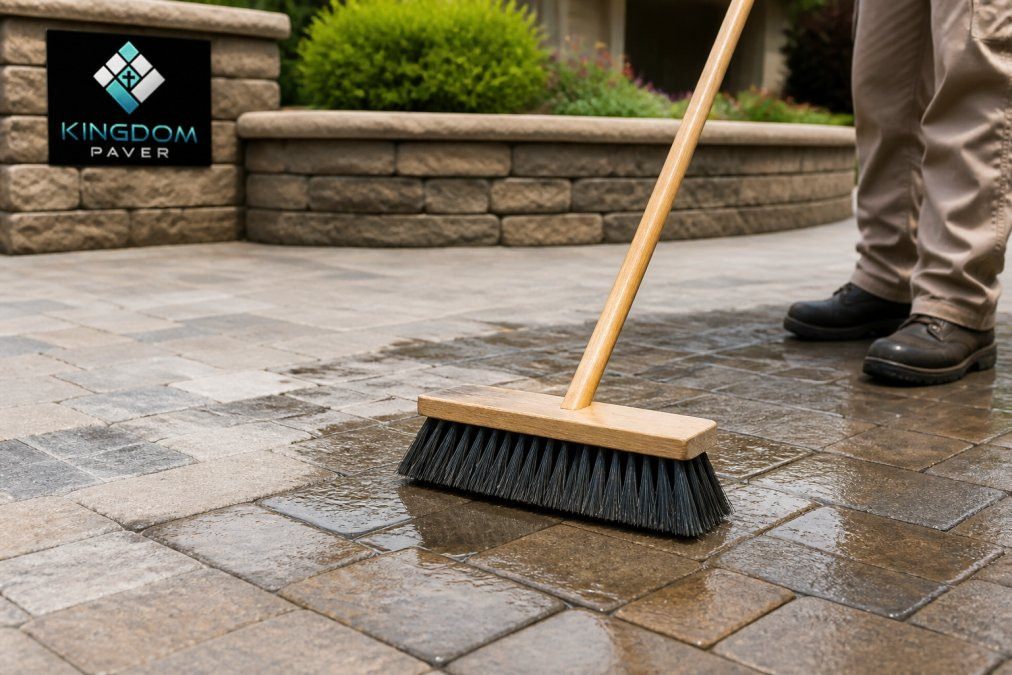
You do not need specialized equipment to keep pavers in top shape. A stiff-bristle push broom handles routine sweeping, while a coarse-bristle brush with mild detergent solution is the workhorse for spot cleaning.

A leaf blower clears organic matter from joints without disturbing the sand. A pressure washer is effective for deeper cleaning, but too much pressure will blast joint sand out of the gaps.
The Right Way to Pressure Wash Pavers
The most common mistake is using a narrow nozzle on full power, which strips sand from joints and can etch softer pavers. Use a wider fan tip, keep the nozzle at least 12 inches from the surface, and move in steady sweeping motions.
Never pressure wash pavers immediately after installation or a recent joint sand application. The sand needs time to settle and lock into the joints, and high pressure will wash it away before it stabilizes.
Paver Sealing Frequency: How Often Is Enough?
Paver sealing frequency depends on exposure and traffic, but most installations benefit from resealing every two to three years. A quality sealant protects against staining, locks in joint sand, enhances color, and makes future cleaning easier.
To test the sealant, pour water on the surface. If it beads up, the sealant is working; if it soaks in and darkens the paver, it is time to reseal.
Choose a sealant based on the finish you want: a wet-look sealant deepens colors and gives a glossy sheen, while a matte or natural-look sealant protects without changing appearance. Always apply to clean, completely dry pavers.
How to Fix Uneven Driveway Sections
A sinking or uneven driveway is a safety hazard and a sign of a deeper problem. How to fix uneven driveway sections starts with understanding the cause: the issue is almost never the pavers themselves but the base material beneath them.
For a single sunken paver, lift it with a flat pry bar, add compactible sand to the base, and reset it level with the surrounding stones, a manageable DIY fix taking about an hour per paver.
Always use polymeric sand when resetting pavers. Unlike regular joint sand, polymeric sand contains a binding agent that activates with water, creating a strong bond that locks pavers in place and resists weed growth and washout.
If multiple sections are sinking or drainage issues cause water pooling, the problem is beyond a simple reset. A professional assessment is worth the cost.
Joint Sand Replenishment: The Step Most Homeowners Skip
Joint sand fills the gaps between pavers, locking them together and transferring load across the surface. When it washes away or gets blown out by a pressure washer, pavers lose lateral stability, shift, and allow weeds to take root.
Most homeowners never think about joint sand until the damage is done. Replenishing it correctly, especially with polymeric sand, requires a specific process.
The Complete Polymeric Sand Replenishment Process
Polymeric sand is the industry standard because it contains a binding agent that activates with water, creating a strong, interlocking joint that resists weeds, insects, and washout. However, it is not as forgiving as regular sand.
Step 1: Prepare the Surface (The Most Critical Step)
This step cannot be skipped. The pavers and joints must be completely dry for at least 24 to 48 hours before installation; if damp, the polymer will activate prematurely and fail to fill the joints. Use a leaf blower to remove all loose debris, dust, and old sand.
Step 2: Choose the Right Sand
Not all polymeric sand is created equal. For joints wider than 1/2 inch, use a product designed for wide joints; for narrow joints (1/4 inch or less), use a fine-graded sand. Check the manufacturer’s specifications to match the product to your joint width.
Step 3: Apply the Sand
Pour sand onto the surface in small piles and sweep it back and forth in a circular motion with a stiff-bristle push broom, filling each joint completely from the bottom up. After 10-15 minutes, sweep again to top off settled joints, filling to within 1/8 inch of the top edge.
Step 4: Compact the Sand
A plate compactor vibrates the sand down into the joints for maximum density. Run the compactor over the entire surface in overlapping passes.
Step 5: The Activation Mist
This is where many DIY projects fail. Using a fine mist nozzle on your garden hose, lightly water the entire surface to saturate the sand without creating puddles or runoff. Mist for about 30 seconds per 100 square feet, then observe, the surface should look damp but not wet.
Step 6: The Curing Period
After activation, keep all foot and vehicle traffic off the area for at least 24 hours.
Never use a pressure washer to activate polymeric sand. The high pressure will blast the sand out of the joints. Always use a gentle, fine mist from a standard garden hose nozzle.
When to Use Standard Joint Sand
Standard, non-polymeric joint sand is cheaper and easier to work with. It is best for temporary fixes, joints wider than 1 inch, or homeowners who prefer a traditional, permeable joint. However, it washes out more easily and provides no barrier against weeds.
How Often Should You Check Your Joints?
Inspect joints at least twice a year, in spring after the freeze-thaw cycle and in fall before heavy rain. Look for joints less than half full, sand washed out near downspouts, or weeds taking hold.
Stain Removal by Type: A Troubleshooting Guide
Different stains require different treatments, and using the wrong approach can make things worse. The table below is a quick reference; detailed procedures for the most common stains follow.
| Stain Type | Cleaning Method | Notes |
|---|---|---|
| Oil and grease | Degreaser or dish soap, scrub with coarse-bristle brush | Treat quickly; old stains may need a poultice |
| Efflorescence (white powder) | Paver cleaner designed for efflorescence | A natural deposit; do not use acid on concrete pavers |
| Rust | Commercial rust remover | Avoid muriatic acid on colored pavers |
| Organic (moss, mildew) | Bleach solution or oxygen bleach | Keep the solution away from plants and grass |
| Paint | Paint stripper per manufacturer instructions | Test in an inconspicuous spot first |
Do not use muriatic acid on concrete pavers. It can permanently discolor or etch the surface. For efflorescence, use a cleaner specifically formulated for paver surfaces instead.
The Definitive Oil and Grease Stain Removal Process
Oil and grease stains are the most common challenge on driveways. The key is speed, the faster you act, the easier the stain is to remove.
For Fresh Stains (Less Than 24 Hours Old):
- Absorb the excess: Immediately cover the stain with an absorbent material like kitty litter, cornstarch, or baking soda. Press it down gently and let it sit for 30-60 minutes to draw the oil out of the paver.
- Sweep and scrub: Sweep up the absorbent material. Mix a solution of warm water and a few drops of mild dish soap (like Dawn). Scrub the area vigorously with a coarse-bristle brush.
- Rinse thoroughly: Rinse the area with clean water from a garden hose. If a faint stain remains, repeat the process.
For Old, Set-In Stains:
Old stains have penetrated deep into the paver’s porous surface and require a poultice to draw the oil out.
- Create a poultice: Mix a commercial poultice powder (available at most hardware stores) with water, or create a DIY version by mixing baking soda or cornstarch with a small amount of water to form a thick paste.
- Apply the poultice: Spread the paste over the stain in a layer about 1/4 inch thick. Extend it about an inch beyond the stain’s edges.
- Cover and wait: Cover the poultice with plastic wrap and tape down the edges. This prevents it from drying out too quickly. Let it sit for 24-48 hours. The poultice will slowly draw the oil out of the paver and into the paste.
- Remove and rinse: Once the poultice has dried and cracked, sweep it up and rinse the area with clean water. You may need to repeat this process for very stubborn stains.
Eco-Friendly Cleaning Alternatives That Actually Work
Many commercial cleaners contain harsh chemicals that can harm your lawn, garden, or pets. For routine cleaning and light stains, these natural alternatives are surprisingly effective.
The All-Purpose Paver Cleaner:
Mix 1 gallon of warm water with 1/4 cup of white vinegar and 1 tablespoon of mild dish soap. This solution is safe for most paver types and excellent for general grime, dirt, and light mildew, but not strong enough for oil or rust.
The Oxygen Bleach Solution for Organic Stains:
For moss, mildew, and algae, oxygen bleach (like OxiClean) is a powerful, environmentally friendly alternative to chlorine bleach. Mix according to package directions, apply, let sit for 15-20 minutes, and scrub with a stiff brush.
For a natural weed killer that is safe for pets, mix 1 gallon of white vinegar with 1 cup of table salt and 1 tablespoon of dish soap. Spray it directly on weeds growing in paver joints on a sunny day. The acetic acid in the vinegar will kill the weed, and the salt prevents regrowth. Be careful not to overspray onto your lawn or garden beds.
The Rust Stain Exception
Rust stains are notoriously difficult to remove and often require a commercial rust remover containing oxalic acid. Wear gloves and eye protection, apply directly to the stain, let it sit per label instructions, scrub, and rinse thoroughly.
Seasonal Paver Maintenance Checklist
A consistent seasonal routine keeps the work manageable and prevents problems from escalating.
Spring: Sweep the entire surface to remove winter debris. Inspect for shifted or sunken pavers from freeze-thaw cycles. Replenish joint sand where needed and check the sealant’s condition.
Summer: Address spills and stains promptly, as heat can bake them in. Clean before gatherings to prevent dirt from being ground in, and spot-treat weed growth between joints.
Fall: Clear leaves and organic matter regularly, as decomposing material can stain pavers and breed moss. This is the ideal time for thorough cleaning and resealing before winter.
Winter: Avoid deicing salts, as many formulations can damage pavers. Use sand for traction and remove snow with a plastic shovel to prevent scratching.
If you only do two maintenance tasks per year, make them joint sand replenishment and resealing. These two steps prevent the majority of structural and cosmetic paver issues.
DIY vs. Professional Paver Restoration
Many routine paver maintenance tasks are well within a capable DIYer’s reach. Sweeping, spot cleaning, weed removal, and joint sand replenishment require only basic tools and a few hours.
The line shifts with structural issues. How to fix uneven driveway sections spanning large areas, extensive cracking, or drainage problems require heavy equipment and experience. Professional restoration involves lifting and resetting pavers, recompacting the base, and ensuring proper drainage.
The cost-benefit analysis comes down to scope. For a single shifted paver or stained section, DIY is the smart choice. For multiple sinking areas or an unevenly settled patio, professional intervention is more economical in the long run.
Before deciding, consider the age of your installation. Pavers that are ten years old or more may benefit from a full restoration, which includes lifting, base repair, and reinstallation. This process can extend the life of the pavers significantly. According to industry guidance from the Interlocking Concrete Pavement Institute, proper base preparation and installation are the most critical factors in paver longevity. If your paver maintenance routine has been inconsistent for years, a professional assessment can tell you whether restoration or selective replacement is the right path.
Caring for pavers is not complicated, but it does require consistency. The difference between a patio that looks new after a decade and one that needs replacement after five years comes down to a few hours of seasonal maintenance. When structural issues arise, trust Kingdom Paver, a team with ten years of experience building and restoring outdoor living spaces in Katy and Cypress. Kingdom Paver offers custom building solutions and professional installation of patios and walkways, as well as quality construction for driveways and extensions. Contact Kingdom Paver and protect the value of your outdoor investment.
Frequently Asked Questions
What maintenance do pavers need?
Pavers need regular sweeping to remove surface grime, periodic washing with a mild detergent, weed and moss control between joints, and joint sand replenishment. Sealing every 2 to 3 years protects the surface and color. Address small cracks or uneven sections promptly to prevent larger paver repair work. A seasonal check keeps your patio and driveway in top condition.
How often should you seal your paver patio?
Most paver patios need sealing every 2 to 3 years. High-traffic areas like driveways and pool decks may need sealing every 1 to 2 years. Check the paver finish: if water soaks in quickly or the color looks dull, it is time to reseal. Clean the pavers thoroughly and let them dry completely before applying a new coat of sealant.
Is it okay to pressure wash pavers?
Yes, but use a fan nozzle and keep the pressure under 1,500 PSI to avoid dislodging joint sand. Hold the wand at a 45-degree angle and stay 6 to 8 inches from the surface. Use a detergent solution for oil or organic stains before washing. Always let the pavers dry fully before resealing or adding new joint sand.
What is the best way to remove weeds from between pavers?
Pull weeds by hand or use a narrow weeding tool to remove the roots. For stubborn growth, pour boiling water directly on the weed or use a vinegar-based solution. Avoid chemical herbicides that can wash into nearby landscaping. After removing weeds, sweep fresh polymeric sand into the joints to prevent new growth and stabilize the pavers.


