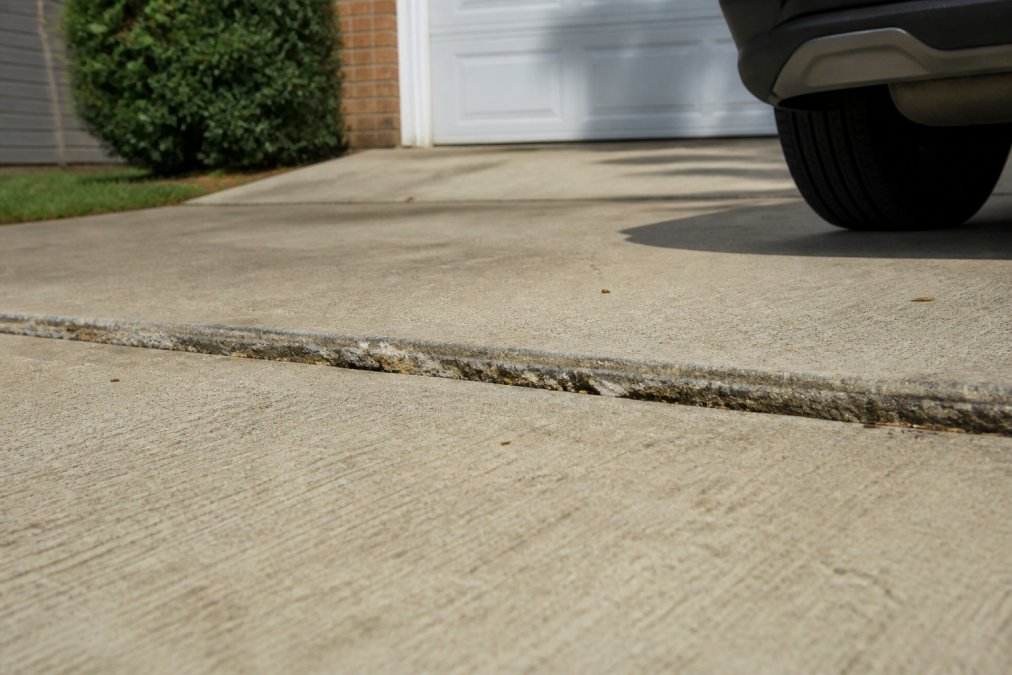
An uneven driveway is more than an eyesore. Left unaddressed, a settled or cracked concrete slab creates genuine safety hazards, accelerates structural deterioration, and quietly chips away at your property value. This guide walks you through how to fix an uneven driveway, covering every method from DIY crack filling to professional-grade polyjacking, so you can make the right call before the problem gets worse.
Here’s what most guides get wrong: they treat all uneven driveways as the same problem. They’re not. A slab that’s settled three inches because of subgrade erosion needs a completely different solution than one with surface cracks caused by freeze-thaw cycles. Getting that distinction right is the difference between a repair that lasts a decade and one that fails in two years.
Why Your Uneven Driveway Is Getting Worse
The biggest mistake homeowners make is treating settlement as a cosmetic issue. It isn’t. An uneven driveway almost always signals an ongoing structural problem underneath the surface, and ignoring it guarantees the repair bill grows.
Soil Erosion, Drainage Problems, and Freeze-Thaw Cycles
Three forces drive the vast majority of driveway settlement.
Soil erosion happens when water moves through or under your subgrade, washing away the compacted base layer that supports the concrete slab. Poor drainage is the usual culprit: water pooling on or beside the driveway finds its way beneath the slab, loosening the soil and creating voids. Over time, the slab loses support and drops.
Freeze-thaw cycles are particularly destructive in climates with cold winters. Water infiltrates hairline cracks in the concrete, expands when it freezes, and widens those cracks with each cycle. The Federal Highway Administration’s guide to pavement distress identifies freeze-thaw damage as one of the leading causes of premature concrete deterioration in northern states.
Hydrostatic pressure from saturated soil can also push slabs upward unevenly, creating the classic inverted V-shape where one panel rises above its neighbor.
The common thread: water. Correcting drainage isn’t optional, it’s the foundation of any lasting repair.
Safety Hazards: When Settlement Becomes a Trip Hazard
A height difference of half an inch between two concrete panels is enough to catch a toe and send someone to the ground. According to the National Safety Council’s injury facts resource, falls are a leading cause of unintentional injury across all age groups, and uneven walkways and driveways are a documented contributing factor.
A deteriorating driveway also affects your home’s load-bearing capacity for vehicles. A slab that’s settled unevenly puts stress on its edges rather than distributing vehicle weight across the full surface, accelerating cracking from the bottom up.
Watch Out A trip hazard isn’t just a personal injury risk, it’s a liability exposure. If someone falls on your uneven driveway, homeowners insurance may cover the claim, but repeated neglect can complicate that coverage. Address settlement before it becomes a documented hazard.
Repair vs. Replace: How to Decide
The repair-or-replace question comes down to three factors: the extent of settlement, the condition of the concrete slab itself, and the underlying cause.
Repair makes sense when:
Settlement is less than 2 inches
The concrete slab is structurally intact (no crumbling, spalling, or widespread cracking)
The root cause (drainage, void filling) can be corrected alongside the lift
The slab is less than 20-25 years old
Replacement is the better call when:
Settlement exceeds 3 inches across multiple panels
The concrete has extensive cracking, crumbling edges, or has lost structural integrity
The subgrade is severely compromised and would need full excavation anyway
The driveway is already at end of life
If lifting the slab would leave you with concrete that’s too deteriorated to function, you’re not saving money by repairing, you’re delaying an inevitable replacement while adding repair costs on top.
Condition
Recommended Action
Reasoning
Settlement under 1 inch, intact slab
Polyjacking or mudjacking
Cost-effective, minimal disruption
1-2 inch settlement, minor cracking
Polyjacking + crack repair
Addresses root cause and surface
Widespread cracking, crumbling edges
Full replacement
Repair won’t restore structural integrity
Settlement over 3 inches
Assess subgrade first
May need excavation before any lift
Surface cracks only, no settlement
Crack filler + sealer
DIY-viable, no lifting needed
Polyjacking vs Mudjacking: Which Method Wins
Both polyjacking and mudjacking are professional concrete lifting methods that inject material beneath a settled slab to fill voids and raise the surface.
How Mudjacking Works
Mudjacking (also called slabjacking) pumps a cement-soil slurry beneath the concrete slab through holes drilled in the surface. The slurry fills the void and lifts the slab back toward its original position. Once cured, the holes are patched. The process is well-established and widely available, but the slurry is heavy, which adds significant weight to an already compromised subgrade. In areas with poor drainage or soft soil, that added load can accelerate future settlement.
How Polyjacking Works
Polyjacking injects expanding polyurethane foam through smaller drill holes. The foam expands to fill voids, lifts the slab, and cures within minutes rather than days. Because polyurethane foam is lightweight and water-resistant, it doesn’t add load to the subgrade and won’t wash away if water infiltrates the area again.
A contractor injecting polyurethane foam beneath a lifted concrete driveway slab using a specialized drill and nozzle, on a residential driveway in bright afternoon sunlight
The Concrete Network’s guide to slab lifting methods notes that polyjacking has become the preferred method for residential applications where minimal disruption and faster return-to-service times are priorities.
Which One Is Right for Your Driveway
Polyjacking is the stronger choice for most residential driveways. It’s faster, lighter, and more durable in wet conditions. Mudjacking remains viable where cost is the primary concern and soil conditions are stable, but the weight of the slurry is a real long-term risk in areas with drainage problems.
Pro Tip Ask any lifting contractor to inspect the subgrade before committing to a method. A good contractor will identify whether the void beneath your slab is caused by erosion (ongoing) or simple compaction loss (stable). That distinction changes which method holds up over time.
How to Fix an Uneven Driveway: Step-by-Step Methods
Fixing an uneven driveway follows a logical sequence regardless of severity. Skipping steps, especially drainage correction, is the most common reason repairs fail within a few years.
Step 1: Assess the Concrete Slab and Subgrade
Walk the entire driveway and note which panels have settled and by how much, where cracks run, where water pools after rain, and any visible voids at slab edges. Probe the edges of settled slabs with a screwdriver. Soft or crumbling concrete suggests the slab has lost structural integrity and may not be worth lifting. Firm edges with clean cracks are a good sign that the concrete itself is sound.
Check your drainage grade. A properly installed driveway should slope away from the house at roughly 1-2% grade. If water is running toward your foundation, that’s both a drainage problem and a likely contributor to settlement.
Step 2: Fill Cracks and Voids
Before lifting or resurfacing, fill existing cracks. Unfilled cracks allow water infiltration that undoes any repair work.
For hairline cracks (under 1/4 inch wide): use a polyurethane or epoxy crack filler applied with a caulk gun. Clean the crack with a wire brush and compressed air first. Undercutting the crack edges with a chisel creates an inverted V-shape that gives the filler better mechanical grip.
For wider cracks (1/4 inch to 1 inch): use a hydraulic cement or concrete patching compound. Pack it in layers, allowing each layer to begin setting before adding the next.
For voids at slab edges: these often indicate the subgrade has washed away. Surface patching alone won’t fix this; the void needs to be filled (often with expanding foam or a slurry) before the patch will hold.
Step 3: Grind Down High Spots or Apply Self-Leveling Compound
High spots from differential settlement: An angle grinder with a diamond grinding cup wheel removes raised edges that create trip hazards. This is a surface correction only and doesn’t address underlying settlement, but it eliminates the immediate safety risk. Grinding works best when the height difference is under 3/4 inch.
Low spots and surface irregularities: Self-leveling compound is a pourable concrete product that flows into low areas and cures to a flat surface. It’s effective for cosmetic leveling of minor surface irregularities. Pour it into the low area, spread with a trowel if needed, and allow full curing time before driving on it.
Key Takeaway Grinding removes material from high spots. Self-leveling compound adds material to low spots. Neither addresses the root cause of settlement; they’re surface corrections that buy time or finish a repair, not stand-alone solutions.
Step 4: Correct Drainage and Seal the Surface
This is the step that separates repairs that last from repairs that fail. If water is still moving under your slab, settlement will return.
Drainage corrections to consider: regrade soil at driveway edges so water flows away from the slab, install channel drains at low points where water collects, extend downspouts so roof water discharges well away from the driveway, and check that expansion joints are clear and not allowing water to pool and infiltrate.
Once drainage is corrected and repairs are complete, apply a concrete sealer to the entire surface. A penetrating silane or siloxane sealer protects against moisture infiltration, freeze-thaw damage, and surface staining. Reapply every 2-3 years in climates with significant weather variation.
Best Tools for Concrete Repair You’ll Actually Need
The right tools make the difference between a patch that holds and one that pops out in the first winter.
Tool
Use
Notes
Angle grinder with diamond cup wheel
Grinding high spots
Rent if you don’t own one
Cold chisel and hammer
Undercutting crack edges
Creates better filler adhesion
Wire brush
Cleaning cracks before filling
Remove all loose material
Caulk gun
Applying crack filler
Use with polyurethane filler
Trowel
Spreading patching compound
Margin trowel for tight areas
Self-leveling compound
Filling low surface areas
Follow manufacturer curing time
Concrete sealer + roller
Surface protection
Apply after all repairs cure
Safety glasses and gloves
Personal protection
Non-negotiable with grinders
Close-up of concrete repair tools laid out on a clean garage floor: a cold chisel, steel trowel, polyurethane crack filler tube, angle grinder with diamond cup wheel, and a bucket of self-leveling compound under bright overhead lighting
A common mistake is skipping the wire brush and compressed air step before applying crack filler. Dust and loose concrete prevent adhesion, and the filler will pull away from the crack edges within a season.
Understanding the Cost of Concrete Leveling
The cost of concrete leveling varies based on the method used, the number of panels affected, and the severity of the settlement. Polyjacking typically costs more per square foot than mudjacking, but the faster cure time and lighter material weight often justify the premium, especially in areas with ongoing drainage challenges. Surface grinding and crack filling are the most affordable options but only address surface-level problems. Full driveway replacement sits at the high end of the cost spectrum but may be the most economical choice over a 10-15 year horizon if the existing slab is structurally compromised.
Long-Term Cost-Benefit: Repair Now vs. Full Replacement Later
A settled slab that’s lifted today, with drainage corrected, typically holds for many years. The same slab left to deteriorate will likely need full replacement within a few years, at substantially higher cost. Factor in liability exposure from a documented trip hazard, and the case for early repair becomes even clearer. The Insurance Information Institute’s guidance on property liability notes that premises liability claims from falls are among the more common homeowner insurance incidents, and preventable ones.
If a professional assessment says the concrete is structurally sound and the settlement is under 2 inches, repair almost always wins on cost. If the concrete is compromised, get a replacement quote alongside the repair quote and compare the 10-year total cost of each path.
Climate, HOA Rules, and Permitting: What to Check First
Permitting: Many municipalities require a permit for driveway work that involves breaking and replacing concrete or altering drainage patterns. Surface repairs and lifting typically don’t trigger permit requirements, but full replacement or significant drainage modifications often do. Check with your local building department before starting any major work.
HOA requirements: If your home is in a master-planned community, your HOA likely has specifications covering driveway materials, finishes, and approved contractors. Some HOAs prohibit asphalt millings as a base material or require specific concrete finishes. Review your CC&Rs and submit any required approval requests before signing a contractor agreement.
Climate-specific considerations: In freeze-thaw climates, any repair that leaves water infiltration paths will fail faster. Expansion joints must be maintained and kept clear. In hot, dry climates, concrete expansion from heat is the bigger concern; ensure expansion joints are properly spaced and intact. In areas with heavy clay soils, drainage correction is especially critical because clay retains water and swells, pushing slabs upward and then contracting to create voids as it dries.
Pro Tip Before any driveway project, a five-minute call to your local building department and a review of your HOA documents can save you from a costly compliance problem after the work is done.
Frequently Asked Questions
How much does it cost to fix an uneven driveway?
The cost of concrete leveling varies based on the repair method, the size of the settled area, and local labor rates. Mudjacking typically costs less upfront than polyjacking, but polyurethane foam lasts longer and adds less weight to the subgrade. Full slab replacement costs significantly more than either lifting method. For an accurate estimate specific to your driveway's condition, request a quote from a local contractor rather than relying on national averages.
Can I level my driveway myself?
Minor cracks and small surface dips can be addressed with DIY crack filler, a chisel, a trowel, and self-leveling compound. However, sunken concrete slabs caused by subgrade settlement or void filling beneath the surface require professional equipment like mudjacking rigs or polyjacking foam injectors. Attempting to lift a settled slab without the right tools can worsen structural damage. Assess the severity first, if slabs have dropped more than an inch, call a professional.
Is it better to mudjack or polyjack a driveway?
Polyjacking vs mudjacking comes down to your priorities. Mudjacking uses a cement-based slurry pumped under the slab and costs less upfront, but adds significant weight and takes longer to cure. Polyjacking injects lightweight polyurethane foam that expands to fill voids, cures in under an hour, and resists moisture better over time. For driveways with drainage issues or freeze-thaw cycle exposure, polyjacking generally delivers better long-term results despite the higher initial cost.
Can you pour self-leveling concrete over existing concrete?
Yes, self-leveling compound can be applied over an existing concrete slab when the surface has minor dips, low spots, or uneven sections without major structural failure. The existing slab must be clean, free of loose material, and primed before application. Self-leveling compound is not a structural fix, it won't correct settlement caused by subgrade failure or voids beneath the slab. For those problems, slab lifting or replacement is the correct solution.
Uneven driveways rarely fix themselves, and the longer settlement goes unaddressed, the more expensive the solution becomes. Kingdom Paver has spent over a decade helping homeowners in the Katy and Cypress areas get driveway repairs done right the first time, with proper drainage correction and quality construction built to last. Contact Kingdom Paver today for a site assessment and find out exactly what your driveway needs.