Assess Your Backyard and Define the Construction Area
The first step in any backyard construction project is understanding what you’re working with.
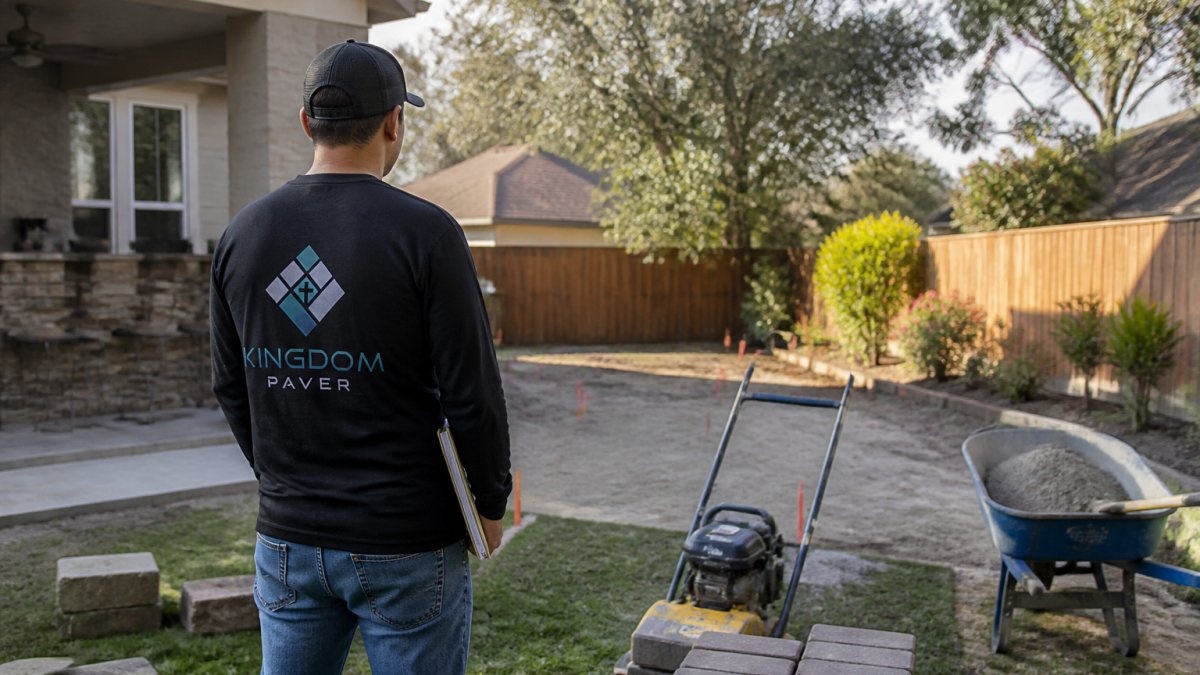
Homeowner standing in backyard with measuring tape and clipboard, examining the yard layout with trees, landscaping, and existing structures visible in the background
Define your construction area clearly.
Document existing conditions before anything changes. Take dated photographs from multiple angles of grass, plants, fences, and nearby structures, they protect you in disputes and help plan restoration once construction ends.
Pro Tip Walk your property at different times of day. Morning light reveals drainage patterns. Afternoon heat shows which areas dry fastest. This information helps contractors plan grading and water management.
Measure, Mark, and Document Your Project Footprint
Accurate measurements save time and money. Mark the exact dimensions of your construction area and record them, noting distances from property lines, existing structures, and utility boxes, these become your baseline for the entire project.
Mark your project footprint with visible markers, spray paint on grass, chalk on pavement, string and stakes for larger areas. Bright, clear marks prevent mistakes and extra costs.
Document the measurements in writing. Sketch your yard layout, construction area, distances to property lines, and locations of trees or structures to protect, then share it with contractors. Clear documentation prevents misunderstandings.
Key Takeaway Measure twice, mark once. Spend an extra hour getting measurements right. This single step prevents most construction delays.
Underground Utility Marking Before Digging
Before any digging, you must locate underground utilities. Hitting a water, gas, or electrical line creates danger, expense, and liability, and the process is standardized and usually free.
Start with 811
In the United States, the national call-before-you-dig number is 811. Call 811 or submit a request through your state’s 811 center at least two to three business days before breaking ground, some states require more notice, so confirm your window. The 811 center notifies member utility companies (electric, gas, water, sewer, telecom, and others) with lines in the area, and they send locators to mark their facilities. The service is free to homeowners, and calling before you dig is required by law in every state.
Call 811 before you dig, national call-before-you-dig resource
Public lines vs. private lines
This is the part most homeowners miss. 811 locates public utilities, lines owned by the utility companies up to the meter or demarcation point. It does not locate private lines on your side of the meter: sprinkler systems, landscape lighting, pool and spa lines, septic lines, gas lines to an outdoor grill or fire pit, electric lines to a detached shed or garage, and invisible fence wires. You are responsible for those. Hire a private locating company or a contractor with ground-penetrating radar (GPR) or electromagnetic locating equipment if you know or suspect private lines are in the work zone, skipping this is how homeowners hit their own sprinkler main or septic line.
Read the markings correctly
The 811 color code is standardized by the American Public Works Association (APWA) and used nationwide:
Color
Utility type
Red
Electric power lines, cables, conduit, and lighting cables
Yellow
Gas, oil, steam, petroleum, or gaseous materials
Orange
Communications, alarm, signal lines, cables, or conduit
Blue
Potable water
Green
Sewer and drain lines
White
Proposed excavation area (you mark this)
Pink
Temporary survey markings
Purple
Reclaimed water, irrigation, and slurry lines
Before you call 811, pre-mark the dig area with white paint, flags, or stakes so locators know where to focus. Vague or missing white marks are the most common reason a locate ticket comes back incomplete.
Respect the tolerance zone
Every state defines a tolerance zone around each marked utility, commonly 18 to 24 inches on either side of the mark, per state law. Inside that zone, no mechanized digging: hand-dig with a blunt-edged shovel, carefully and progressively. If you expose a line, stop and confirm with the utility owner before proceeding. Never assume a line runs straight between two marks; lines curve, jog, and change depth.
Keep the ticket and the marks valid
A locate ticket expires, typically in 10 to 21 days depending on the state. If your project runs longer, or paint fades or flags are knocked over, request a refresh before digging resumes. Take dated photos of every mark and keep your ticket number; if a line is damaged despite following the rules, a valid ticket and photos protect you in a damage claim.
Watch Out Digging without calling 811 can result in serious injury, property damage, and legal liability, and in many states it also means you pay for the repair. The call is free. Hitting a gas line or fiber optic cable can cost thousands of dollars plus potential injury. Call 811, pre-mark in white, and hand-dig inside the tolerance zone.
Clear Vegetation, Debris, and Obstacles from Your Work Zone
A clean work zone keeps the project moving.
Decide what to do with removed vegetation, compost clippings and small branches or haul everything away. If a large tree is removed, clarify before work starts whether the wood gets chipped for mulch or hauled off.
Identify obstacles in the work zone. Fences, sheds, decorative structures, and garden beds all affect the project, some can be temporarily removed, others must stay.
Protect landscaping and trees outside the work zone. Mark them clearly, wrap trunks with protective padding if heavy equipment will pass nearby, and move potted plants and garden decorations away from the construction area.
How to Prepare Ground for a Paver Patio
Paver patios require proper ground preparation to last. The foundation matters more than the pavers themselves. A patio that fails almost always fails because of what’s underneath it, not because of the pavers on top.
Start with soil and drainage assessment
Before removing a single shovel of dirt, understand your soil. Dig a test hole about 12 inches deep and fill it with water: draining within a few hours means reasonably good drainage; standing for a day or more means clay-heavy soil that needs a thicker base and possibly drainage. For anything beyond a small patio, a professional soil test (often available through your state’s cooperative extension service for a modest fee) tells you texture, pH, and whether to amend.
For a typical paver patio, excavate enough for the paver thickness plus bedding layer plus compacted base. A common rule of thumb is 6 to 8 inches of total excavation for a standard 2 3/8-inch paver on a 1-inch bedding layer over a 4- to 6-inch compacted base, deeper in cold climates where frost heave is a concern, and deeper still for driveways or heavy loads. Remove topsoil and organic material completely; organic matter decomposes and causes settling.
Build and compact the base in lifts
A proper base is compacted in lifts, typically 2 to 4 inches at a time, not dumped in one thick layer. Each lift is watered to near-optimum moisture and compacted with a plate compactor or vibratory roller before the next goes down, targeting 95% compaction or better, verified with a density test on larger jobs. Loose or under-compacted base is the single biggest cause of pavers that sink, shift, and crack within a few years, if your contractor skips lift compaction, the patio will fail regardless of paver quality.
Grade for drainage
Grade the base so water runs away from the house and any structures. A common slope is about 1/4 inch per foot (roughly 2%) away from the building, keeping water from pooling against the foundation or standing on the patio. Check the slope with a level and straightedge, not by eye. Where the patio meets the house, keep the finished paver surface at least 1 to 2 inches below the siding or threshold to keep water out.
Control erosion and sediment during construction
Bare, excavated ground erodes fast. Before disturbing soil, put sediment control in place: a silt fence or sediment barrier downslope of the work area, straw wattles or fiber rolls along the perimeter, and a stabilized gravel entry where equipment enters and exits. Never let runoff carry sediment into storm drains, ditches, or a neighbor’s yard, many municipalities require erosion and sediment control on permitted projects, and violations can trigger fines and stop-work orders. Cover soil and base stockpiles with tarps when rain is forecast.
Protect the subgrade and finish
Keep equipment off the finished subgrade where possible, and re-compact any disturbed area. Use edge restraints (plastic or concrete) on the perimeter to keep pavers from spreading. Sweep polymeric sand into the joints once pavers are set, and cure per the manufacturer’s instructions. A patio built on a properly excavated, lift-compacted, correctly graded base with erosion control typically performs for decades; one on loose soil with no sediment control often shows movement within the first few seasons.
Best For Homeowners who want a patio that lasts 15-20 years without sinking or cracking. Proper ground preparation, soil assessment, lift compaction, correct grading, and erosion control, is the difference between a patio that fails in five years and one that performs for decades.
Backyard Construction Access Planning and Material Delivery Routes
Plan how equipment and materials will enter your property. Identify the best gate or driveway opening, confirm the path is wide enough for trucks and equipment, and remove obstacles like low branches or parked cars.
Coordinate delivery timing with your contractor so materials arrive when workers are ready to use them, piles sitting for weeks create hazards and block access, so discuss schedules before work starts.
Protect your driveway and landscaping during delivery.
Plan where workers will park. If your driveway isn’t available, identify a nearby spot and tell workers before they arrive, a simple conversation prevents delays and frustration.
Create Your Backyard Construction Preparation Checklist and Timeline
A project checklist keeps everything organized.
Create a realistic timeline.
Schedule tasks in the right order. Mark utilities before clearing vegetation. Assess ground conditions before deciding on patio depth. Coordinate with your contractor about timing.
Task
Timeline
Responsibility
Contact utility locating service
Day 1
Homeowner
Utility marking completed
Days 3-5
Utility company
Clear vegetation and debris
Days 5-10
Homeowner or contractor
Assess soil and drainage
Days 8-12
Contractor
Measure and mark project area
Days 5-7
Homeowner
Final walkthrough with contractor
Day 10-14
Both
Prepare ground (if needed)
Days 12-21
Contractor
Construction ready
Day 21+
Complete
Document your decisions in writing. Create a simple project plan covering the timeline, who’s responsible for each task, and the expected outcome, then share it with your contractor.
Preparing your backyard properly transforms the entire construction experience.
At Kingdom Paver, we’ve seen countless projects succeed or struggle based on preparation quality.
Ready to transform your backyard? Contact Kingdom Paver to discuss your project.
Frequently Asked Questions
How do I prepare my backyard for construction?
Start by assessing your entire yard and identifying the construction area. Measure and mark the project footprint clearly, call for utility marking before any digging, remove vegetation and debris, protect existing landscaping you want to keep, plan equipment access routes, and check local permit requirements. Document everything with photos before work begins. A professional contractor like Kingdom Paver can guide you through each step and coordinate with utility locators to ensure safe excavation.
What should I remove from my yard before construction starts?
Clear grass, weeds, roots, rocks, and surface debris from the work zone. Remove or relocate garden beds, outdoor furniture, planters, and decorative items. If trees or large shrubs are in the construction area, decide whether to remove or protect them before the crew arrives. Move children’s play equipment, pet toys, and any stored items. Trim low-hanging branches that could interfere with equipment access. Document what was removed with photos in case you need to restore landscaping later.
How do I mark underground utilities before digging?
Contact your local utility locating service (often called Call Before You Dig or similar) at least 3-5 days before construction starts. Provide them with your address and project details. Utility locators will mark gas lines, electric lines, water lines, and sewer lines with colored paint or flags. Mark these locations clearly on your project plan and communicate them to your contractor. Never dig without this step, hitting utilities can be dangerous and costly.
Do I need a permit for backyard construction?
Permit requirements depend on your project type and local codes. Most patios, walkways, and driveways require permits in residential areas. Check with your local building department or city code office before starting. Some projects may also require property line surveys or easement verification. A reputable contractor can advise you on what permits apply to your specific project and help you understand the process. Skipping permits can create problems when selling your home or filing insurance claims.