
Last Updated: November 11, 2026
Quick Summary
Paver base compaction presses base material into a tight, dense layer that spreads weight and builds load-bearing capacity, so pavers stay flat instead of shifting, cracking, or sinking. It works by forcing air and space out of the stone, raising soil density. Build the base in 2 to 3 inch lifts and compact each one before adding the next.
- Spread roughly 25 to 30 percent more loose stone than your target compacted depth.
- Never compact the full base depth in one pass; use lifts of 2 to 3 inches.
- Base material should be damp, not wet, before each compaction pass.
- Compact paver sand after the pavers are set, using two gentle passes with a pad.
- Sunken mid-patio sections usually point to thick lifts or skipped inter-lift compaction.
Table of Contents
- Why Paver Base Compaction Decides How Long Your Pavers Last
- Choosing the Right Paver Base Material for Your Soil
- How Compaction Builds Load-Bearing Capacity and Soil Density
- How Much Paver Base Do I Need? Calculating Depth and Lift Thickness
- How to Use Paver Base: Layer-by-Layer Compaction Steps
- Should You Compact Paver Sand? Settling, Joint Sand, and Surface Finish
- Compaction Mistakes That Cause Settlement, Sinking, and Trip Hazards
- Get Your Paver Base Built Right the First Time
- Frequently Asked Questions
Why Paver Base Compaction Decides How Long Your Pavers Last
A paver patio is only as strong as the ground beneath it. That’s the short answer. Paver base compaction is the single step that decides whether your patio stays flat for decades or starts rocking within a few seasons.
Here’s the part most guides get wrong: pavers don’t fail because of the pavers. They fail because the base underneath them was never compacted to the right density.
Proper compaction presses the base material into a tight, dense layer. That layer spreads the weight of everything above it. Skip it, and the soil settles unevenly, the pavers shift, and you get cracks, sunken corners, and trip hazards.
Below, we’ll walk through exactly how compaction works, how deep your base needs to be, and the mistakes that cause patios to sink.
Choosing the Right Paver Base Material for Your Soil
The right paver base material depends on your soil. For most residential patios and walkways, a crushed stone mix called dense graded aggregate is the standard choice. It locks together under pressure and holds its shape.
But soil type changes the equation. Clay-rich soil holds water and swells, so it needs extra attention to drainage and depth. Sandy soil drains well but can shift more easily. In both cases, a layer of geotextile fabric between the soil and the base helps keep the two from mixing.
Dense Graded Aggregate vs. Open Graded Base
Dense graded aggregate contains a mix of stone sizes, from fine dust up to larger pieces. That blend compacts into a hard, stable surface. Open graded base uses uniform stone with no fines, so water flows straight through it. Open graded systems work well where drainage is the top concern. Dense graded wins for load-bearing strength.
How Compaction Builds Load-Bearing Capacity and Soil Density
Compaction works by forcing air and space out of the base material. Fewer voids mean higher soil density. Higher density means the base can carry more weight without moving. This is what engineers call load-bearing capacity, and it’s the whole point of the process.
Think of it this way. A loose pile of gravel shifts under your foot. A compacted layer of the same gravel acts almost like concrete. The material didn’t change. The density did.
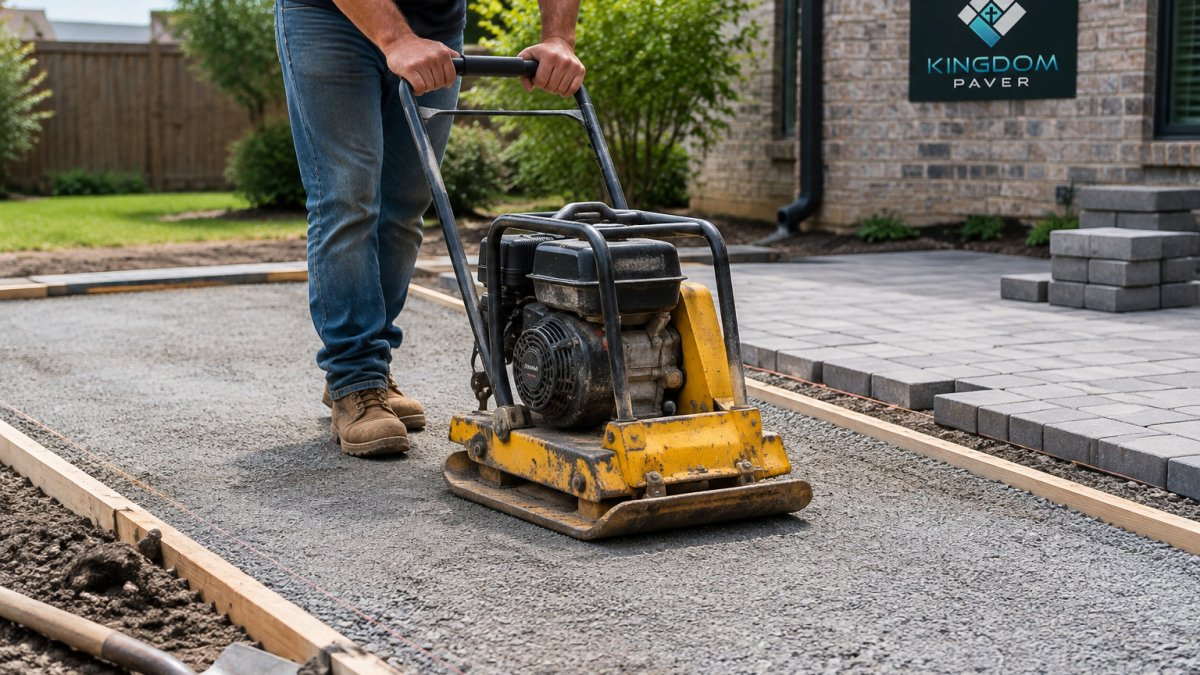
Vibratory compaction is the method typically used to make this happen. A plate compactor delivers rapid, downward force that rearranges the stone particles into a tighter, interlocking pattern.
How Much Paver Base Do I Need? Calculating Depth and Lift Thickness
Base depth requirements vary by project. Driveways generally need more base than patios and walkways because they carry vehicle weight. But here’s the catch: that number is the compacted depth, not the loose depth you spread.
Loose base material shrinks as it compacts. A common rule of thumb is to spread roughly 25 to 30 percent more than your target depth. So a 4-inch finished layer starts as about 5 to 5.5 inches of loose stone.
This is where lift thickness matters. Never try to compact the full depth in one pass. Build the base in lifts of 2 to 3 inches. Compact each lift before adding the next.
If you want to understand what drives the cost of a full installation, see our guide on what factors affect the cost of paver installation.
How to Use Paver Base: Layer-by-Layer Compaction Steps
Knowing how to use paver base correctly comes down to patience. Each layer needs to be spread, leveled, and compacted before the next one goes down. Here is a general sequence for compacting a paver base.

- Excavate to the right depth. Dig out enough soil to fit your base plus the paver thickness.
- Lay geotextile fabric. This separates soil from stone and slows settling.
- Spread the first lift. Add 2 to 3 inches of base material and rake it even.
- Compact the lift. Run the plate compactor in overlapping passes until the surface stops moving.
- Repeat for each lift. Add and compact until you reach the target depth.
- Check for flatness. Use a straightedge to confirm the surface is level before setting pavers.
Managing Moisture Content Before Each Pass
Moisture content is the detail most crews skip, and it matters. Base material that’s bone dry won’t bind. Material that’s soaking wet turns to mud and won’t compact either.
The sweet spot is damp, not wet. Squeeze a handful of the aggregate. It should hold its shape without dripping water. If it crumbles, add a light mist. If it’s soggy, let it dry before you run the compactor. Getting this right before each pass is one of the biggest differences between a base that holds and one that fails.
Here is the layer-by-layer sequence for compacting a paver base correctly.
| Step | What to do |
|---|---|
| 1 | Excavate to fit base plus paver thickness |
| 2 | Lay geotextile fabric to separate soil from stone |
| 3 | Spread first lift of 2 to 3 inches, rake even |
| 4 | Compact with overlapping passes until surface stops moving |
| 5 | Repeat each lift until target depth is reached |
| 6 | Check flatness with a straightedge before setting pavers |
Should You Compact Paver Sand? Settling, Joint Sand, and Surface Finish
Yes, you should compact paver sand, but after the pavers are set, not before. Joint sand fills the gaps between pavers and locks them together. Once you sweep sand into the joints, a pass with the compactor settles it into place and firms up the whole surface.
The type of sand matters too. Polymeric sand hardens when wet and resists washout better than plain sand. For proper drainage, choose the right joint sand for your surface. Our guide on the best sand for paver joints to improve water runoff covers this in detail.
Watch out: over-compacting can crack pavers or force sand out of the joints. Use a pad on the compactor and make two gentle passes, not a heavy pounding.
Compaction Mistakes That Cause Settlement, Sinking, and Trip Hazards
Settlement almost always traces back to a short list of repeat mistakes, and each one leaves a different fingerprint in the finished patio. Learning to read those fingerprints is how you diagnose a failure instead of guessing at it.
The Four Mistakes That Cause Most Failures
Compacting too thick in one pass. If a crew spreads 6 inches and runs the plate compactor over it once, the top inch or two reaches density while the bottom stays loose. The surface feels hard underfoot, so it passes a casual inspection. Years later the loose zone consolidates and the pavers drop.
Skipping compaction between lifts. Every lift has to be compacted before the next one goes on. Stacking loose lifts and compacting only at the end traps loose material in the middle of the base.
Getting moisture wrong. Too dry and the stone never locks; too wet and the compactor pumps water instead of densifying stone. Either way the base looks finished and is not.
Compacting only the center of the pad. Edges and corners get fewer passes because the compactor is awkward to maneuver there. Those are exactly the spots where pavers rock and edges spall.
Over-Compaction: Real Risk or Myth?
A lot of homeowners worry about over-compacting the base, and the honest answer is that it is hard to over-compact a properly built granular base with a walk-behind plate compactor.
On the paver surface, too many heavy passes, especially without a pad, can crack pavers, chip edges, and drive joint sand out of the joints. That is surface damage, not base failure, and it is the over-compaction most people actually experience.
Beneath the base, over-compaction matters on clay-rich subgrade. Running a heavy vibratory compactor directly on saturated clay can create a smeared, over-consolidated crust that traps water and prevents proper drainage.
Watch out: if a base feels rock hard but pavers still rock at the edges, the problem is usually coverage, not over-compaction, the compactor never made enough overlapping passes along the perimeter.
Diagnosing Which Mistake You Are Looking At
Sunken sections in the middle of a patio usually point to thick lifts or skipped inter-lift compaction. Rocking pavers along edges and corners point to incomplete pass coverage. Widespread settling after a wet season points to moisture problems or a base that was too shallow for the soil. Localized dips near downspouts or grade changes point to drainage, not compaction.
If your pavers have already sunk, our step-by-step guide on how to fix sunken paver patio sections like a pro walks through the repair. And if you want to prevent it from happening in the first place, read our complete guide on how to prevent sinking pavers.
Get Your Paver Base Built Right the First Time
Compaction isn’t glamorous work. It’s dust, noise, and repeated passes with heavy equipment. But it’s the difference between a patio that lasts and one you’re repairing in three years.
Kingdom Paver has ten years of experience across patios, driveways, and walkways, and also builds custom outdoor kitchens and fire pits for families who want a backyard made for hosting.
If you’d rather not gamble on a base that fails, let a crew that does this every day handle it. Our article on the benefits of professional hardscape installation explains what you get when a pro takes the lead.
Contact Kingdom Paver to discuss your outdoor space.
Frequently Asked Questions
How much will pavers settle after compacting?
A correctly compacted base should settle very little. Most movement happens in the first few weeks as joint sand works into the gaps, typically a fraction of an inch. If you see dips deeper than about 1/4 inch, the cause is usually an under-compacted lift or a base spread too thick in one pass. Compacting in lifts of 2 to 4 inches and running several passes with a plate compactor gives you a base that holds its grade instead of slowly sinking under foot traffic and vehicle loads.
Should you compact paver sand?
Yes, but differently from the base. The bedding layer of sand should be screeded flat and left loose, roughly 1 inch deep, so pavers settle into it evenly. Compacting it beforehand packs it down and removes the cushion the pavers need. After the pavers are laid, though, run a plate compactor over the surface with a pad attached to seat them and drive joint sand into the gaps. That final pass is what locks the interlocking pavers together.
How can you tell if a paver base is properly compacted?
Watch the plate compactor. Once the base stops visibly settling and the machine starts bouncing or hopping rather than thumping flat, that lift is done. You can also press a screwdriver or a stiff probe into the surface; it should resist with firm pressure rather than push in easily. A properly compacted dense graded aggregate feels like a hard, tight crust. If the surface still shifts under your boots or the compactor leaves deep ruts, add moisture or another pass before moving on.
Can poor base compaction cause uneven pavers?
It is the most common cause. When the subgrade or base is loose, the pavers above it move as the ground shifts, which shows up as rocking stones, widened joints, and low spots where water pools. Over time those low spots become trip hazards and cracked edges. Clay-rich soil makes it worse because it holds water and swells. Professional paver base compaction, done in thin lifts with the right moisture, is what prevents that cycle before the first paver goes down.


