
Table of Contents
- Identify the Cause of Water Pooling on Your Driveway
- Driveway Drainage Solutions for Standing Water
- How to Fix Uneven Driveway Through Regrading
- Install Trench Drains to Redirect Water
- Trench Drain Installation Cost and Budget Considerations
- Alternative Solutions: Permeable Pavers and Dry Creek Beds
- When to Hire a Professional Contractor
- Maintenance and Seasonal Care
Last Updated: August 25, 2026
Identify the Cause of Water Pooling on Your Driveway
Water pooling on your driveway accelerates pavement deterioration, creates safety hazards, and signals underlying drainage failures. Before fixing the problem, identify its cause: inadequate slope, poor soil composition, or missing drainage infrastructure.

Site Assessment and Soil Composition
Examine the soil beneath your driveway. Clay-heavy soils shed water and cause pooling. Sandy soils drain quickly but offer less support. The ideal is a balanced mix with adequate compaction.
Walk your driveway after rain and note where water collects. Single-point pooling suggests a localized elevation problem. Widespread pooling indicates systemic drainage failure. Press a metal rod into the soil at the pooling location, if it penetrates easily, the base may be inadequately compacted. If it meets resistance quickly, the problem is likely slope or surface drainage.
Examine the surrounding landscape. Does water from higher ground flow toward your driveway? Are downspouts directing runoff toward the pavement? This reveals whether pooling stems from your driveway’s design or external runoff overwhelming your drainage capacity.
Elevation and Slope Problems
Proper driveway grading requires a minimum slope of 1-2% away from structures, a 1-2 inch drop per 10 feet of length (fhwa.dot.gov). Most pooling problems stem from insufficient slope due to inadequate original grading or settling over time.
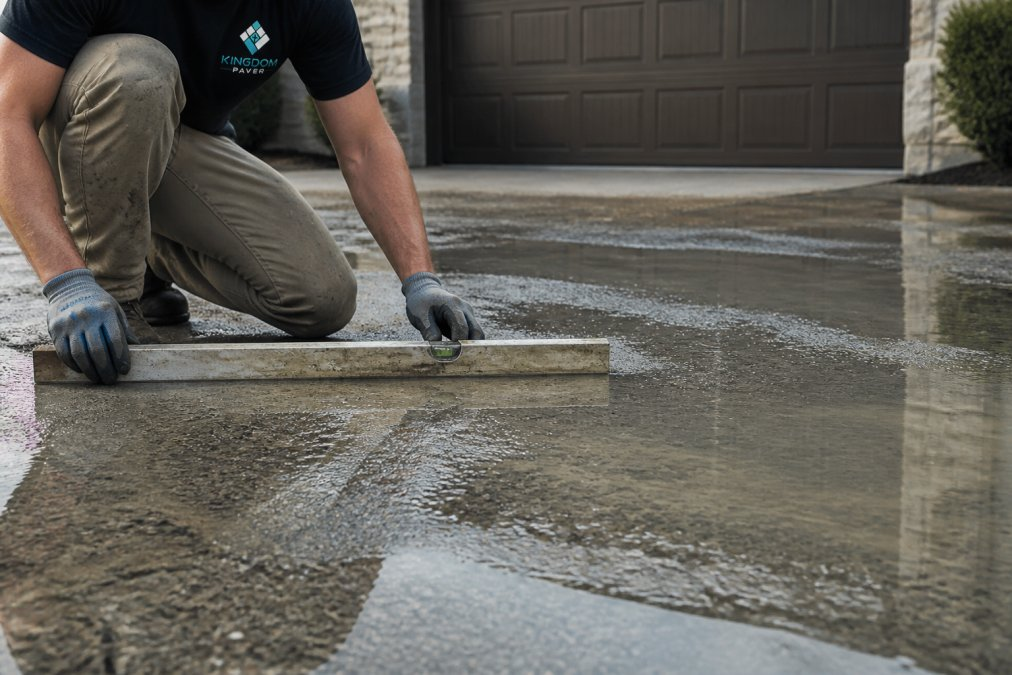
Use a level and measuring tape to check your actual slope. Place a 10-foot straight edge across the pooling area and measure the vertical distance between high and low points. Less than 1 inch of drop over 10 feet means your slope is too shallow.
Soil naturally settles, especially in the first few years after installation. If your driveway was marginal to begin with, settling can eliminate slope entirely. Minor elevation issues may respond to leveling compounds or regrading. Severe problems require excavation and base preparation.
Driveway Drainage Solutions for Standing Water
Fixing water pooling requires matching the solution to the cause. A simple slope correction works for elevation issues. A French drain or catch basin becomes necessary when site conditions force water toward your driveway.
French Drains and Sub-Surface Drainage
A French drain intercepts water before it reaches your driveway. This system consists of a perforated drainage pipe surrounded by gravel, installed in a trench below the surface. Water enters through perforations and flows downslope to a lower elevation or catch basin.
French drains work best when water approaches from higher ground or when groundwater is the problem. They’re less effective for fixing localized low spots in the driveway itself.
Install a French drain parallel to the driveway edge on the upslope side. Dig a trench 12-18 inches deep and 6-12 inches wide. Lay 2-3 inches of gravel at the bottom, then place 4-inch perforated drainage pipe. Surround the pipe with more gravel and cover with landscape fabric to prevent soil from clogging the gravel layer. Backfill with soil.
The drainage pipe must slope downhill at least 0.5-1% grade toward the outlet (fhwa.dot.gov). If your yard is flat, the outlet needs to be significantly lower than the installation point, or you’ll need a sump pump.
Catch Basins and Surface Runoff Management
A catch basin collects water pooling on your driveway and diverts it underground through drainage pipe. Unlike a French drain, which intercepts water before it reaches the surface, a catch basin handles water already pooling.
Install a catch basin at the lowest point where water pools. Connect it with 4-inch perforated drainage pipe to a discharge location at least 10 feet away from your foundation and driveway. The pipe must slope continuously downhill.
Catch basins require maintenance. Debris, sediment, and leaves accumulate and can clog the outlet pipe. Plan to clean the basin twice yearly, especially after heavy rain or wind events.
How to Fix Uneven Driveway Through Regrading
Regrading is the most common solution for water pooling caused by elevation loss. The process involves removing the top layer of pavement, adjusting the base to restore proper slope, and reinstalling the surface.
Step 1: Assess Current Grade and Elevation
Measure your driveway’s current slope across the pooling area using a 10-foot straight edge and level. Calculate the slope percentage: (vertical drop ÷ length) × 100. A driveway with 1 inch of drop over 10 feet has a 0.83% slope, borderline acceptable. A driveway with 0.5 inches of drop has a 0.42% slope, too shallow and likely to pool.
Mark the areas that need adjustment. If the low spot is only 2-3 feet wide, leveling compound may work. If the problem spans the entire driveway width or length, regrading is necessary.
Step 2: Excavate and Prepare the Base
Remove the pavement from the problem area using a jackhammer or excavator. Once pavement is removed, assess the base for compaction issues, soft spots, or areas where base material has washed away. Remove unstable base material and replace it with compacted gravel or recycled asphalt.
Compact the new base material in 2-inch lifts using a plate compactor (astm.org). Each lift should be firm and stable, you shouldn’t be able to leave a footprint. Under-compacted base material will settle again within months, recreating the pooling problem.
Step 3: Apply Leveling Compounds and Backfill
For minor elevation issues, self-leveling concrete mix can restore slope without full removal. These compounds work best on small areas (under 50 square feet) with elevation losses under 2 inches.
For larger areas or deeper elevation loss, use compacted recycled asphalt or gravel to build up low spots. Each layer should be 2 inches thick and compacted thoroughly. Grade the backfill to create continuous slope away from the driveway. Once the base is properly graded, apply the new surface material.
Regrading is where many DIY attempts fail. Inadequate compaction of the base is the leading cause of re-pooling within 2-3 years. If you’re not confident in your compaction technique, hiring a professional makes sense. Kingdom Paver can handle regrading with proper compaction equipment and expertise to ensure the fix lasts.
Install Trench Drains to Redirect Water
A trench drain (also called a linear drain or slot drain) is a continuous drainage channel that collects water across your driveway’s width and directs it away. Unlike catch basins, which handle water at a single point, trench drains intercept water along a line.

Planning Your Trench Drain Layout
Trench drains work best when installed perpendicular to the direction water flows. If water pools in the center of your driveway, install the drain across the center. If water flows toward one edge, install the drain parallel to that edge.
The drain should slope continuously downhill toward the outlet at a minimum of 0.5% grade (0.5 inches of drop per 10 feet). Over a 20-foot run, you need at least 1 inch of elevation change from inlet to outlet.
Plan the outlet location before starting installation. The outlet must be at least 10 feet from your foundation and driveway, ideally downslope where water flows away naturally. If your yard is flat, you’ll need a dry well or sump pump system.
Installation Process and Best Practices
Excavate a trench 6-8 inches wide and 12-18 inches deep along your planned drain line. The trench bottom must slope continuously toward the outlet. Lay 2-3 inches of gravel at the trench bottom, then place 4-inch perforated PVC drainage pipe with perforations facing down. Surround the pipe with 3-4 inches of gravel on all sides.
Cover the gravel with landscape fabric to prevent soil from clogging the drain. Backfill the trench with soil and compact in 2-inch lifts. Connect the outlet end of the drainage pipe to a discharge location such as a dry well, storm drain system, or daylight drainage where the pipe exits at a lower elevation.
Trench Drain Installation Cost and Budget Considerations
Material costs depend on trench length and pipe diameter. A typical residential installation using 4-inch PVC pipe costs materials for roughly 50-100 linear feet of drain. Labor is the larger component, especially if the drain runs under existing pavement.
DIY installation is possible if you have excavation equipment or can rent it. The main challenges are maintaining proper slope and ensuring the outlet is actually downhill. Many DIY attempts fail because the drain outlet ends up at the same elevation as the inlet.
Professional installation ensures proper slope, compaction, and outlet configuration. Kingdom Paver can design and install trench drains that actually solve your pooling problem. The cost difference between a failed DIY attempt and professional installation that works is usually smaller than it appears.
The most common trench drain failure is improper slope or inadequate outlet elevation. If your outlet is not lower than your inlet, water won’t flow. Before committing to installation, verify that your outlet location is genuinely downslope using a level and measuring tape to confirm elevation difference.
Alternative Solutions: Permeable Pavers and Dry Creek Beds
If regrading or trench drains don’t fit your situation, permeable pavers and dry creek beds offer alternatives that address pooling while enhancing your landscape.
Permeable Paving with Polymeric Sand
Permeable pavers allow water to drain through the surface rather than pooling on top. Water passes through the joints between pavers, through a permeable base layer, and into the soil below. This approach eliminates pooling if the base is properly designed.
Permeable pavers work best when your soil can absorb water (sandy or loamy soil rather than clay). Installation requires a 4-6 inch permeable base (typically recycled asphalt or gravel), then 2 inches of polymeric sand in the joints. Polymeric sand hardens when wet, locking pavers in place while remaining permeable.
Permeable pavers cost more than solid asphalt or concrete, but they solve the pooling problem permanently if installed correctly and improve stormwater management for your entire property.
Dry Creek Beds for Erosion Control
A dry creek bed is a landscape feature that doubles as a drainage channel. It consists of a shallow trench filled with gravel and river rocks, designed to look like a natural streambed. Water flows through the rocks and gravel, draining away from your driveway while adding visual interest.
Install a dry creek bed along the upslope edge of your driveway, sloping downhill away from the pavement. Line the trench with landscape fabric, then layer river rocks and gravel. Dry creek beds require minimal maintenance compared to catch basins or French drains and don’t clog because water flows openly through the rocks.
When to Hire a Professional Contractor
Regrading requires proper compaction equipment and expertise, inadequate compaction is the leading cause of re-pooling within 2-3 years. Trench drain installation under existing pavement requires cutting and careful slope management. Extensive drainage systems need proper design to ensure water actually flows downhill.
Professional contractors also handle permits and inspections. Some jurisdictions require permits for drainage work, especially if it involves connecting to municipal storm systems.
Kingdom Paver has 10 years of experience fixing drainage problems on driveways throughout the Katy and Cypress areas. We assess your specific situation, design a solution that matches your soil and site conditions, and handle installation with proper equipment and expertise. Most importantly, we are committed to delivering durable building solutions tailored to your specific needs.
The difference between a failed DIY attempt and professional installation is often smaller than expected. A failed DIY project might cost $500-1000 in materials plus your time, then require professional repair anyway. Professional installation from the start eliminates the risk of re-pooling and the frustration of a fix that doesn’t hold.
Maintenance and Seasonal Care
Once you’ve fixed water pooling, maintenance keeps the problem from returning. For regraded driveways, monitor the slope after heavy rain. If pooling returns within the first year, the base may be settling.
For French drains and trench drains, inspect the outlet after heavy rain to confirm water is flowing. If water isn’t flowing, the drain is clogged, flush the pipe with a garden hose.
For catch basins, clean the basin twice yearly. Remove leaves, sediment, and debris that accumulate at the bottom.
For permeable pavers, avoid using salt or harsh chemicals on the surface. Sweep regularly to prevent debris from compacting the joints.
For dry creek beds, rake the gravel annually to prevent compaction. Remove leaves and debris that accumulate.
Water pooling on your driveway signals a drainage problem that won’t improve on its own. Whether the cause is inadequate slope, poor soil composition, or missing drainage infrastructure, you have solutions ranging from simple regrading to comprehensive French drain systems. Kingdom Paver can assess your specific situation and design a fix that actually works. With 10 years of experience solving drainage problems in the Katy and Cypress areas, we know which solutions work for your soil type and site conditions. Contact Kingdom Paver for a professional assessment and a drainage solution that keeps your driveway dry year-round.
Frequently Asked Questions
Q: What causes water to pool on my driveway?
A: Water pooling occurs when your driveway lacks proper slope or elevation, or when soil composition prevents adequate drainage. Poor grading, compacted soil, and blocked surface runoff channels all contribute to standing water. A site assessment will reveal whether the issue stems from inadequate slope correction, soil permeability problems, or both. Standing water can lead to foundation damage if not addressed, making diagnosis the critical first step.
Q: What are the best driveway drainage solutions for standing water?
A: Effective solutions include installing trench drains or French drains for sub-surface drainage, regrading to improve slope, and managing downspout runoff away from the driveway. Permeable pavers with polymeric sand allow water to permeate rather than pool. For severe cases, catch basins and drainage pipes direct surface runoff to proper outlets. The best solution depends on soil type, driveway size, and the extent of pooling, a professional assessment determines which combination works best for your property.
Q: How much does trench drain installation cost?
A: Trench drain installation cost varies based on driveway size, soil conditions, and complexity. Factors affecting price include excavation depth, drainage pipe length, backfill materials, and labor. Simple installations may cost less than complex systems requiring significant regrading. For accurate pricing tailored to your specific driveway, contact Kingdom Paver for a detailed quote that accounts for your site's unique drainage challenges.
Q: Can I fix water pooling myself, or do I need a professional?
A: Simple solutions like clearing debris and extending downspouts can be DIY projects. However, regrading, trench drain installation, and leveling compound application require proper equipment, grading expertise, and knowledge of local permit requirements. Professional contractors ensure correct slope correction, proper compaction, and compliance with drainage standards. If pooling is severe or near your foundation, professional installation protects your home's structural integrity and ensures long-term results.
This article was written using GrandRanker


