
Table of Contents
- Why Patio Pavers Crack: The Root Causes
- Improper Base Preparation and Compaction
- Freeze-Thaw Cycles and Frost Heave Damage
- Drainage Failures and Excessive Moisture
- Heavy Vehicle Traffic and Load-Bearing Issues
- How to Repair a Cracked Paver
- How to Fix an Uneven Driveway
- Paver Patio Maintenance Tips for Long-Term Durability
- Frequently Asked Questions
Last Updated: September 4, 2026
Why Patio Pavers Crack: The Root Causes
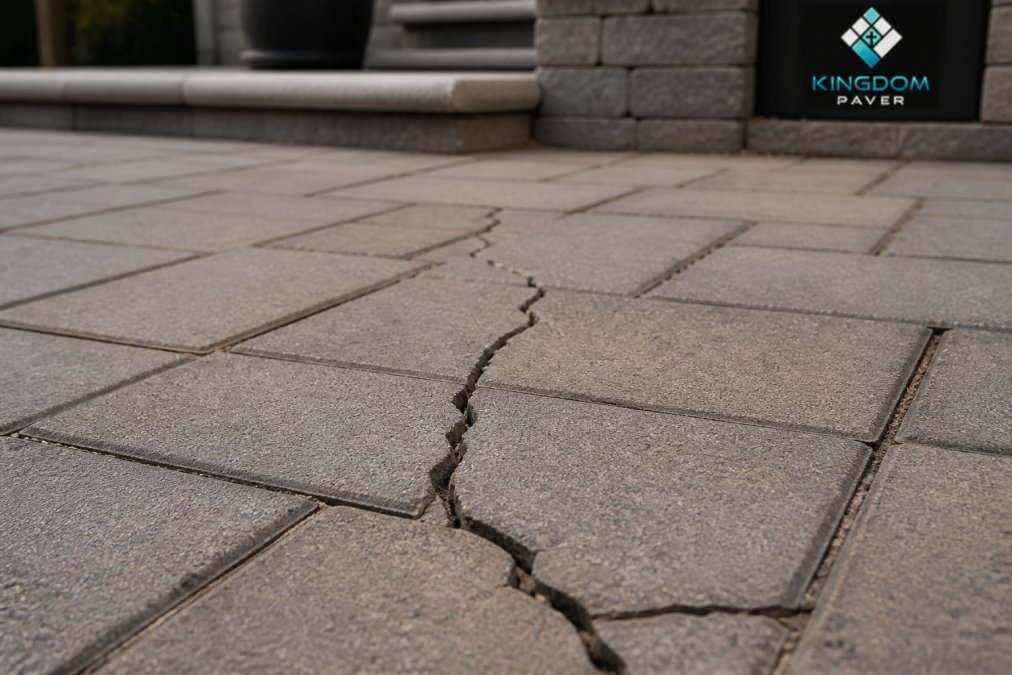
Patio pavers crack when the forces acting on them exceed the structural capacity of the paver itself or the base beneath it. In our decade installing driveways, patios, and walkways across the Katy and Cypress area, the Kingdom Paver team has seen that cracking is almost never a random event. It is the visible end result of a specific installation or environmental failure that could have been prevented.
The real question is not whether pavers crack, but why they crack, because the answer determines whether a simple replacement will hold or whether the same failure will repeat. Most homeowners assume a cracked paver means a defective product. In practice, the paver is usually the victim of what is happening underneath it. The most common culprits fall into a few categories: poor base preparation, freeze-thaw cycles, drainage failures, and loads the surface was never designed to carry. Below, we will walk through each cause and show you exactly how to identify, repair, and prevent the damage.
Replacing a single cracked paver without fixing the underlying base issue is a temporary fix. The new paver will likely crack within a season or two because the same force that broke the first one is still active.
Improper Base Preparation and Compaction
The leading cause of paver cracks is an inadequate sub-base that allows movement. A paver patio is only as strong as the compacted aggregate base beneath it, and when that foundation shifts, the pavers on top have nowhere to go but up, down, or sideways, which creates stress fractures.
A proper installation requires excavating to the correct depth and installing a layer of crushed aggregate, typically 4 to 6 inches for a patio and 8 to 12 inches for a driveway that will carry vehicles. Each layer must be compacted with a vibratory plate compactor, not just tamped down by hand. Many installations skip this step or rush it, and the result is settling that appears months later as cracked and uneven pavers.

The failure mode here is subtle. A base that is 80 percent compacted looks fine on installation day. It only reveals its weakness after rain saturates the ground and the first heavy object rolls across the surface. The paver bed then shifts unevenly, and the rigid concrete or clay paver, which has high crushing strength but almost no flexibility, snaps under the bending stress.
A common mistake is assuming that more sand solves a compaction problem. Joint sand and the bedding layer are for leveling and locking, not for structural support. If the aggregate base is weak, no amount of sand will save it. The fix is almost always to remove the affected section, re-excavate, add fresh aggregate, and compact it properly in lifts.
When repairing a section, compact the new base in 2-inch lifts rather than all at once. A vibratory plate compactor can only densify material near the surface, so thick single layers stay loose underneath and will settle later.
Freeze-Thaw Cycles and Frost Heave Damage
In climates that experience hard freezes, frost heave is a primary cause of cracked pavers. Water that seeps into the sub-base freezes, expands, and pushes upward with enough force to lift and crack the surface above it.
The freeze-thaw cycle is relentless. Each winter, moisture in the soil freezes and expands by roughly 9 percent in volume. When it thaws, it leaves voids that the next rain fills, and the cycle repeats. Over years, this repeated movement fatigues the pavers and breaks the bonds holding them in place.
The fix starts with proper drainage at the base level. A well-built paver installation uses a permeable aggregate sub-base that lets water drain away before it can freeze. Adding a geotextile fabric barrier between the soil and the aggregate prevents fine silt from migrating upward and clogging the drainage layer, which is a common contributor to frost damage.
Edge restraints also play a critical role here. When the ground freezes and shifts, pavers at the perimeter have nowhere to spread unless they are held firmly by a concrete or steel edge restraint. Without that restraint, the entire field of pavers can shift laterally, opening joints and creating the conditions for cracking. If you notice your patio edge lifting or spreading after winter, that is the first sign frost heave is at work.
Drainage Failures and Excessive Moisture
Poor drainage is a silent killer of paver patios, and it is often the hardest cause to diagnose because the damage appears far from the source of the water. Patio pavers crack when water accumulates beneath the surface, saturates the base, and causes it to lose load-bearing capacity.
When the soil beneath your patio becomes saturated, it behaves like a sponge. Walk on a wet sponge and it deforms; drive a vehicle over a saturated base and the pavers flex and crack. The excess moisture also creates hydrostatic pressure, which pushes upward against the pavers and can cause them to lift and break.
The most common drainage mistake is installing pavers without accounting for surface runoff. Patios need a slight slope, typically a 1 to 2 percent grade away from the house, to shed water quickly. Standing water on the surface is not just a nuisance; it is water that will eventually find its way through the joints and into the base.
If you see efflorescence, the white chalky residue on paver surfaces, it is a sign of chronic moisture in the base. The pavers themselves are not failing, but the installation is holding water it should be shedding.
Permeable pavers offer a solution for areas with poor natural drainage. These pavers have larger joints filled with open-graded aggregate that allows water to pass through to a prepared stone reservoir below. For homeowners dealing with persistent pooling, switching to permeable pavers in the affected zone can resolve the issue permanently.
Heavy Vehicle Traffic and Load-Bearing Issues
Not all pavers are created equal, and using the wrong paver for the application is a guaranteed path to cracking. Patio pavers crack when they are subjected to loads beyond their designed load-bearing capacity, which is why driveway pavers are manufactured thicker than patio pavers.
Standard patio pavers are typically 60 mm thick, while driveway-rated pavers are 80 mm or more. The difference matters. A standard paver on a driveway will develop hairline cracks under the weight of a vehicle, especially if the vehicle turns sharply on the surface, which creates a twisting force that pavers resist poorly.
The base requirements also differ. A driveway needs a deeper aggregate base than a patio because the load spreads differently. A vehicle concentrates its weight through four small contact patches, and without sufficient base depth, those loads transfer directly to the soil, which compresses and allows the pavers to crack.
If you are planning to park vehicles on a paver surface, do not cut corners. Use pavers rated for vehicular traffic, install the deeper base, and consider using a heavier edge restraint along the driveway edges. The small price difference between patio and driveway pavers is trivial compared to the cost of replacing a cracked driveway surface.
How to Repair a Cracked Paver
Repairing a cracked paver is a straightforward DIY project, but only if the underlying cause has been addressed. The process takes about an hour per paver plus curing time for the joint sand.
Step 1: Remove the cracked paver. Use a chisel and hammer to break it into pieces, or use a paver puller with two stiff wires to lift it out intact. Work from the center outward to avoid damaging neighboring pavers.
Step 2: Inspect the base. This is the step most guides miss. Look at the bedding sand and the aggregate below. If the base is uneven, has deep ruts, or shows signs of water damage, you must repair it before replacing the paver.
Step 3: Level the base. Add or remove bedding sand to create a smooth, level surface that sits about 1/8 inch below the surrounding pavers to allow for the new paver to be tapped into place.
Step 4: Install the new paver. Set it in place and tap it down with a rubber mallet until it is flush with its neighbors.
Step 5: Fill the joints. Sweep polymeric sand into the joints and activate it with a light water mist. Polymeric sand hardens to lock the pavers together and prevent weed growth and insect infiltration.
Step 6: Compact and seal. Run a vibratory plate compactor over the repaired area with a protective pad to avoid scratching the new paver. Consider sealing the entire patio to protect against future moisture intrusion.
Do not use a metal hammer directly on the new paver. The impact will create hairline fractures that weaken the paver and may cause it to crack later. Always use a rubber mallet or a block of wood as a buffer.
How to Fix an Uneven Driveway
An uneven paver driveway is a bigger problem than a single cracked paver, because it signals widespread base failure rather than a localized issue. How to fix an uneven driveway depends on the severity of the settling and the size of the affected area.
For a small section with minor settling, less than 1/2 inch of dip, you can often lift and reset the affected pavers. Remove the pavers in the sunken area, add compacted base material to raise the level, and reinstall them. This is a temporary fix that works well for isolated spots caused by a utility repair or a single tree root.
For widespread unevenness, the entire driveway surface may need to be lifted and the base rebuilt. This is a major project that involves removing thousands of pounds of pavers and base material, re-grading the soil, and reinstalling everything with proper compaction. Most homeowners hire a professional for this scale of work because the equipment costs and labor are substantial.
A quick diagnostic test: lay a straight 6-foot level across the uneven area. If the gap under the level exceeds 1/2 inch, the base has settled significantly. If water pools in the low spots after rain, the problem will only worsen as the saturated base continues to compress under traffic.
| Problem | Likely Cause | Best Fix |
|---|---|---|
| Single cracked paver | Point load or minor base shift | Replace paver, level base |
| Small sunken area | Localized settling | Lift and reset pavers |
| Widespread unevenness | Base failure or poor compaction | Full base rebuild |
| Edges spreading outward | Missing edge restraint | Install concrete or steel restraint |
Paver Patio Maintenance Tips for Long-Term Durability
Prevention is cheaper than repair, and a few minutes of maintenance each season will extend the life of your paver patio significantly. Paver patio maintenance tips start with keeping the surface clean and the joints filled.
Sweep and clean regularly. Dirt and organic debris break down into a fine dust that washes into the joints and gradually displaces the joint sand. Sweeping the patio weekly and rinsing it with a garden hose removes this material before it becomes a problem. For deeper cleaning, a pressure washer on a low setting works well, but keep the nozzle at least 6 inches from the surface to avoid washing out the joint sand.
Replenish joint sand annually. Joint sand settles and washes out over time, especially in high-traffic areas. After a season of use, top up the joints with fresh sand and compact it in. If you used polymeric sand originally, use the same type for the top-up to maintain a consistent bond.
Seal the surface every 2 to 3 years. A quality paver sealer protects the surface from moisture intrusion, oil stains, and UV fading. It also locks the joint sand in place, reducing the frequency of sand replenishment. Apply sealer on a dry day when the pavers are fully dry, and allow 24 hours of drying time before walking on the surface.
Address drainage issues promptly. If you notice water pooling after rain, fix the grading issue before it damages the base. This is the single most important maintenance task for preventing long-term structural damage.
Inspect edge restraints and level. Walk the perimeter of your patio each spring and check that the edge restraints are still secure. If you find a loose section, re-anchor it before the pavers begin to shift.
The long-term durability of a paver surface comes down to the quality of the original installation. At Kingdom Paver, we build every patio and driveway with the full base preparation, proper compaction, and edge restraint system that prevents these failures from occurring. Our decade of experience serving Katy and Cypress has shown us that a correctly installed paver surface can last 25 years or more with basic maintenance.
Cracked pavers are rarely a manufacturing defect. They are a signal that the base beneath them has failed, the drainage is inadequate, or the pavers were undersized for the load. Diagnosing the cause before you repair will save you from repeating the mistake. If you are facing widespread paver damage or planning a new installation, our team at Kingdom Paver provides quality construction for driveways, patios, and walkways with the proper base preparation that prevents cracking. Contact Kingdom Paver to schedule a consultation and get a surface built to last.
Frequently Asked Questions
How can I stop pavers from cracking?
Prevent cracks by starting with proper base preparation, a 4-6 inch compacted aggregate base is essential. Install edge restraints to prevent lateral movement, use appropriate joint sand (polymeric sand resists water infiltration better than standard sand), and ensure adequate drainage so water doesn’t pool beneath the pavers. Address freeze-thaw concerns in colder climates by choosing pavers with high crushing strength and proper slope for water runoff. Regular maintenance, including resealing and joint inspection, catches problems early.
Can you repair a cracked paver?
Yes. Small hairline cracks (under 1/8 inch) can sometimes be sealed with polyurethane joint sealant to prevent water infiltration and expansion. For larger structural cracks that compromise the paver’s integrity, removal and replacement is the best solution. A professional can lift the affected paver, inspect the base for settling or compaction failure, correct any underlying issues, and install a new paver. This prevents the crack from spreading to adjacent pavers and maintains structural integrity.
What causes uneven pavers and how do I fix it?
Uneven pavers typically result from inadequate compaction of the base layer, settling over time, or erosion beneath the pavers due to poor drainage. To fix an uneven driveway or patio, remove the affected pavers, assess the sub-base condition, add or redistribute aggregate base material as needed, and recompact thoroughly with a vibratory plate. If settling is widespread, you may need to add a geotextile fabric layer to stabilize the soil and prevent future movement. Proper slope (1/8 inch per foot) ensures water drains away rather than pooling.
How often should I maintain my paver patio?
Paver patio maintenance tips include annual inspections for cracks, loose joints, or weeds, resealing the surface every 2-3 years to protect against water penetration and UV damage, and refreshing joint sand as needed. After winter, check for frost heave or settling caused by freeze-thaw cycles. Clean debris from joints and reapply polymeric sand if washing has displaced it. Address drainage issues immediately, standing water accelerates deterioration. These preventive steps extend the life of your patio and avoid costly repairs.
This article was written using GrandRanker


