
Table of Contents
- Why Concrete Pavers Crack: Common Causes
- How to Fix Uneven Driveway Pavers
- Preventing Paver Cracks: Best Practices
- Paver Repair Cost and Your Options
- Material-Specific Failure Analysis
- Visual Diagnostic Guide
- Frequently Asked Questions
Last Updated: September 25, 2026
Why Concrete Pavers Crack: Common Causes
Concrete pavers crack for several reasons, and understanding why helps you prevent expensive damage. The most common culprits are improper installation, soil movement, freeze-thaw cycles, heavy loads, missing edge support, and poor drainage. Each of these factors weakens the structural integrity of your patio, driveway, or walkway over time.
The good news is that most failures are preventable with the right approach during installation and maintenance. The good news is that most failures are preventable with the right approach during installation and maintenance.
Improper Base Preparation
The foundation is everything. If your base isn’t compacted properly, pavers will sink and crack within months.
A solid sub-base requires crushed stone compacted to proper density. Many installers skip this step or rush through it. They’ll dump gravel, compact it once, and call it done. That’s a recipe for failure.
The base layer should be:
- At least 4 inches of crushed stone for driveways
- Properly compacted in multiple passes
- Level and stable before pavers are laid
- Built to support the load-bearing capacity your application demands
When base preparation fails, pavers shift out of alignment. Uneven settling creates stress points. Cracks appear first at joints, then spread across individual pavers. This is why Kingdom Paver invests time in base preparation, it’s the difference between a driveway that lasts and one that lasts for years to come.
Soil Movement and Settlement
Soil doesn’t stay still. It compacts over time, shifts with moisture changes, and moves when temperatures swing.
Settlement is the most common cause of paver failure. Soil underneath your pavers compresses unevenly. One section sinks while another stays put. This creates stress on the pavers themselves, and they crack under the tension.
Poor compaction during installation makes this worse. If your sub-base wasn’t compacted to proper density, settlement happens faster and more dramatically. You might see uneven pavers within the first year.
Soil movement also happens naturally over years. Water enters the soil, adds weight, then drains away. Freeze-thaw cycles expand and contract the ground. Tree roots grow and shift the soil. All of this movement puts stress on your pavers and eventually causes hairline cracks that grow larger.
Freeze-Thaw Cycles and Extreme Weather
Temperature swings create stress that pavers can’t always handle.
When water gets into small cracks or underneath pavers, it freezes in winter. Ice expands. This expansion pushes pavers up and apart. When spring arrives and ice melts, the pavers settle back down, but often not evenly. The freeze-thaw cycle repeats year after year, widening cracks and pushing pavers out of position.
Extreme weather accelerates this process. Harsh winters with deep freezes cause more damage than mild ones. Heavy rain followed by sudden cold snaps creates ideal conditions for freeze-thaw damage.
The solution is preventing water from getting trapped. Proper drainage, sealed joints, and polymeric sand help keep moisture out. Without these protections, freeze-thaw cycles will eventually crack your pavers.
Heavy Loads and Weight Distribution
Pavers have limits on how much weight they can handle.
A standard concrete paver is designed to support typical residential loads, foot traffic, light vehicle traffic, patio furniture. But concentrated weight in one spot creates stress points. A heavy vehicle parked in the same spot repeatedly, a hot tub on a small section of pavers, or stacked materials all concentrate load beyond what the pavers were designed to bear.
When load exceeds the load-bearing capacity of your pavers or sub-base, the pavers flex. Flexing causes hairline cracks. Over time, these cracks spread and deepen. Eventually, the paver breaks or shifts out of place.
The key is distributing weight evenly across the surface. Avoid parking heavy vehicles in the same spot repeatedly. Don’t stack materials on pavers for extended periods. If you’re adding a permanent structure like a hot tub, make sure your base was built to handle that extra load.
Missing Edge Restraints and Polymeric Sand
The edges of your paver installation are vulnerable. Without proper edge restraint, pavers shift inward and create gaps.
Edge restraints are physical barriers, usually plastic or metal, that hold pavers in place at the perimeter. They prevent lateral movement. Without them, pavers creep toward the center of the installation over time. This creates gaps at the edges and stress on interior pavers.
Polymeric sand is equally important. Regular sand washes away with rain and foot traffic. Polymeric sand stays in place because it hardens when wet. It locks pavers together and prevents weed growth and root intrusion.
Many installations fail because they skip polymeric sand entirely or use regular sand. The pavers shift, gaps widen, and moisture gets underneath. This leads to cracking, settling, and expensive repairs.
How to Fix Uneven Driveway Pavers
Uneven pavers are often a symptom of deeper problems. Before you fix them, identify the root cause.
Identifying Uneven Sections
Walk across your pavers and feel for high spots and low spots. Mark them with chalk or tape.
Check whether the unevenness follows a pattern. Do pavers slope toward the center? Are they sinking in one area? Is one section higher than the rest? The pattern tells you what went wrong.
Look for cracks near the uneven areas. Cracks often appear where settlement is happening. Check for weeping, water seeping up through joints, which indicates drainage problems. Look for root intrusion, where tree roots have lifted pavers from below.
Take photos of the problem areas. This helps you explain the issue to a professional if you decide to call one.
When to Call a Professional
Some paver problems are DIY-fixable. Others require professional equipment and expertise.
Call a professional if:
- More than a few pavers are uneven or cracked
- The problem covers a large area (more than 20% of your installation)
- You suspect soil movement or drainage issues underneath
- The base layer may be compromised
- You’re not confident removing and resetting pavers yourself
Small fixes, one or two pavers that have shifted slightly, can sometimes be reset by a homeowner.
Preventing Paver Cracks: Best Practices
Prevention is far cheaper than repair. The right installation practices prevent most cracking.
Installation Standards That Matter
Proper installation follows these standards:
- Compact the sub-base in 2-inch lifts until it reaches proper compaction density
- Use a geotextile fabric between soil and crushed stone to prevent mixing
- Install edge restraints around the entire perimeter
- Use polymeric sand in all joints
- Slope the surface for water drainage (typically 1-2% slope)
- Leave proper spacing between pavers for sand and movement
- Seal the surface after installation to protect against moisture
These steps take time. They cost more than cutting corners. But they prevent the cracking and settling that cost thousands to repair later.
Maintenance Schedule and Sealing
Maintenance extends the life of your pavers and catches problems early.
| Maintenance Task | Frequency | Why It Matters |
|---|---|---|
| Seal pavers | Every 2-3 years | Prevents moisture damage and extends life |
| Check for weeping | After heavy rain | Identifies drainage problems early |
| Remove weeds | Monthly | Prevents root intrusion and paver lifting |
| Inspect for cracks | Annually | Catches problems before they worsen |
| Clean surface | As needed | Maintains appearance and prevents staining |
Paver Repair Cost and Your Options
Repair costs vary widely depending on the extent of damage and whether you fix just the surface or address the underlying problem.
DIY vs. Professional Repair Thresholds
A few cracked pavers might seem like a DIY job. But the real question is whether you can fix the cause, not just the symptom.
DIY makes sense for:
- One or two cracked pavers in an otherwise stable installation
- Resealing joints with polymeric sand
- Cleaning and basic maintenance
- Small surface cracks that haven’t affected the base
Professional repair is necessary for:
- Multiple pavers cracked or uneven
- Signs of settlement or soil movement
- Drainage problems
- Base layer damage
- Large areas requiring removal and reinstallation
What Affects Total Repair Expense
Several factors determine whether repairs cost a few hundred dollars or several thousand.
Material-Specific Failure Analysis
Different paver materials fail in different ways. Understanding your material helps you prevent the specific problems it’s prone to.
Visual Diagnostic Guide
Learning to spot paver problems early prevents expensive repairs.

Hairline Cracks vs. Structural Damage
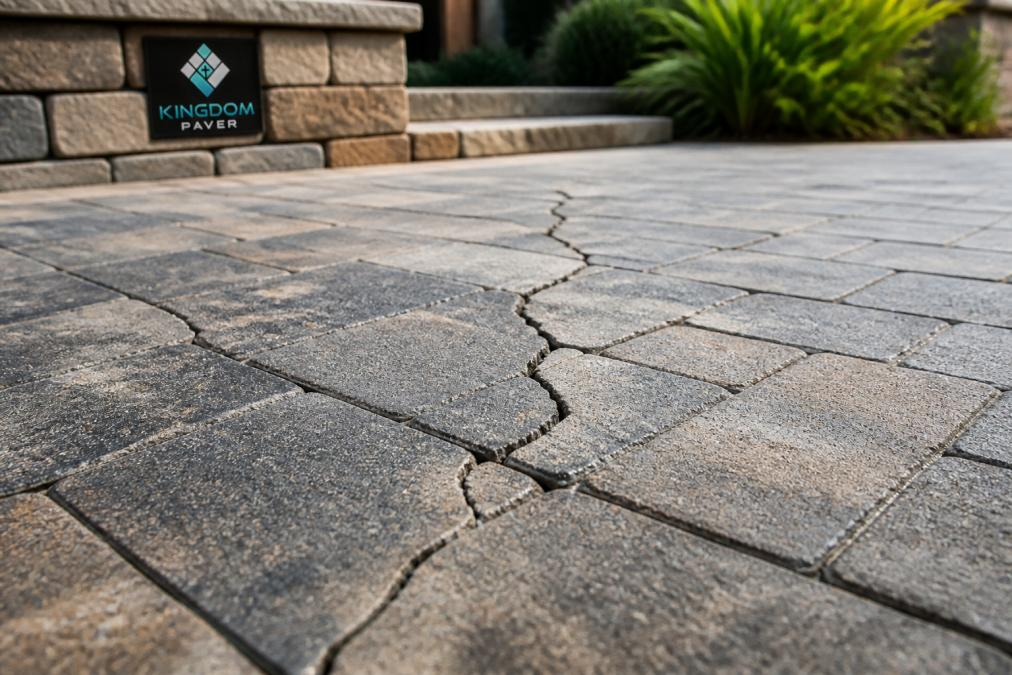
Hairline cracks are thin lines in the surface of a paver. They’re usually cosmetic and don’t affect the paver’s function. Hairline cracks can be sealed to prevent water penetration.
Spalling, Weeping, and Root Intrusion Signs
Spalling is surface flaking where pieces of the paver break away. It usually starts at edges or corners. Spalling indicates moisture has gotten underneath the paver and freeze-thaw cycles are breaking it apart. Spalled pavers should be replaced.
Frequently Asked Questions
How long do concrete pavers typically last?
Concrete pavers can last 15-25 years or longer when installed on a proper base with adequate compaction, edge restraints, and polymeric sand joint stabilization. Lifespan depends heavily on base preparation, local freeze-thaw cycles, and maintenance. Pavers without proper sub-base and joint support often fail within 4-8 years due to settlement, cracking, and paver shifting.
What causes concrete pavers to crack after just a few years?
Premature cracking typically results from inadequate soil compaction, missing polymeric sand in joints, poor edge restraint, or improper load distribution. Freeze-thaw cycles accelerate failure by creating tensile stress in the paver material. Moisture accumulation beneath the surface and hydrostatic pressure from poor drainage also accelerate spalling and hairline cracks. A weak aggregate base or geotextile fabric failure compromises structural integrity.
Can I put pavers over cracked concrete?
Installing pavers directly over cracked concrete is not recommended. The existing cracks indicate settlement or base failure, and building on top will transfer that movement to the new pavers. Remove the old concrete, prepare the sub-base with proper compaction density, install a geotextile fabric, and add a crushed stone aggregate base. This prevents new paver failure and ensures load-bearing capacity and long-term stability.
What should I put between paver cracks to prevent weeds and root intrusion?
Polymeric sand is the best choice for joint stabilization. It hardens when wet, locks pavers in place, and resists weed growth and root intrusion. Regular polymeric sand maintenance every 2-3 years extends the life of your installation. Avoid regular sand, which washes out and allows moisture accumulation. Proper joint filling also reduces hydrostatic pressure buildup and thermal expansion movement.


