
Last Updated: October 27, 2026
Quick Summary
Remove weeds from paver joints by pulling them from the base with a weeding knife or screwdriver, then scraping out leftover roots and rinsing the joint. Household treatments like boiling water or vinegar only kill surface growth, so refill the joints with polymeric sand to stop weeds returning.
- Weeds grow because washed-out joint sand collects soil, moisture, and wind-blown seeds.
- Pull weeds at the crown and pull straight up to avoid snapping taproots like dandelions.
- Boiling water, vinegar, salt, and baking soda kill surface growth but rarely reach deep roots.
- Polymeric sand is formulated for joints roughly 1/8 inch to 1 1/2 inches wide.
- Keep foot traffic off fresh polymeric sand for at least 24 hours while it cures.
Table of Contents
- Why Weeds Grow in Paver Joints and How to Spot the Source
- Step-by-Step: How to Remove Weeds From Paver Joints Safely
- Best Tools for Removing Weeds Between Pavers
- Household Methods: Boiling Water, Vinegar, Salt, and Baking Soda
- Does Roundup Stain Pavers? Chemical Risks and Safer Alternatives
- What to Put Between Pavers to Stop Weeds
- How to Refill Paver Joints With Polymeric Sand
- When to Call a Professional for Paver Restoration
- Frequently Asked Questions
Why Weeds Grow in Paver Joints and How to Spot the Source
Weeds in paver joints signal a joint that has lost its seal and collected the three things every seed needs: soil, moisture, and light. Learning how to remove weeds from paver joints starts with understanding why they return.
The joint sand between pavers is the weak point. Rain washes sand out, organic debris fills the gap, and wind-blown seeds land in that soft, damp pocket. A single dandelion seed can travel for miles before it settles.
Seeds, Soil, and Failed Joint Sand
Three culprits drive repeat growth:
- Seeds: Wind, birds, and lawn mowers drop them into open gaps.
- Soil and organic debris: Leaves and dirt break down into a seed bed.
- Failed joint sand: Washed-out or crumbling sand leaves space for roots.
Most guides blame the weeds. The real problem is the joint. Fix the joint and the weeds have nowhere to grow. Our guide to preventing weeds in paver joints covers that fix.
Step-by-Step: How to Remove Weeds From Paver Joints Safely
Work on a dry day when the soil in the joints is soft but the pavers are not slick.

- Clear the surface. Sweep off leaves and loose debris so you can see every gap.
- Soak light growth. Mist the weeds with water to loosen the soil around the roots.
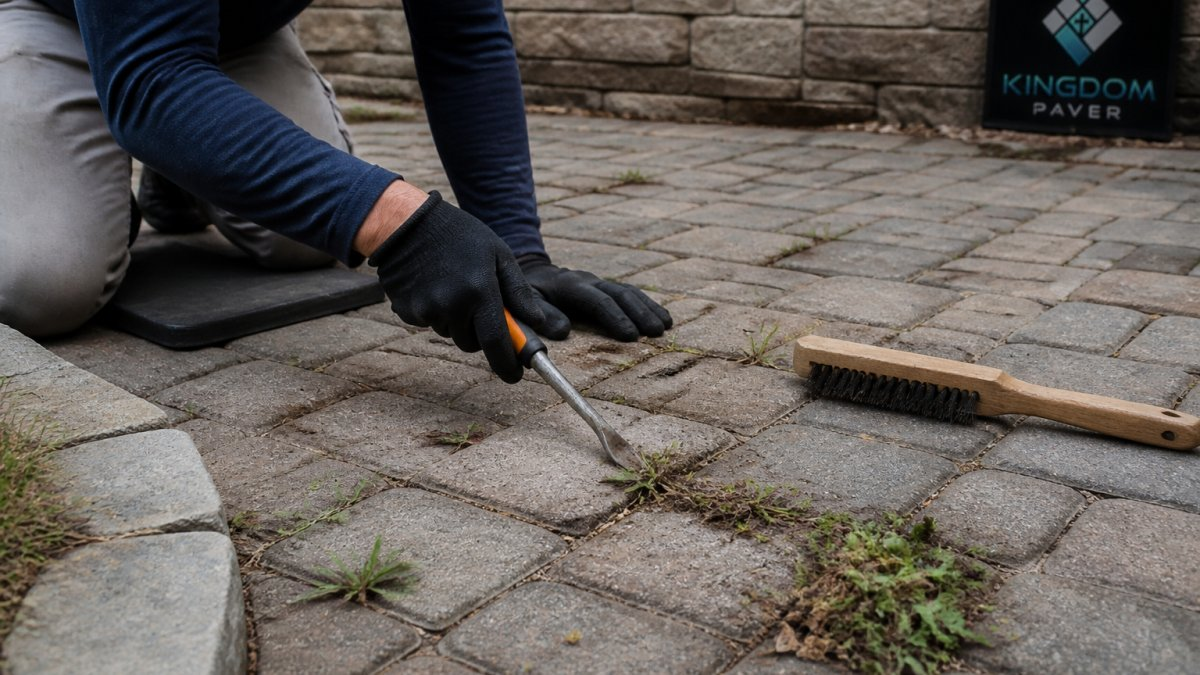
- Loosen with a narrow tool. Slide a weeding knife or screwdriver along the joint edge. Do not pry against the paver face.
- Pull from the base. Grip the weed at the crown and pull straight up with steady pressure.
- Scrape the joint. Remove leftover roots and compacted dirt with a joint scraper.
- Rinse and inspect. Flush the joint with water and check for loose or rocked pavers.
Hand-Pulling, Scraping, and Cleaning the Joints
Hand-pulling works best on young weeds and small gaps; scraping handles deep roots and matted grass. Cleaning the joints after either job matters, because any root left behind will sprout again.
Watch out: pulling a deep taproot like a dandelion by the top alone snaps the root, and the weed returns within weeks. Skipping the rinse leaves loose soil ready for the next seed.
Best Tools for Removing Weeds Between Pavers
Tools for removing weeds between pavers include a narrow weeding knife, a stiff joint scraper, a wire brush, and a shop vacuum for dry debris.
- Weeding knife or fishtail tool: reaches into tight joints without widening them.
- Joint scraper: lifts compacted dirt and old sand.
- Stiff wire brush: clears the surface between pavers.
- Shop vacuum: pulls loose seed and grit out of dry gaps.
- Knee pads and gloves: save your back and hands on long driveways.
Skip the pressure washer for routine weeding.
Household Methods: Boiling Water, Vinegar, Salt, and Baking Soda
Household treatments are contact killers. They damage the green growth above the joint but rarely reach the crown or taproot below the sand line, which is why the same weed often returns within weeks. The table below shows what each method does, how to apply it, and where it goes wrong.
| Method | What It Does | How to Apply | Main Limitation |
|---|---|---|---|
| Boiling water | Scalds leaf tissue and shallow roots on contact | Pour slowly directly into the joint; keep the stream narrow | Cools before it reaches deep roots; can splash and burn skin |
| White vinegar | Acetic acid burns leaves and young shoots | Spot-spray or dribble full-strength vinegar on a dry, sunny day | Does not kill established taproots; can etch limestone, travertine, and some concrete pavers |
| Baking soda | Raises pH in the joint and slows new growth | Dust a light layer into the gap, then sweep off the surface | Weak and short-lived; excess can leave a white film on pavers |
| Salt | Draws moisture out of plant tissue and kills roots over time | Apply sparingly to the joint only, never broadcast | Stays in the soil, harms adjacent plantings, and is unsafe for pets |
How to Apply Each Method Without Damaging the Pavers
- Boiling water: Work one joint at a time and pour slowly so the water penetrates instead of running across the surface. Keep children and pets off until the pavers cool. Best for light growth in wide joints, not matted grass.
- White vinegar: Use it on a dry day with no rain expected for at least 24 hours. Full-strength vinegar is more effective than cooking strength but more likely to stain, so test a hidden paver first. Do not use it near acid-sensitive stone such as limestone or travertine.
- Baking soda: The gentlest option and the least effective on established weeds. It works best as a follow-up after hand-pulling, dusted into the cleaned joint to discourage new sprouts.
- Salt: The most persistent of the four and the most likely to cause collateral damage. It does not break down quickly, and runoff carries it into beds, lawns, and drainage paths. Confine it to the joint and keep it several feet from planting beds.
None of these methods fixes a failed joint. If the sand is washed out or the gap is wide, the weed will return no matter how many times you treat the top. Clean and refill the joint after treatment, or the cycle repeats.
Why These Methods Buy Weeks, Not Seasons
The roots are the issue. A dandelion or plantain taproot can extend several inches below the paver surface, and a surface treatment only kills the top inch or two. The root survives, sends up new growth, and the joint stays infested. That is why the most reliable sequence is mechanical removal first, household treatment second as a spot follow-up, and a proper joint refill last. university extension guidance on integrated weed management for hardscapes consistently recommends removing the root and correcting the growing condition rather than relying on surface sprays alone.
Does Roundup Stain Pavers? Chemical Risks and Safer Alternatives
If you use an herbicide, follow the label exactly.
What to Put Between Pavers to Stop Weeds
| Joint Fill Option | Weed Control | Best For | Watch Out For |
|---|---|---|---|
| Polymeric sand | Strong | Patios, walkways, driveways | Needs proper install and curing |
| Regular joint sand | Weak | Temporary or budget fixes | Washes out, refills often |
| Paver sealer | Moderate | Sealing after sand set | Seals surface, not the gap |
| Gravel or stone dust | Weak | Decorative edges | Traps seed and debris |
Sealing versus polymeric sand is its own decision. Our comparison of paver sealing vs polymeric sand for weeds breaks down which one fits your patio.
How to Refill Paver Joints With Polymeric Sand
Polymeric sand only performs as well as its installation. The most common failures are joints not cleaned to depth, overwatered sand, and traffic too soon after curing. The steps below cover the preparation, fill, and curing details that separate a joint that lasts seasons from one that washes out in the first heavy rain.
Preparation Before You Open the Bag
- Clean to depth. Remove all weeds, roots, old sand, and compacted dirt so the joint is open to roughly half its depth. Use a joint scraper or narrow weeding knife; a pressure washer can erode the bedding.
- Check joint width. Polymeric sand is formulated for a specific width range, typically about 1/8 inch to 1 1/2 inches depending on the product. Wider joints need a different fill or a two-stage approach.
- Dry time matters. The pavers and joints must be dry before sand goes in. Moisture in the joint prevents the binder from adhering properly.
- Match the product to the use. Driveway-rated polymeric sand is formulated for heavier loads than patio-rated sand. Using a patio product on a driveway is a common cause of early failure.
Step-by-Step Installation
- Pour and sweep. Spread the sand over the surface and sweep it into the joints with a soft-bristle broom. Work in sections so the sand does not sit on the pavers long enough to stain.
- Compact. Run a plate compactor or hand tamper over the surface to settle the sand into the joint. This step is often skipped and is one of the main reasons joints end up low.
- Top off. Re-sweep and add sand to any joint that settled below the surface. The joint should be full but not mounded.
- Clear the surface completely. Blow or sweep every trace of sand off the paver faces. Leftover sand binds to the surface and leaves a haze that is difficult to remove later.
- Water in two passes. Apply a fine mist so the sand absorbs water without washing out. Wait a few minutes, then mist again. The goal is to saturate the joint, not flood the surface.
- Let it cure. Keep foot traffic off for at least 24 hours and vehicle traffic off longer, following the product label. Avoid installation before rain or on a cold, damp day, because the binder needs consistent conditions to set.
A simple test before you commit: squeeze a small amount of the mixed sand in your hand. If it holds together after you open your hand, the binder is activating as expected. If it crumbles, check the moisture level and the product date.
Curing Conditions and What to Watch For
Choosing the right sand for paver joints to improve water runoff matters as much as the installation. A product matched to your joint width, paver type, and traffic load will outperform a generic bag every time.
When to Call a Professional for Paver Restoration
Call a professional when weeds return within weeks, pavers rock or sink, or the joint sand will not hold. Those signs point to a bedding or base problem, not just surface weeds. No amount of pulling fixes a failed base.
Watch out: if your patio drains poorly or pavers shift after a refill, the issue is underneath. Continued DIY upkeep only delays the repair. Our paver maintenance tips for homeowners help you judge whether DIY care is enough.
Kingdom Paver has a decade of experience and specializes in patios, driveways, and walkways. Reach our team to talk through your patio.
Frequently Asked Questions
What is the best way to remove weeds from paver joints?
Start by pulling weeds by hand or with a narrow weeding tool. Scrape out any remaining roots and debris from the paver joints, then rinse the surface.
Should you remove the old jointing sand after pulling weeds?
Yes, remove loose or contaminated joint sand after pulling weeds. Old sand mixed with soil and organic debris creates a seedbed for the next flush of growth. Scrape out the top 1/2 inch of joint fill, rinse the joints, and let them dry before installing fresh polymeric sand. This step is critical because weeds regrow within 2 to 4 weeks when roots and old sand remain.
Does Roundup stain pavers?
If you use a chemical weed killer, follow the product label.
How often should you remove weeds from paver joints?
Check paver joints periodically and pull weeds while they are small.
Weeds between pavers are a symptom, and the joint is the cure. If your patio keeps sprouting grass no matter how often you pull, Kingdom Paver can diagnose the base, reset problem pavers, and install a joint fill built to last. Our team brings ten years of experience, custom solutions, and durable construction to every patio, walkway, and driveway. Get started with Kingdom Paver and reclaim your outdoor space for good.


