
Table of Contents
- Why Layered Outdoor Kitchen Lighting Makes Evening Entertaining Work
- Outdoor Kitchen Pendant Lights: Style and Function Over the Island
- Outdoor Kitchen Task Lighting for Safe Cooking and Prep
- Outdoor Kitchen String Lights for a Relaxed Evening Ambiance
- Weatherproof Outdoor Kitchen Lights: What to Look For
- Brightness, Color Temperature, and Glare Control That Guests Notice
- Controls, Dimming, and Smart Lighting for Effortless Evenings
- Frequently Asked Questions
Last Updated: October 8, 2026
Why Layered Outdoor Kitchen Lighting Makes Evening Entertaining Work
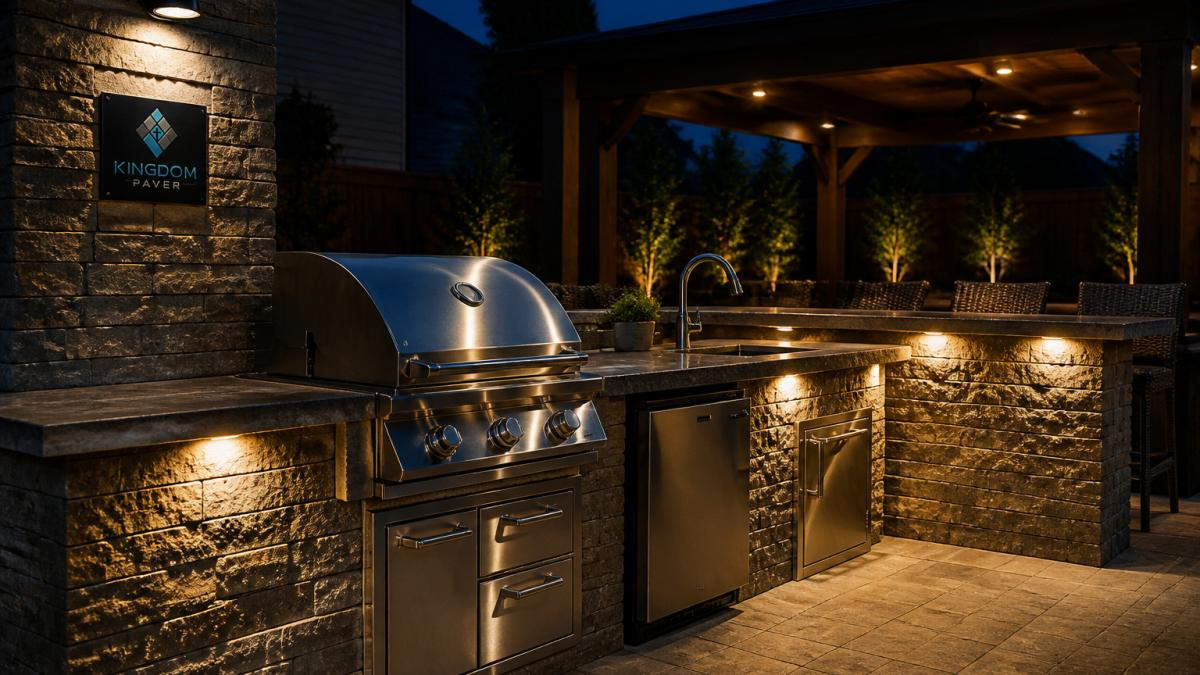
Great outdoor kitchen lighting ideas for evening entertaining all share one trait: they layer light instead of relying on a single source. At Kingdom Paver, we’ve built custom outdoor kitchens across the Katy and Cypress area, and the difference between a space that works after dark and one that doesn’t almost always comes down to planning.
Layered lighting is the practice of combining three light types in one space: task lighting for cooking, ambient lighting for overall glow, and accent lighting for depth and style. One bright fixture over a grill creates harsh shadows and glare. Three well-placed layers make cooking safe and the space inviting.
Here’s what most guides get wrong: they treat lighting as a finishing touch you pick after construction. In practice, wiring and fixture placement should be decided while the kitchen is still on paper. Retrofitting conduit through finished stonework costs far more than planning it upfront.
Below, we’ll walk through pendant, task, and string lighting options, plus the specs, brightness, and controls that make evenings effortless. The U.S. Department of Energy guidance on outdoor LED lighting is a good primer on why LED fixtures now dominate outdoor design.
Plan your lighting layout before you pour footings or lay stone. Moving a fixture later means cutting into finished masonry.
Outdoor Kitchen Pendant Lights: Style and Function Over the Island
Pendant lights are the workhorse of outdoor kitchen island lighting. Hang two or three over a bar counter or dining counter, and they define the space while throwing useful light right where guests gather.
The details are where most installs go wrong. Work from these numbers before you buy anything:
- Hang height: 30 to 36 inches above the countertop for a standard 36-inch-high bar. Over a dining-height table (about 30 inches), drop to 30 to 34 inches. Any lower and tall guests duck; any higher and you lose the pooling effect that makes pendants worth installing.
- Spacing: leave roughly 30 to 36 inches of clear space between pendant centers, and keep at least 18 inches from the pendant edge to the end of the counter. Even spacing across the whole island is the classic mistake, group pendants over the seating zone where people actually sit.
- Size: a common rule of thumb is to add the island’s width and depth in feet, then convert that number to inches for the total combined diameter of all pendants. A 6-foot-by-3-foot island points to about 9 inches of combined pendant diameter, so two 8- to 10-inch pendants or three 6-inch pendants.
- Coverage: each pendant throws a usable pool of light roughly equal to its diameter plus 12 to 18 inches. Two 10-inch pendants over a 6-foot counter leave the ends dim, that’s a job for the ambient and accent layers, not more pendants.
For outdoor use, choose fixtures rated for wet or damp locations. Look for sealed glass, powder-coated finishes, and gasketed sockets. A fixture built for a covered porch will fail fast in open air. If the island sits under a pergola or roof overhang, a damp-rated fixture is usually sufficient; fully exposed islands need wet-rated housings.

One more placement note: run pendant wiring through the pergola beam or ceiling joist during framing, not after. Adding a pendant circuit to a finished beam means surface-mounted conduit or a soffit drop, both visible, both avoidable.
Mock up pendant positions with cardboard cutouts taped to the beam before you drill. It takes ten minutes and saves a patched hole in a powder-coated finish.
Outdoor Kitchen Task Lighting for Safe Cooking and Prep
Task lighting is the layer that keeps fingers intact. It puts bright, direct light on the grill, prep area, and countertops so you can see what you’re cutting and flipping after sunset.
Under-cabinet lighting and strip lights do most of this work. Mount them under wall cabinets, along the back of a bar counter, or inside a grill station hood. Recessed lights in a soffit above the cooking area also work well.
Aim for bright, even light with no glare bouncing off stainless steel. Position fixtures slightly forward of the work surface so your body doesn’t cast a shadow on the cutting board.
- Under-cabinet strip lights: best for prep counters
- Recessed ceiling lights: best for open cooking zones
- Adjustable spotlights: best for the grill itself
The goal is visibility, not drama. Save the mood lighting for the ambient layer.
Outdoor Kitchen String Lights for a Relaxed Evening Ambiance
String lights, also called bistro lights, are the cheapest way to make an outdoor kitchen feel like a destination. They cast a soft, warm glow with no harsh hot spots, which is exactly what evening entertaining needs.
Run them overhead in a zigzag between posts, pergola beams, or the house and a freestanding structure. Keep the lowest point at least 8 feet above the floor so nobody walks into them.
Choose commercial-grade string lights with thicker wire and weather-resistant sockets. Big-box holiday strands burn out within a season outdoors. Commercial strands last for years.
Hang string lights on a slight sag rather than pulling them tight. A gentle curve looks better and gives the wire room to expand and contract with temperature changes.
Pair string lights with path lighting and landscape lighting around the perimeter. The layers work together: string lights set the mood, path lights keep walkways safe.
Weatherproof Outdoor Kitchen Lights: What to Look For
Weatherproof outdoor kitchen lights must carry a UL listing for wet or damp locations, use sealed housings, and resist corrosion from humidity and rain. Anything less will fail within a season or two in this climate.
Here’s the spec sheet you actually need to check:
| Feature | What to Look For | Why It Matters |
|---|---|---|
| UL rating | Wet or damp location listed | Safety and code compliance |
| Housing | Sealed glass, gasketed sockets | Keeps moisture out |
| Finish | Powder-coated or marine-grade | Fights rust and fading |
| IP rating | IP65 or higher | Dust and water resistance |
| Wiring | Outdoor-rated cable, GFCI protected | Prevents shock and tripping |
Every outdoor circuit should run through a GFCI outlet. That’s not optional, it’s the single most important safety feature in the whole system.
Skipping GFCI protection on outdoor circuits is a serious shock risk.
Brightness, Color Temperature, and Glare Control That Guests Notice
Brightness and color temperature decide whether your kitchen feels warm or clinical. Get them right and guests won’t notice the lighting at all, which is the point.
Stick to warm white LEDs in the 2700K to 3000K range. That’s the same tone as a cozy living room lamp. Cool white or daylight bulbs (4000K and up) make outdoor spaces feel like a parking lot.
For brightness, aim for around 2700 to 3000 lumens over a typical cooking zone, split across several fixtures rather than one. Layering dimmable fixtures lets you dial brightness down as the night goes on.
Glare is the silent killer of outdoor ambiance. Shield fixtures so the bulb isn’t visible from seating height, and avoid aiming lights straight at reflective countertops. If you can see the bulb from where guests sit, it’s too bright or badly placed.
Controls, Dimming, and Smart Lighting for Effortless Evenings
Dimming turns a well-lit kitchen into a great one. Being able to drop the lights from cooking-bright to conversation-warm with one tap is what separates a functional space from an entertaining space. Most guides skip this layer entirely, it’s the single biggest upgrade for evening hosting.
Split the layers onto separate circuits. Task, ambient, and accent lighting should each be switchable independently. That way you can keep the grill area bright while softening the rest. A common pattern is three circuits: one for task (under-cabinet strips, grill spots), one for ambient (pendants, string lights), and one for accent (path lights, landscape uplights).
Match the dimmer to the load. Not every dimmer works with every LED. Look for a dimmer rated for LED loads and check the fixture’s compatibility list, mismatched dimmers cause flicker, buzz, and premature driver failure. Low-voltage strip lights usually need a dimmable driver, not just a dimmable switch.
Set scenes, not just levels. Smart switches and app controls let you program named scenes:
- Cooking, task at full, ambient at 60%, accent off
- Dinner, task at 30%, ambient at 80%, accent on
- Late night, task off, ambient at 20%, accent on
Schedule the ambient circuit to come on at dusk so the space is lit before the first guest arrives, and shut everything off from your phone without walking the yard.
Watch the outdoor-specific control issues. Smart switches need a weather-protected location or a covered enclosure. Wi-Fi signal fades through stone and stucco, so a mesh node or a hub near the patio is often necessary. Timers and photocells are a low-cost alternative if you don’t want an app.
For energy efficiency, LED fixtures use a fraction of the power of older halogen or incandescent bulbs, and they run cooler, which matters under a covered structure. Check the ENERGY STAR guidance on outdoor LED fixtures for efficiency ratings before you buy.
Maintenance is simple: rinse fixtures a few times a year, check gaskets for cracks, and replace any bulb that flickers. Catching a failed seal early prevents water damage to the whole fixture. Keep a spare set of the exact LED bulbs or integrated fixtures on hand, color temperature drifts between batches, and a mismatched replacement is visible from across the patio.
A dimmer on a circuit that also feeds a GFCI outlet can trip the GFCI when the dimmer is at low levels. Keep dimmed lighting circuits separate from any outlet circuit you plan to use for tools or a blender.
Frequently Asked Questions
How do you light an outdoor kitchen for cooking and entertaining?
Plan three layers: task lighting over the grill and prep counter so you can see what you’re doing, ambient lighting such as string lights or overhead fixtures for overall glow, and accent lighting on stonework or plantings for depth. Pair each layer with dimming controls so you can brighten the cooking area during meal prep and lower everything once guests sit down.
Where should lights be placed in an outdoor kitchen?
Put task lights directly over the grill, prep area, and sink, roughly 30 to 36 inches above the counter so they light your hands without shining in your eyes. Hang pendants over the island or bar, run string lights across the seating zone, and add low path or landscape lights along walkways. Keep every fixture on separate switches so you can control each zone independently.
Are string lights bright enough for an outdoor kitchen?
String lights work well as ambient lighting, but they are not bright enough on their own for chopping, grilling, or plating food. Use them to set the mood across the seating and dining area, and rely on dedicated task lighting over the counter and grill for anything that needs real visibility. Together, the two layers keep the space both safe and inviting.
What type of lighting works best over an outdoor kitchen island?
Pendant lights are the most common choice over an island or bar counter because they direct light downward onto the surface. Choose outdoor-rated pendants with sealed housings, and space them 30 to 36 inches above the countertop. One pendant per every 2 to 3 feet of island length gives even coverage. Add a dimmer so the same fixtures can serve prep work and dinner conversation.


