
Last Updated: November 6, 2026
Quick Summary
To protect outdoor countertops in winter, clean and fully dry the surface, seal it on a dry day above freezing, and cover it with a breathable, vented cover. Trapped moisture that freezes is the main cause of cracking, so keep water off the surface and out of cracks.
- Clean and fully dry the counter before sealing, since trapped moisture can freeze and crack stone from within.
- Seal granite on a dry day above freezing and apply thin coats, since heavy coats get sticky and attract dirt.
- Choose a breathable or vented cover, because plain plastic tarps can trap condensation against the surface.
- Leave 2 inches of overhang on each side so runoff drips clear of the counter and cabinets.
- Remove snow with a plastic shovel and never chip ice with metal tools, which can crack stone.
Table of Contents
- What You’ll Need Before Winter Arrives
- Step 1: Clean and Dry the Countertop Surface
- Step 2: Seal Your Outdoor Granite Counter
- Step 3: Choose and Fit a Breathable Outdoor Kitchen Cover
- Step 4: Remove Standing Water and Snow Safely
- Winter Maintenance Schedule for Outdoor Granite Countertops
- Booking Your Outdoor Kitchen Consultation with Kingdom Paver
- Frequently Asked Questions
Winter is hard on outdoor countertops, so knowing how to protect outdoor countertops matters before the first freeze.
Most homeowners assume a sealed counter can handle anything. That is not quite true. Water finds hairline cracks, grout lines, and the edges of the counter, then freezes overnight.
- Standing water pools on flat surfaces after rain or sleet
- Cold snaps turn trapped moisture into ice that pushes outward
- Wood cabinets swell and warp when they stay wet
Freeze-thaw cycles can cause real harm, since each cycle may widen small cracks.
What You’ll Need Before Winter Arrives
Gather these supplies before the first hard freeze.
- Soft brush and mild, pH-neutral stone cleaner
- Microfiber towels or a leaf blower for drying
- A breathable, waterproof outdoor cover sized to your counter
Pick a dry day above freezing for the sealing work. A warm stretch gives sealers time to set before nighttime temperatures drop.
Step 1: Clean and Dry the Countertop Surface
Clean the counter first. Dirt, grease, and food residue trap moisture and can stain the stone once it freezes in place.
- Sweep away leaves, grit, and debris.
- Scrub the surface with a soft brush and mild stone cleaner.
- Rinse with clean water and wipe up all residue.
- Dry the surface completely with towels or a leaf blower.
Give the counter time to dry fully, since stone can look dry on top while moisture stays trapped in its pores.
Sealing over a damp surface can trap water inside the stone, where freezing may crack it from below.
Step 2: Seal Your Outdoor Granite Counter
Granite is dense, but it is not fully waterproof, so sealing can slow water absorption and make stains easier to wipe away. Compare granite and other countertop materials for outdoor use to see how it stacks up. Apply it on a dry, mild day after cleaning.
A typical sealing sequence looks like this:
- Tape off the edges and any adjacent surfaces.
- Apply a thin, even coat with a foam brush, working in one direction.
- Let it soak in for the time the label recommends, usually around 15 minutes.
- Wipe off any excess before it dries on the surface.
- Apply a second coat if the stone is very porous, then let it cure fully.
Choosing a Granite Sealer for Outdoor Countertops
Look for a sealer labeled for exterior granite, and read the label for UV resistance and water repellency to confirm it works on your specific stone.
A common mistake is sealing too thick. A heavy coat sits on the surface, gets sticky, and attracts dirt. Thin coats soak in better and last longer.
Step 3: Choose and Fit a Breathable Outdoor Kitchen Cover
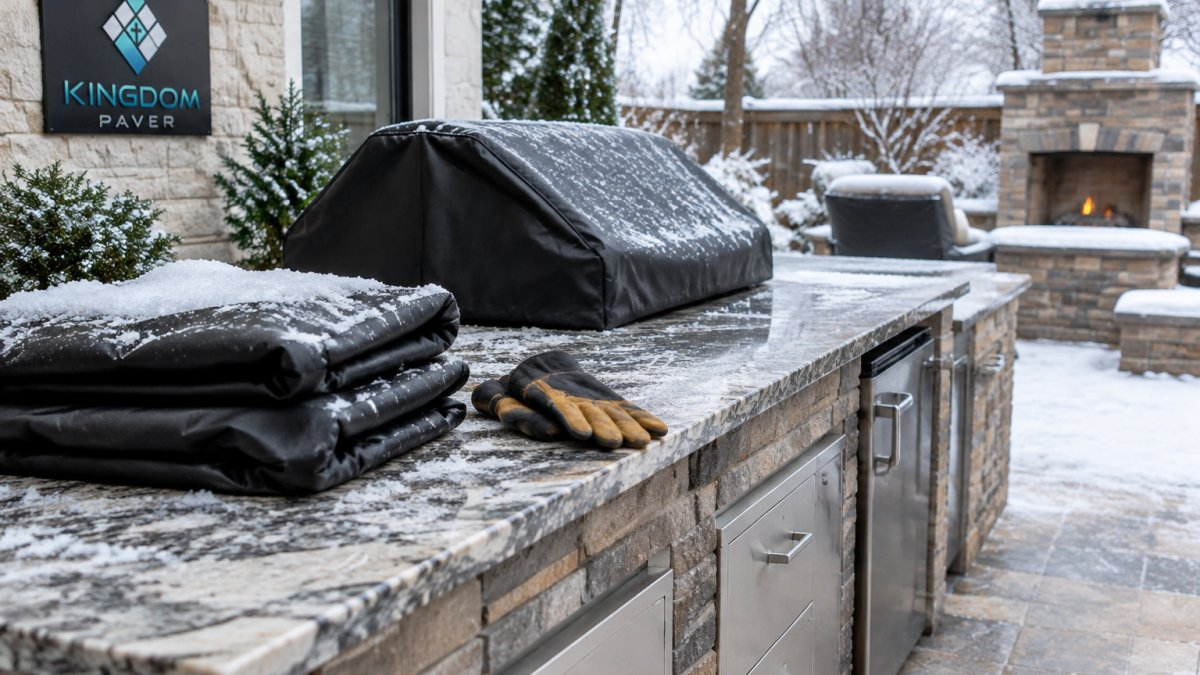
A cover can help keep water and debris off the counter. Browse weather-resistant outdoor kitchen cabinet options that pair well with a covered setup. The right cover blocks rain and snow but still lets moisture escape. A plain plastic tarp can seal moisture underneath, and condensation may soak into stone and wood and then freeze.

Pick the right cover fabric
- Coated canvas or solution-dyed outdoor polyester, breathable, water-repellent, and UV-stable. These are the default choice for an outdoor kitchen.
- PVC-backed or laminated fabric, waterproof but only breathable if it has vents or a mesh panel. Use only if the cover is vented.
- Plain polyethylene tarp, cheap and waterproof but not breathable. Avoid it as a primary cover; if you must use one for a storm, remove it within a day.
Look for a cover labeled breathable or vented, with UV resistance and a water-repellent finish. A cover that traps condensation can hold moisture against the surface through freeze-thaw cycles.
Size and fit it correctly
Measure the counter’s length, depth, and height, then add 2-4 inches of overhang on each side so runoff clears the counter edge instead of wicking back under the cover. A cover that is too tight pulls at seams and tears in wind; one that is too loose flaps and abrades the surface.
- Snug but not stretched, the fabric should drape without tension at the corners.
- Overhang past the edge, at least 2 inches so water drips clear of the counter and cabinets.
- Vent gap at the bottom, leave a few inches of open air at the lowest edge, or choose a cover with mesh vents, so moisture can escape.
Secure it against wind
Wind is what turns a loose cover into a scraper. Use the cover’s built-in straps, elastic hem, or grommets, and add bungee cords or weighted sandbags at the corners. Do not tie the cover so tightly that it seals the bottom vent, airflow is the point.
Watch out: a cover that is waterproof but not breathable, or one sealed tight at the bottom, can trap condensation against the stone and wood.
Storm and mild-day routine
Check the cover after every major storm. Lift it briefly on mild, dry days to let the surface breathe and to check for pooled water or snow on top. Clear snow off the cover with a soft broom rather than letting it pile up and weigh the fabric down. If water pools in a sag, tighten the tension or add a support before the next storm.
Step 4: Remove Standing Water and Snow Safely
Even with a cover, storms can leave water and snow on the counter. Remove it quickly before it freezes.
- Use a plastic shovel or soft broom to clear snow without scratching the surface.
- Never chip at ice with a metal tool. It can crack stone and damage sealant.
- Wipe up standing water with a towel and let the area dry before covering again.
Clear snow soon after it falls, since packed snow and ice can cause more damage than a light dusting.
Winter Maintenance Schedule for Outdoor Granite Countertops
Keeping a simple routine can help reduce winter damage. Read whether sealing or polymeric sand better prevents stains and surface damage for year-round upkeep. Use this schedule as a starting point and adjust for your local weather and your counter material.
The winterization sequence
- Late fall, before the first hard freeze: Clean, dry, seal (if the material takes sealer), repair any cracks, and fit the cover. This is the one window where you can do the work in mild, dry weather.
- After each major storm: Remove snow and standing water, check the cover for tears or sagging, and confirm the surface is dry before re-covering.
- Monthly during winter: Inspect for new cracks, loose grout, lifted sealant, and rust or staining at the edges. Photograph anything new so you can track whether it is spreading.
- Early spring, after the last freeze: Remove the cover, clean the surface, inspect for freeze damage, and reseal if water no longer beads up. This is also the time to catch small chips before they become replacements.
Adjust for your material
The schedule above is written for granite, but the same sequence applies with material-specific tweaks:
- Granite and other natural stone: Seal in late fall; reseal every one to three years depending on exposure. A water test, splash a little water on the stone and see whether it beads or soaks in, tells you when it is time.
- Quartz: Non-porous, so it does not need sealer, but it can chip at edges and is sensitive to prolonged standing water at seams. Keep it covered and dry.
- Concrete: Seal with a concrete sealer rated for exterior use; unsealed concrete absorbs water and spalls in freeze-thaw. Repair hairline cracks before winter so water cannot get in and freeze.
- Tile and grout: Grout is the weak point. Seal grout lines in late fall, and check for cracked or missing grout after each storm. A cracked grout line lets water reach the substrate, where freezing does the most damage.
Adjust for your climate and exposure
- Freeze-thaw regions: The freeze-thaw cycle is the main threat. Prioritize keeping water off the surface and out of cracks, and check after every storm.
- Heavy snow: Snow load can crack thin countertops and tear covers. Clear snow promptly with a plastic shovel or soft broom, and support the cover so it does not sag under the weight.
- Coastal conditions: Salt spray and wind-driven rain accelerate corrosion at fasteners and staining on stone. Rinse and dry the surface after storms, and inspect metal edges and brackets for corrosion.
- Covered versus exposed kitchens: A roof or pergola cuts direct rain and snow but can trap moisture. Covered kitchens still need ventilation and periodic drying; exposed kitchens need a fitted breathable cover and more frequent storm checks.
When to call a professional
Small hairline cracks can often be sealed and monitored. Call a professional if you see a crack that is widening, a chip at an edge, a loose or hollow-sounding tile, or water staining that does not dry. Those are signs that water has already reached the substrate or that the material has lost integrity, and a pro assessment is cheaper than a spring replacement.
The article lays out a winterization sequence with timing for each stage.
| When | What to do | Note |
|---|---|---|
| Late fall, before first hard freeze | Clean, dry, seal, repair cracks, fit cover | Best done in mild, dry weather |
| After each major storm | Remove snow and standing water, check cover | Confirm surface is dry before re-covering |
| Monthly during winter | Inspect for new cracks, loose grout, lifted sealant | Photograph new damage to track spread |
| Early spring, after last freeze | Remove cover, clean, inspect, reseal if needed | Catch small chips before they become replacements |
Booking Your Outdoor Kitchen Consultation with Kingdom Paver
Protecting an outdoor kitchen takes steady care, and some damage needs a professional eye. If you are planning a new outdoor kitchen or want a second opinion on an existing one, contact Kingdom Paver to talk through your project and get a quote. You can also see examples of our past outdoor kitchen work to see how we build for Katy and Cypress weather.
Frequently Asked Questions
What countertop can withstand being outside all year?
Granite is widely used for outdoor countertops because it is dense and holds up well to weather when properly sealed. Stone surfaces still need regular care, though. Sealing the surface every year or two keeps water from soaking in, which limits freeze-thaw damage and staining. Tile with a durable grout and wood surfaces treated with exterior-rated products are other options, but each requires its own maintenance routine to perform well through the seasons.
Should outdoor countertops be covered in winter?
Yes, covering outdoor countertops in winter is one of the simplest ways to reduce damage. A cover keeps snow, ice, and rain off the surface, which limits the water that can enter pores and joints. Choose a breathable, waterproof cover rather than a plastic tarp, because plastic can trap condensation underneath and encourage moisture problems. Make sure the cover is secured against wind and fits the countertop edges.
Can freezing temperatures crack outdoor countertops?
Freezing temperatures can crack outdoor countertops when water seeps into the material and expands as it freezes. This freeze-thaw cycle is the main cause of winter damage to stone and tile surfaces. Keeping water out through sealing and covering, removing standing water after storms, and repairing small cracks before winter all reduce the risk. Cracks that are already present tend to widen with each freeze, so address them early.
How often should you seal an outdoor countertop?
Most outdoor stone countertops should be resealed about once a year, though exposure and climate affect the schedule. Test the surface by sprinkling water on it: if the water soaks in rather than beading up, the sealer has worn off and the countertop needs resealing. Clean and dry the surface completely before applying a new coat, and follow the sealer manufacturer’s instructions for drying time and coverage.
Protecting your countertop now saves costly repairs in spring. Start with a thorough clean and a quality seal, then add a breathable cover before the first freeze.


