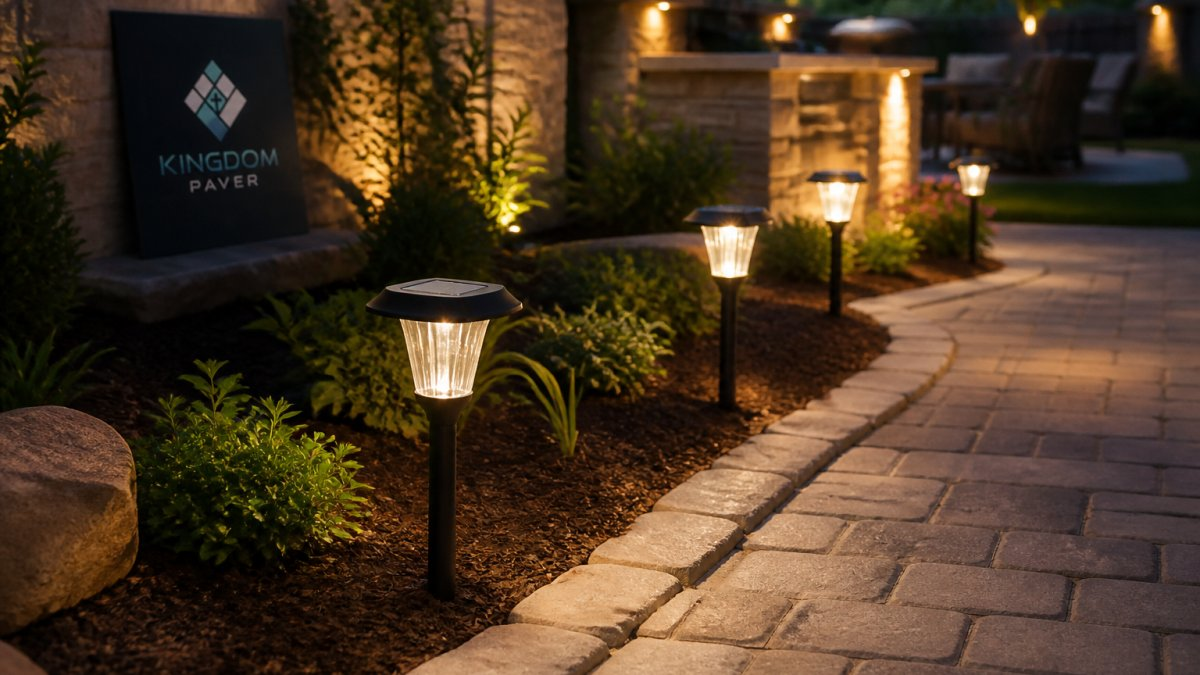
You can install solar landscape lighting on a budget by choosing plug-and-play fixtures with no wiring, power bills, or permits, then planning placement before you buy. A typical six-path-light and two-spotlight setup costs roughly $112 to $257, while a lean multipack version can land near $60 to $90.
Walk your yard at night with a flashlight and mark steps, path turns, and patio edges before buying any lights.
Installation takes most homeowners an afternoon, with The Home Depot estimating two to four hours for a typical setup.
Space path lights about 6 to 8 feet apart, and closer at 4 to 6 feet on turns and steps.
Standard solar lights need six to eight hours of direct sunlight to fully charge, so shaded spots need separate panels.
Replace weak batteries in fall rather than spring, since cold weather cuts battery performance.
Solar landscape lighting is the practice of using sun-powered fixtures to brighten paths, gardens, and patios without tapping into your home’s electrical system. It costs less to run and less to install than wired lighting, and that is exactly why so many homeowners start here. For a wider look at budget-friendly options, see our guide to alternatives to traditional backyard lighting.
Yes. The savings come from three places:
No wiring. No conduit, no trenching, no licensed electrician.
No power bill. The sun does the charging.
No permits. Most plug-and-play systems skip the inspection process.
The catch is that cheap solar lights fail fast when you put them in the wrong spot. Placement decides whether a fixture lasts years or dies in one season. Get that right, and a modest budget goes a long way.
Solar Landscape Lighting Cost: What You’ll Actually Spend
The biggest cost driver is whether you wire the system or not. A professionally installed wired system runs into the thousands, according to Tru-Scapes outdoor lighting installation cost guide.
What most budget guides skip is the actual math. Here is a realistic, itemized plan for a typical 40-foot front walkway with six path lights and two accent lights.
Line item
Quantity
Unit price (USD)
Line total (USD)
Notes
Solar path lights (stake, 50-100 lumens)
6
$8-$20
$48-$120
Multipacks cut unit cost
Solar spotlights (adjustable, 100-200 lumens)
2
$15-$35
$30-$70
For shrubs or a focal point
Rechargeable AA NiMH batteries (spares)
8
$2-$4
$16-$32
Replaceable cells extend life
Landscape stakes or mounting brackets
2
$5-$10
$10-$20
Only if fixtures lack hardware
Trowel or hand digger
1
$8-$15
$8-$15
Reusable for other projects
Sample total
$112-$257
Before tax and shipping
That range is the honest answer to “how much does budget solar landscape lighting cost.” A lean version, six multipack stake lights, no spotlights, reused tools, can land near $60-$90. A fuller version with separate-panel fixtures for a shaded corner pushes toward $250-$300.
Here is where the money goes and how to protect it:
Expense
What Drives It
How to Save
Fixtures
Count and quality
Buy in multipacks
Batteries
Type and lifespan
Choose replaceable cells
Stakes or mounts
Ground type
Reuse existing posts
Solar panels
Panel size
Pick integrated panels
One insider tip: the fixture is the cheap part. Replacement batteries and failed units are what eat your budget over time. Spend a little more per light on build quality and you will spend less later.
Pro Tip Set a hard budget before you shop and buy one multipack first. Install it, live with the layout for a week, then add the second batch. This prevents the most common budget mistake: buying twelve lights, finding six sit in shade, and eating the return shipping.
Long-term costs matter too. Budget fixtures typically use standard rechargeable AA or AAA cells, which cost a few dollars each to replace. Plan on swapping batteries every one to two seasons depending on sun exposure. That is still far cheaper than trenching, conduit, a transformer, and an electrician’s labor for a low-voltage wired system.
Planning Your Solar Light Placement Before You Buy
Start with a pencil and a rough map of your yard, not a shopping cart. Walk the space at night with a flashlight and mark where you actually need light: steps, path turns, and the patio edge. Most people buy first and plan second, then discover half the lights sit in shade.
Put lights where feet land, not where looks matter most.
Space path lights evenly along the walkway edge.
Keep fixtures away from sprinkler heads.
Aim panels toward the midday sun, not the morning sun.
If you have a compact yard, our guide to small backyard design ideas shows how a few well-placed lights make a tight space look intentional. Planning a new path at the same time? Our walkway design guide covers how hardscape and lighting work together.
Solar Landscape Lighting Installation in 6 Steps
Installation takes most homeowners an afternoon. The Home Depot’s solar lighting guide estimates two to four hours for a typical setup. Here is the sequence we recommend.
Homeowner installing a solar landscape lighting fixture into the soil beside a concrete walkway at golden hour.
Charge the lights first. Set panels in full sun for a day before installing.
Peel the protective film. Most fixtures ship with a clear film on the panel. Leaving it on kills charging.
Mark your spots. Use stakes or flags so spacing stays even.
Prep the ground. Loosen soil with a trowel where stakes go in.
Push the stake in. Seat it firm and level, not at an angle.
Test at dusk. Check each light, then adjust any that face shade.
Watch out: forcing a stake into dry, compacted soil cracks the housing. Water the spot the night before if the ground is hard.
Solar Lights for Shaded Areas: What Works and What Doesn’t
Standard solar lights need six to eight hours of direct sunlight to fully charge, per Home Depot’s installation guidance. Shade breaks that rule, and no cheap fixture fixes it.
Separate panels. A panel on a long cord can sit in sun while the light sits in shade.
Larger panels. More surface area charges faster in low light.
Fewer, better lights. Three strong fixtures beat eight weak ones.
What doesn’t work: budget stake lights under a dense tree canopy. They dim within weeks. Move them to a sunny edge and buy one panel-separated unit for the dark corner instead.
Brightness, Spacing, and Layout Math That Saves Money
Spacing is where budgets quietly bleed. Buy too many lights and you overspend; buy too few and the path looks patchy.
Start with brightness by use:
Use
Target output
Why
Path and walkway edge
50-100 lumens
Lights the ground without glare
Steps and turns
75-150 lumens
Higher contrast where feet land
Garden beds and shrubs
50-100 lumens
Soft wash, not spotlights
Focal point or tree uplight
100-200 lumens
Needs reach through foliage
Patio or seating edge
100-200 lumens
Task and safety light
Matching brightness across fixtures keeps the yard looking planned rather than pieced together.
Now the layout math. A simple rule: space path lights about 6 to 8 feet apart along a walkway, and closer, 4 to 6 feet, on turns and steps.
Use this quick checklist before you buy:
Measure your path length in feet
Divide by 7 for an average spacing count
Add two lights for steps and turns
Round down, not up
Worked example: a 40-foot straight walkway with one turn and two steps. Divide 40 by 7 and you get about 5.7, so round down to 5. Add two for the turn and steps and you land on 7 fixtures.
Key Takeaway Spacing and brightness are one decision, not two. Decide the lumen level for each zone first, then space fixtures so their pools of light just meet. That is how you avoid buying extra lights to cover dark gaps.
A few placement details protect both the look and the budget:
Keep fixtures at least 12 inches back from the walkway edge so mowers and string trimmers do not clip them.
Avoid placing lights where water pools; standing water shortens fixture life.
Keep stakes clear of steps and driveway aprons so they are not trip hazards.
Aim panels toward the midday sun, not the morning sun, so charging is consistent across the layout.
If you have a compact yard, our guide to small backyard design ideas shows how a few well-placed lights make a tight space look intentional.
Troubleshooting Weak Lights and Planning for Winter
Dim lights almost always trace back to charging, not the fixture. Check these in order: dirty panels, shade, a loose battery connection, then an old battery. Wipe panels monthly and trim anything casting shadow.
Cold weather cuts battery performance. Before the first freeze:
Bring removable panels inside if your model allows.
Replace weak batteries in fall, not spring.
Store unused fixtures in a dry spot.
Batteries are the usual failure point. Most budget fixtures use standard rechargeable cells you can swap yourself, which is far cheaper than replacing the whole unit.
Pairing Your Lighting With Hardscaping That Lasts
Lighting looks best when it follows good hardscape. A path that heaves or a patio that pools water ruins the effect, no matter how nice the fixtures are. That is where professional installation earns its keep. Our article on the benefits of professional hardscape installation explains why a solid base matters more than the finish.
At Kingdom Paver, we have ten years of experience building patios, walkways, and driveways. We offer affordable pricing and custom solutions. If you want to see what finished work looks like, browse our completed projects before you plan.
Frequently Asked Questions
How much does solar landscape lighting cost compared with wired systems?
Solar pathway light packs typically run $30 to $60 for 8 to 12 fixtures, and they draw no electricity, so there is no ongoing power bill. A DIY solar project with 10 lights can reach up to $1,500 depending on fixture quality, while professionally installed landscape lighting averages $2,000 to $6,000. The gap comes from trenching, transformers, wiring, and labor. If your goal is a lit walkway on a budget, solar wins on upfront cost; if you need bright, uniform coverage of a large yard, wired low-voltage lighting still delivers more output per fixture.
Where should solar light placement go for the best results?
Put fixtures where they receive six to eight hours of direct sunlight daily, per Home Depot’s installation guide. Aim panels south or southwest and keep them clear of roof overhangs, fence shadows, and dense shrubs. For path lighting, space stakes 6 to 8 feet apart along one side of a walkway rather than alternating sides, which cuts the fixture count and cost. Keep fixtures 2 to 3 feet back from the path edge so the light washes across the surface instead of glaring into eyes. Test panel positions for a full sunny day before committing to holes.
Do solar lights work in shaded yards?
They work, but with limits. Solar lights for shaded areas need a panel placed in sun even if the fixture sits in shade, which usually means a detached panel on a longer cable or a wall-mounted unit above the shadow line. Expect shorter runtimes of three to five hours instead of the six to eight a full-sun fixture manages. A practical compromise is to use solar on the sunny perimeter and reserve a small number of wired low-voltage fixtures for deep shade under trees or along a covered patio.
Why do solar lights fail so quickly, and how do I prevent it?
Most failures trace to three causes: a dirty or shaded panel that never fully charges the battery, a battery that degrades after a year or two of heat cycling, and water intrusion through a cracked housing. Wipe panels monthly, replace batteries when runtimes drop noticeably, and choose fixtures with a stated IP65 or higher rating. Green Builder Media also points out that plastic housings break down under sustained sun exposure, so metal or higher-grade housings cost more upfront but last longer. Bring removable batteries inside for winter in cold climates to extend their life.
Solar lighting is the easy part. The hard part is a walkway or patio that stays level and drains right for years. That is the work we do. Kingdom Paver brings a decade of experience, in-house crews, and custom building solutions to every project, with quality construction for driveways, patios, and walkways. Get started with Kingdom Paver and build an outdoor space worth lighting up.