
Quick Summary
Affordable outdoor kitchen countertop options can be worth it when the material is rated for outdoor exposure and fits your climate and maintenance tolerance. Exterior-rated tile, concrete, and granite remnants offer lower-cost routes, while laminate works only in covered spaces.
- Laminate is the lowest-cost starting point but suits only covered, light-use grill stations.
- Exterior-rated tile performs well outdoors when set with proper grout and substrate.
- Concrete needs sealing and periodic maintenance to resist staining and moisture.
- Installed cost includes substrate, cutouts, edge work, and sealing, not just material price.
- Ask for a written installed quote listing each cost line to compare bids fairly.
Table of Contents
- Why Outdoor Kitchen Countertops Need a Different Standard
- Affordable Outdoor Kitchen Countertop Materials Compared
- Outdoor Kitchen Countertop Cost: What Installed Prices Look Like
- DIY Outdoor Kitchen Countertop Ideas That Save Money
- Small Outdoor Kitchen Ideas That Make Budget Countertops Look Intentional
- Maintenance, Sealing and Climate Performance
- Planning Your Countertop Next Step With Kingdom Paver
- Frequently Asked Questions
Why Outdoor Kitchen Countertops Need a Different Standard
Outdoor kitchen countertops face sun, rain, temperature swings, and humidity every day. A surface that works indoors can fade, warp, crack, or stain quickly once it lives outside. That is why an outdoor countertop should be judged by how well it handles weather, not only by its price tag.
Many homeowners assume a cheaper material is always a compromise. Often it is not. The real question is whether the material is rated for outdoor exposure, how much maintenance it needs, and how long it will last before replacement. Kingdom Paver’s approach to outdoor kitchen projects includes asking about those questions, because a low upfront price can turn expensive if the surface fails in two seasons.
Outdoor countertops also carry more weight and more heat than kitchen counters. Grills, smokers, and side burners raise surface temperatures. Direct sun can heat stone or metal well above ambient air temperature. Water pooling on a flat surface can lead to staining or freeze-thaw damage in colder climates. Any budget option needs to handle those stresses first.
Affordable Outdoor Kitchen Countertop Materials Compared
Affordable countertop choices fall into a few groups. Some are manufactured products, some are concrete-based builds, and some are reused or DIY-friendly materials. Each one trades cost against durability, look, and upkeep.
Laminate and Tile: The Lowest-Cost Starting Points
Laminate is often the cheapest countertop option. Compare how each material ranks overall in our best outdoor kitchen countertop materials guide. Laminate is generally affordable and offers many finish choices, but it is less durable than stone or stainless steel. Laminate can work for a light-use grill station in a covered space, though it is not the best pick for constant sun or heavy wet use.
Tile is another low-cost route. Tile is often among the more budget-friendly starting points. Tile performs well outdoors when it is rated for exterior use and set with proper grout and substrate. The grout lines need sealing and regular cleaning, since they are where stains and moisture collect.
Concrete and Stone Alternatives
Concrete is a popular middle-ground option. Outdoor concrete countertops can be poured in place or built from precast slabs, and they suit a custom look. They do require sealing and periodic maintenance to resist staining and moisture. Concrete is widely considered a mainstream outdoor countertop material alongside granite and limestone.
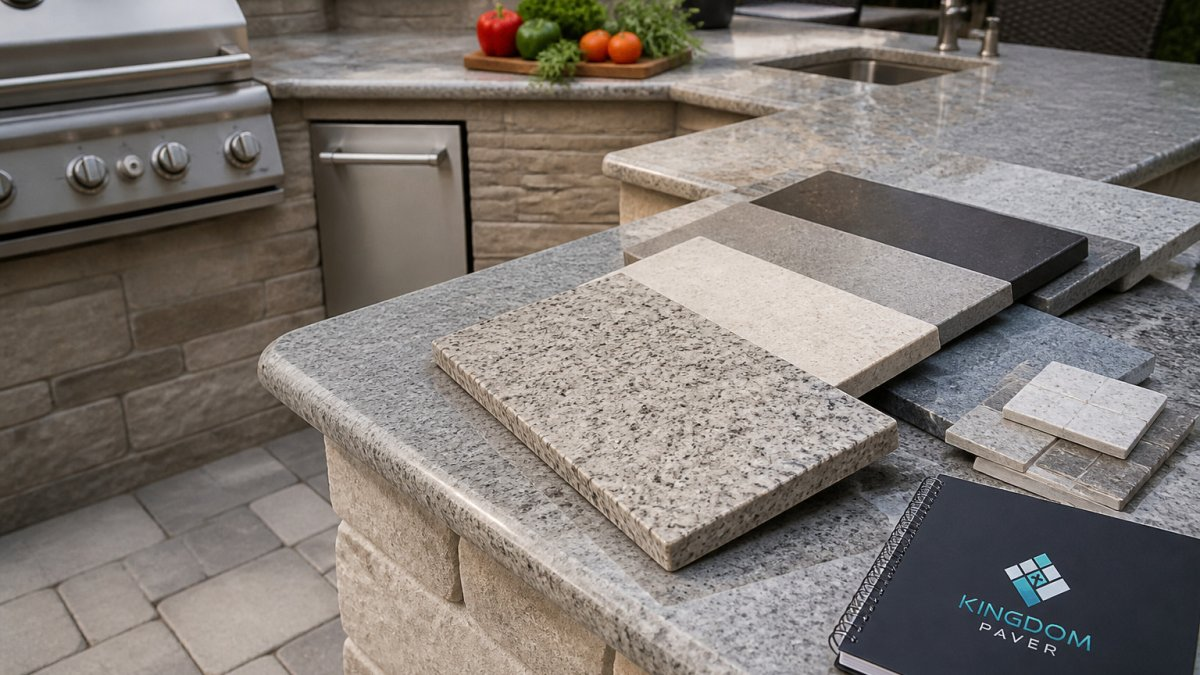
Natural stone such as granite and limestone costs more, but it handles heat and weather well. Granite is widely used outdoors because of its durability. For buyers who want stone looks at lower prices, porcelain and engineered surfaces can imitate natural stone at a reduced cost. Check outdoor-rating specifications before buying any indoor-grade product.
Outdoor Kitchen Countertop Cost: What Installed Prices Look Like
Material price is only part of the total. Installed cost depends on the slab or tile price, substrate preparation, labor, cutouts for sinks and appliances, edge work, and sealing. Two countertops with the same material price can end up with very different final bills. The table below gives realistic installed ranges for a typical 8-foot straight run (about 24 square feet of surface, 36-inch depth) so you can compare options on the same basis.
| Material | Material cost per sq ft | Fabrication & install per sq ft | Typical installed total (24 sq ft) | Budget tier |
|---|---|---|---|---|
| Laminate (covered use only) | $2.50-$8 | $8-$15 | $250-$550 | Entry |
| Exterior-rated ceramic or porcelain tile | $3-$12 | $10-$20 | $310-$770 | Entry |
| Precast concrete slab | $15-$30 | $20-$40 | $840-$1,680 | Mid |
| Poured-in-place concrete | $10-$25 | $30-$55 | $960-$1,920 | Mid |
| Granite remnant or prefab slab | $20-$45 | $25-$50 | $1,080-$2,280 | Mid |
| Quartz (indoor-grade, not recommended exposed) | $40-$85 | $25-$50 | $1,560-$3,240 | Premium |
When comparing outdoor kitchen bids, ask for a written installed quote that lists substrate, cutouts, edge, delivery, and sealing as separate lines so you can compare them on the same basis.
Pricing for your project depends on quantity, dates, delivery, and site conditions. For current pricing tailored to your layout, contact Kingdom Paver for a quote.
DIY Outdoor Kitchen Countertop Ideas That Save Money
Do-it-yourself builds can cut costs significantly, but they demand careful sealing and planning. The four projects below are ranked from easiest to hardest, with the tools, skill level, and realistic time each one requires. All assume an existing or newly framed base; none include framing labor.

1. Tile over cement board (beginner-friendly)
Skill level: Beginner. Time: One weekend.
- Tools: Notched trowel, tile saw or manual snap cutter, spacers, grout float, sponge, drill with mixing paddle.
- Steps: Fasten 1/2-inch cement board to the substrate with thinset and screws; tape and mud the seams; apply exterior-rated thinset with a 1/4-inch notch; set exterior-rated porcelain or ceramic tile; cure 24 hours; grout with an epoxy or sealed cement grout; seal grout after 72 hours.
- Failure mode: Interior thinset or non-exterior tile will debond after a freeze-thaw cycle. Confirm both the tile and thinset are rated for exterior use.
2. Poured concrete slab (intermediate)
Skill level: Intermediate. Time: Two weekends plus a 7-day cure.
- Tools: Melamine or plywood form, rebar or wire mesh, concrete mixer or rented mixer, float, trowel, plastic sheeting.
- Steps: Build a level form with a 2-inch overhang; suspend wire mesh 1 inch above the base; mix a 4,000-5,000 psi mix with a low water ratio; pour, vibrate to release air, and float; cover with plastic and cure 7 days; seal with a penetrating exterior sealer after 28 days.
- Failure mode: Too much water in the mix causes shrinkage cracks. Reinforcement placed on the bottom does nothing. Cure time cannot be rushed.
3. Sealed plywood with epoxy pour (intermediate)
Skill level: Intermediate. Time: One weekend plus 72-hour cure.
- Tools: 3/4-inch exterior-grade plywood, 2×4 edge forms, silicone caulk, self-leveling epoxy, heat gun or torch for bubbles.
- Steps: Build a box with 2×4 edges; seal all seams with silicone; pour a 1/8-inch self-leveling epoxy coat; pass a heat gun over the surface to pop bubbles; cure 72 hours.
- Failure mode: Any moisture in the plywood or a missed seam causes bubbling or delamination. This build is for covered, protected counters only, it will fail in direct sun or standing rain.
4. Butcher block with exterior oil (beginner, covered use)
Skill level: Beginner. Time: One afternoon.
- Tools: Pre-made butcher block, exterior-rated oil (tung or mineral), sander, rags.
- Steps: Sand to 220 grit; apply three coats of exterior oil, letting each dry 24 hours; re-oil every 3-6 months.
- Failure mode: Butcher block is not a wet-surface material. It belongs under a roof and away from the grill’s direct heat.
Before buying any material, confirm three things in writing: exterior rating, UV stability, and freeze-thaw suitability for your region. A cheap DIY build that fails in two winters can cost more than a properly installed slab that lasts for years.
Reclaimed or recycled stone can also keep costs down. Used stone needs to be checked for flatness, cracks, and suitability for outdoor use before installation. Reclaimed slab costs vary, and fabrication labor is a separate line item to request in a quote.
Small Outdoor Kitchen Ideas That Make Budget Countertops Look Intentional
Small outdoor kitchens benefit from simple design choices. A compact grill island with a single material, clean edges, and a matching backsplash looks deliberate even when the budget is tight. Using one countertop material across the whole space avoids the cluttered look of mixed finishes.
Color and texture matter more than expensive stone in small spaces. A honed or matte finish hides water spots and fingerprints better than high gloss. Pairing a neutral countertop with warm wood accents or stainless steel fixtures adds visual interest without extra material cost.
Keep the layout focused. Place the prep surface, grill, and serving area in a logical sequence, and avoid oversized counters that add cost without adding function. Outdoor-rated woods can add warmth to a compact design.
Maintenance, Sealing and Climate Performance
Maintenance is where budget countertops often succeed or fail. Concrete, tile grout, and natural stone generally need sealing. Laminate needs protection from direct sun and standing water. Sealers should be reapplied according to product guidance.
Climate changes the equation. Humid, salty, or hot-summer areas accelerate staining, fading, and surface wear. Freeze-thaw cycles can crack porous materials in colder regions. Choose materials rated for your local weather, and provide good drainage so water does not sit on the surface.
For cabinets and structure beneath the countertop, weather-resistant construction matters too. Pair your countertop with outdoor-rated cabinetry and follow a regular cleaning schedule to protect the whole installation. Read our guide to choosing weather resistant outdoor kitchen cabinets that match your countertop.
Planning Your Countertop Next Step With Kingdom Paver
Choosing an affordable outdoor countertop comes down to matching material, budget, climate, and maintenance tolerance. A low price is worth it only when the surface holds up in your conditions. If you are weighing options for a Katy or Cypress outdoor kitchen, Contact Kingdom Paver for a quote tailored to your project.
Frequently Asked Questions
What is the most affordable material for an outdoor kitchen countertop?
Laminate and tile are usually the lowest-cost options. Laminate is less durable than stone or stainless steel and needs protection from sun and rain. Tile is also a common low-cost option. Compare material and labor costs separately when getting quotes. Pricing for Kingdom Paver’s projects depends on quantity, dates and delivery, so request a quote for current figures.
What countertop materials hold up best outdoors?
Materials that handle sun, rain and temperature swings include granite, porcelain, sintered stone and stainless steel. Homes & Gardens cautions that not all countertop materials can handle outdoor life, so check weather resistance before buying. Concrete and natural stone need sealing to resist stains and water. Laminate tends to fail first in direct sun. Choose the material based on your climate exposure, not just its look or price.
Do outdoor kitchen countertops need to be sealed?
Most porous materials need sealing. Concrete, natural stone and wood should be sealed to resist water, oil and stains, and many manufacturers recommend resealing every one to three years depending on exposure. Non-porous materials such as porcelain and stainless steel need little or no sealing. Check the manufacturer’s care instructions for your specific product before installation.
Can you build a DIY outdoor kitchen countertop on a budget?
Yes. Common DIY approaches include sealed plywood with an epoxy finish, a poured concrete slab, tile over cement board, and outdoor-oiled butcher block, . These require careful sealing, proper substrate support and drainage, and a poorly sealed surface can fail within a season. For a large or load-bearing island, consider a licensed contractor. Kingdom Paver offers custom outdoor kitchens, and you can contact the company for a quote.


